So, there I was, reading the March/April 2017 issue of Popular Photography magazine (specifically an article by Glen Van Slooten on ‘seeing the trees for the forest’) which included this quote from Henry David Thoreau. The words resonated deep inside me. A few days later, I was reading about the cover shot for the March 2017 issue of Outdoor Photographer magazine. In his own words to describe the picture and his process for making it, the photographer, Robert Glenn Ketchum, said this, “…As you look at this image, I want to call your attention to an “old school” idea about taking pictures: The camera doesn’t matter; it’s what you see that’s important…” My technically oriented engineer’s brain almost exploded. I called one of my photo mentors to discuss this interesting concept. He laughed and said something like, ‘why yes, and that’s the subject of a presentation I’m making next week.’ (Though I didn’t hear it specifically, I’m sure that he covered the telephone and said something like ‘he FINALLY gets it!!’)
As I thought about the quotes and my mentor and his presentation, I realized that I have been subconsciously wrestling with the concept for some time. When I look at something, what am I actually seeing? I had always wondered why people making images from the same place and time that I was were making better images. In many instances, they could see an image that I didn’t.
What does it mean? Simply, there’s one more item on my list of things to learn about photography. This one, however, is not a setting on the camera – it’s consciously looking at an item, animal, or scene and visualizing the image it could be, or taking an idea and making it into a reality. We’ll all see if I can actually do it – the challenge is there.
I had the opportunity to go inside the Nevada State Railroad Museum in Carson City before it re-opened last weekend. The Museum suffered damage from flooding last January and has been closed for repairs and cleanup. I’m happy to report that the Museum staff and volunteers did an excellent job and the displays and exhibits are in excellent shape. Here are some images from my visit.

This is the Glenbrook. I made this image from three exposures processed in Photomatix, a High Dynamic Range (HDR) software, and finished as a monochrome image. HDR utilizes multiple images made at different exposures to bring out the best highlights and details in the shadows. (I discuss HDR in more detail in this post, https://photorogr.com/2016/03/29/an-amazing-week-for-me/ – go take a look!)
Same image as above, but rendered in color.
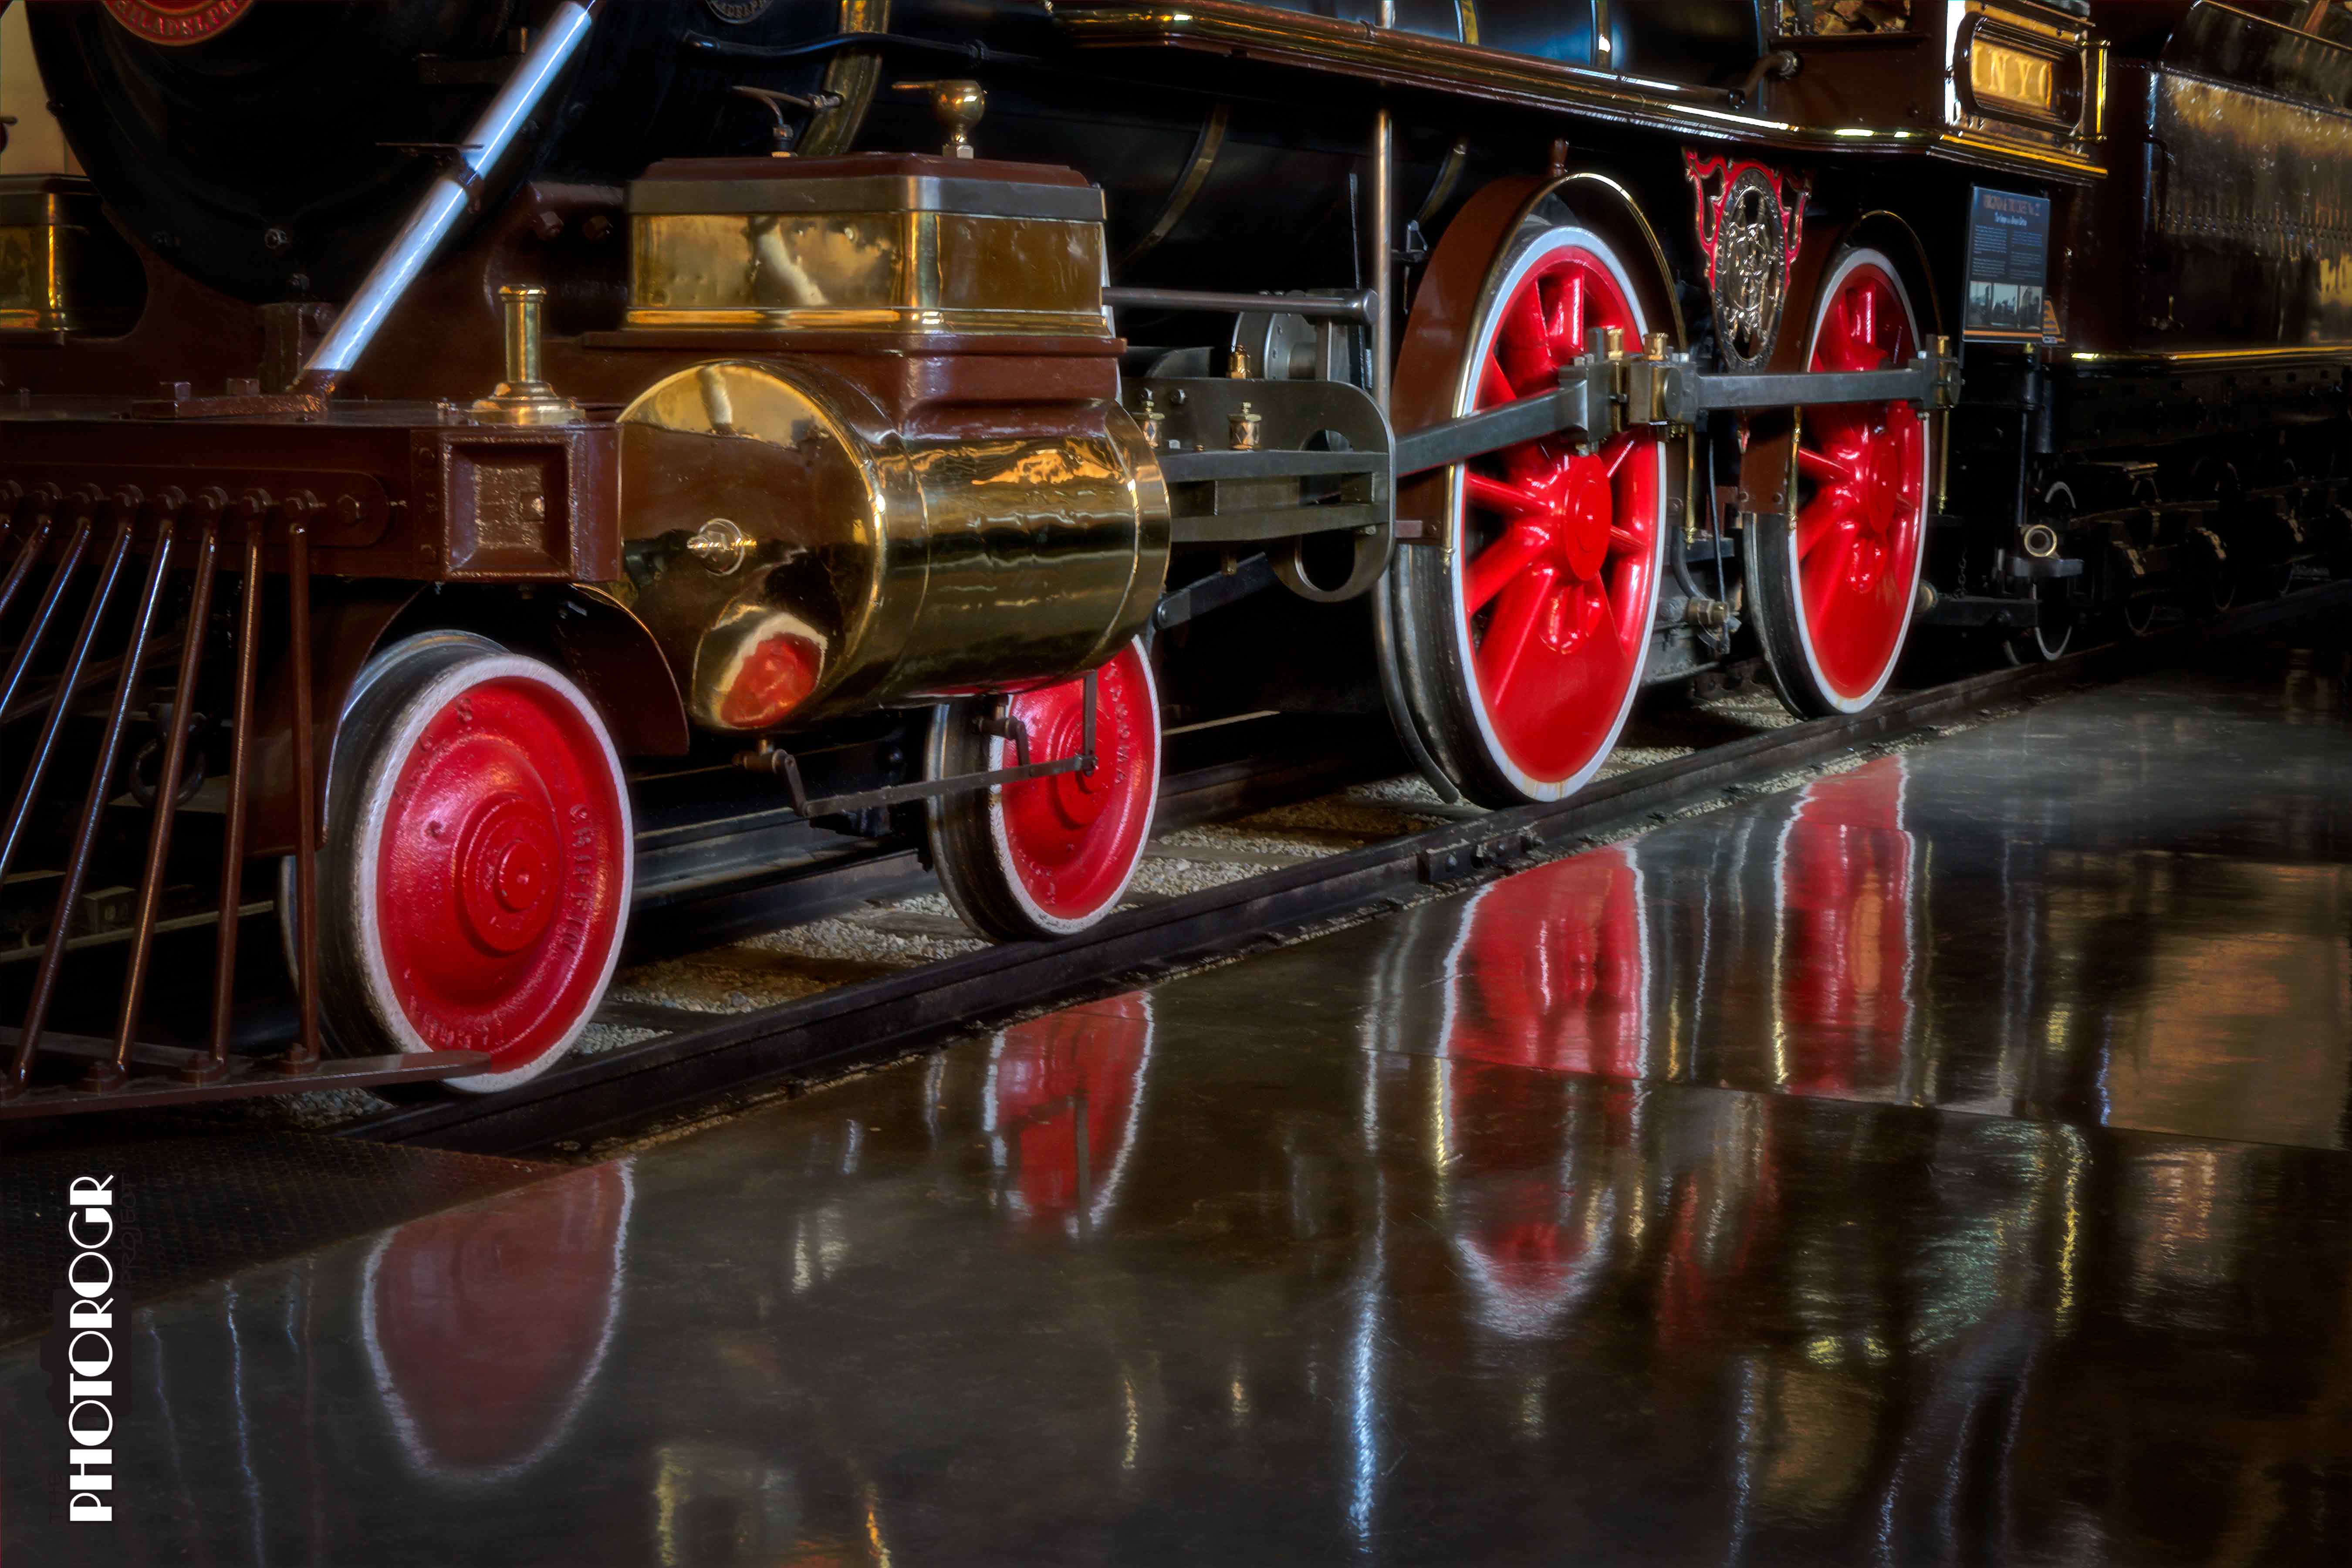
The drive wheels on the Inyo. Note the reflection in the floors – Museum staff thinks the floors look better than ever and I agree!
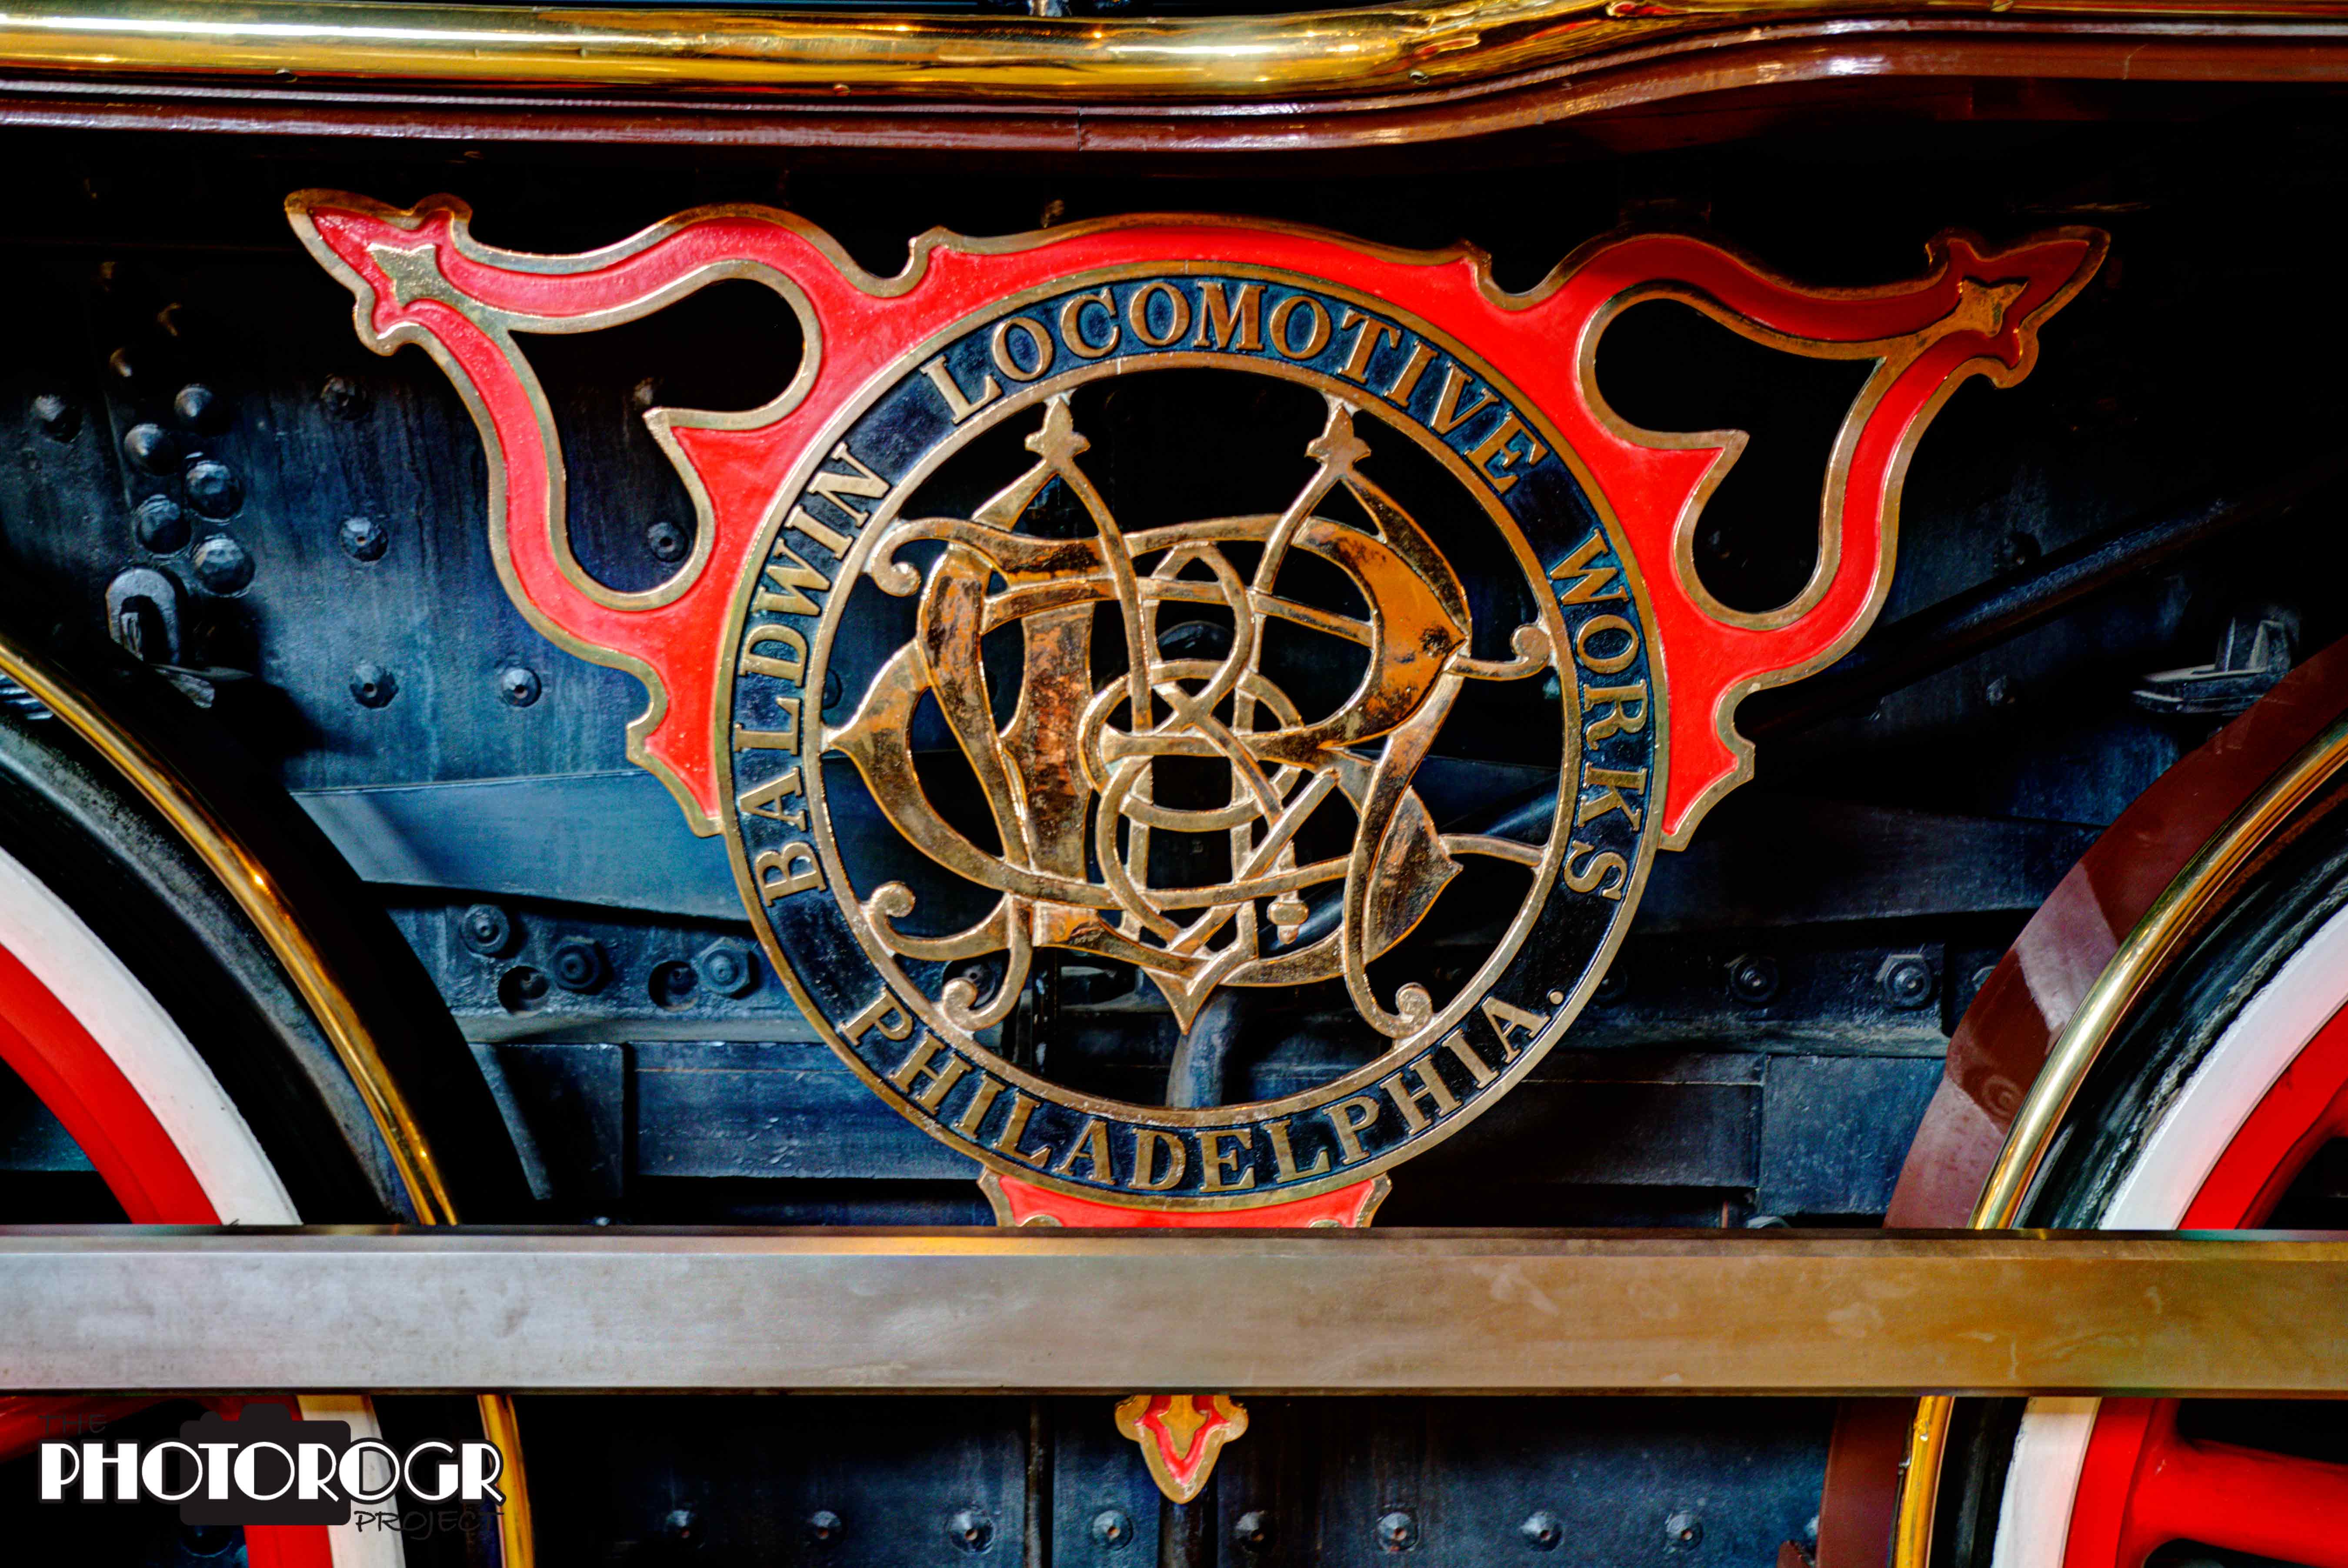
If you think the names on cars are obtrusive, take a look at this! We can clearly see that the Inyo was built by the Baldwin Locomotive Works in Philadelphia. This decoration/advertisement is displayed between the drive wheels and can be seen in the previous image.

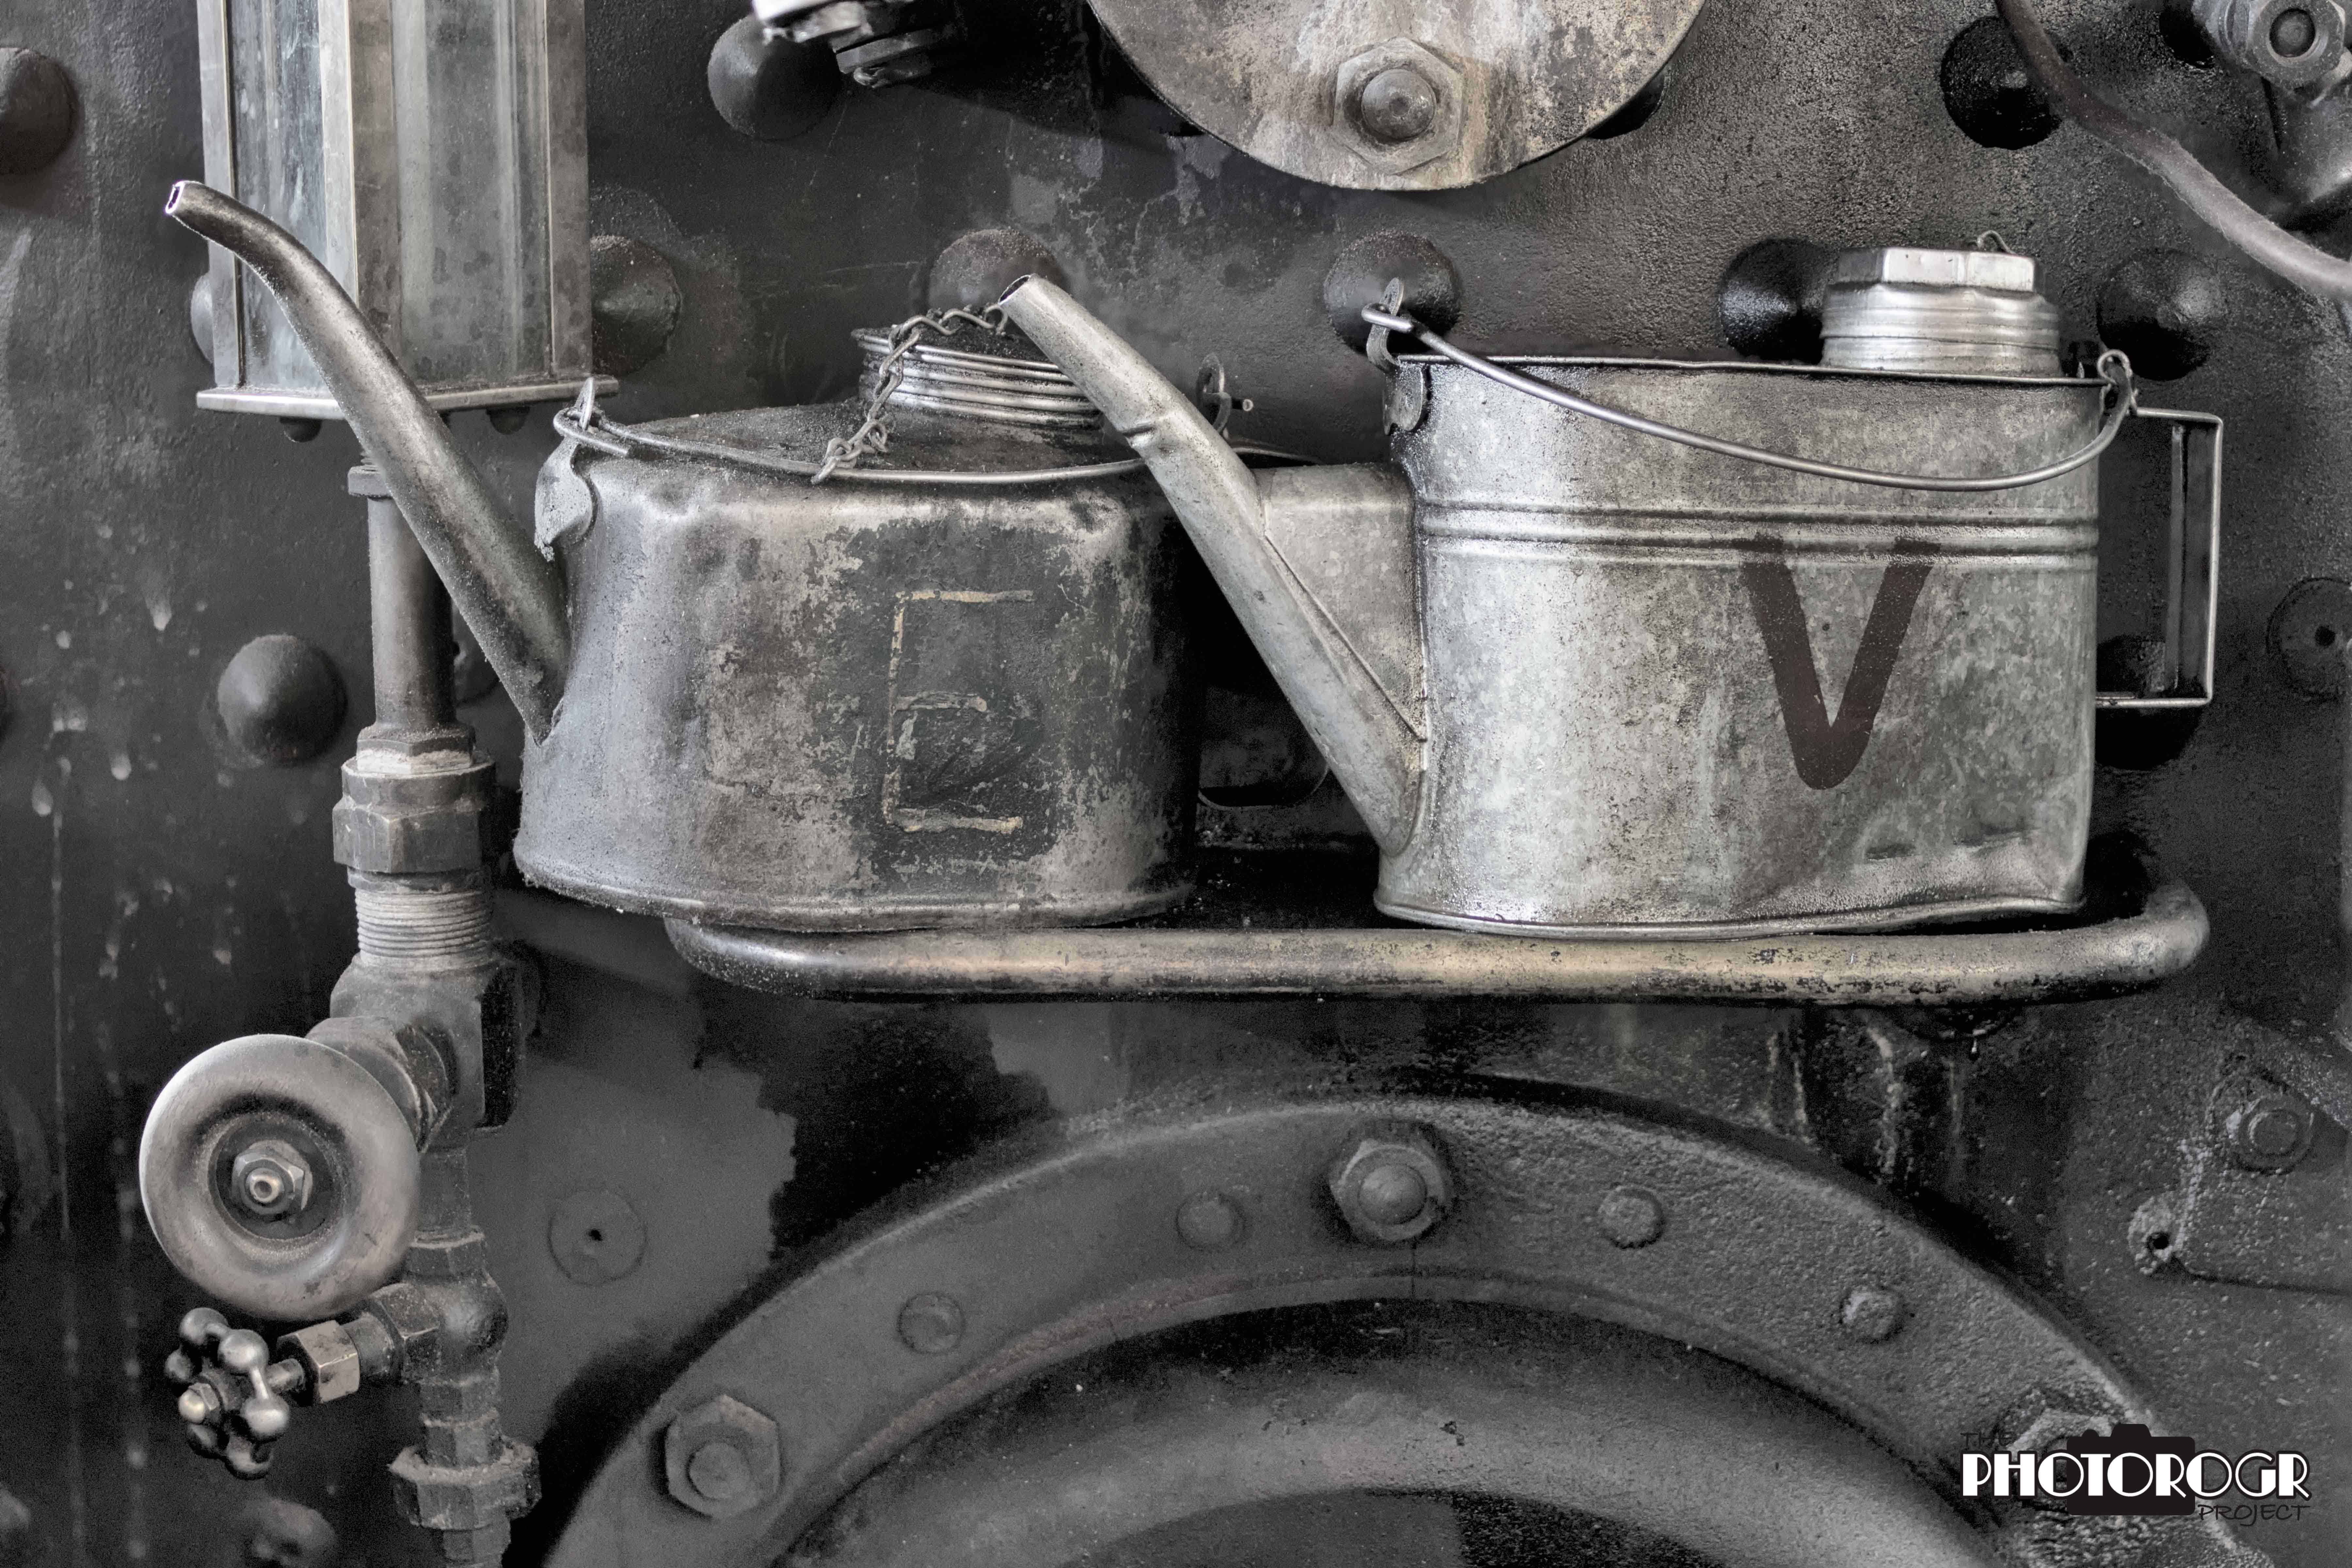
I’ve got to learn the names of the things that make these beautiful machines run. This is an HDR image.

The firebox and surrounding area of the Glenbrook, processed as an HDR image.
As you can see, I worked on my HDR skills. I also tried a new technique that I’ve been exploring – focus stacking. In focus stacking, images are made at different focal planes and then blended together to achieve deep focus in subjects. The Museum was probably not the best place to work this technique as many of the subjects have curved surfaces, making focus stacking a challenge. I did it, however, and learned lots about the technique and its challenges.

One of the drive wheels on an engine. I focused on the face of the bolt (at left center), the washer, the face of the drive shaft, the bolt heads on top of the drive shaft, the wheel spokes, and the machinery behind the wheel. The light was at the top of the drive shaft, so everything below was in shadow. I liked the composition.

Inside the cab of one of the engines, a focus stacked image (8 focal planes).
Same image as above, rendered in monochrome.
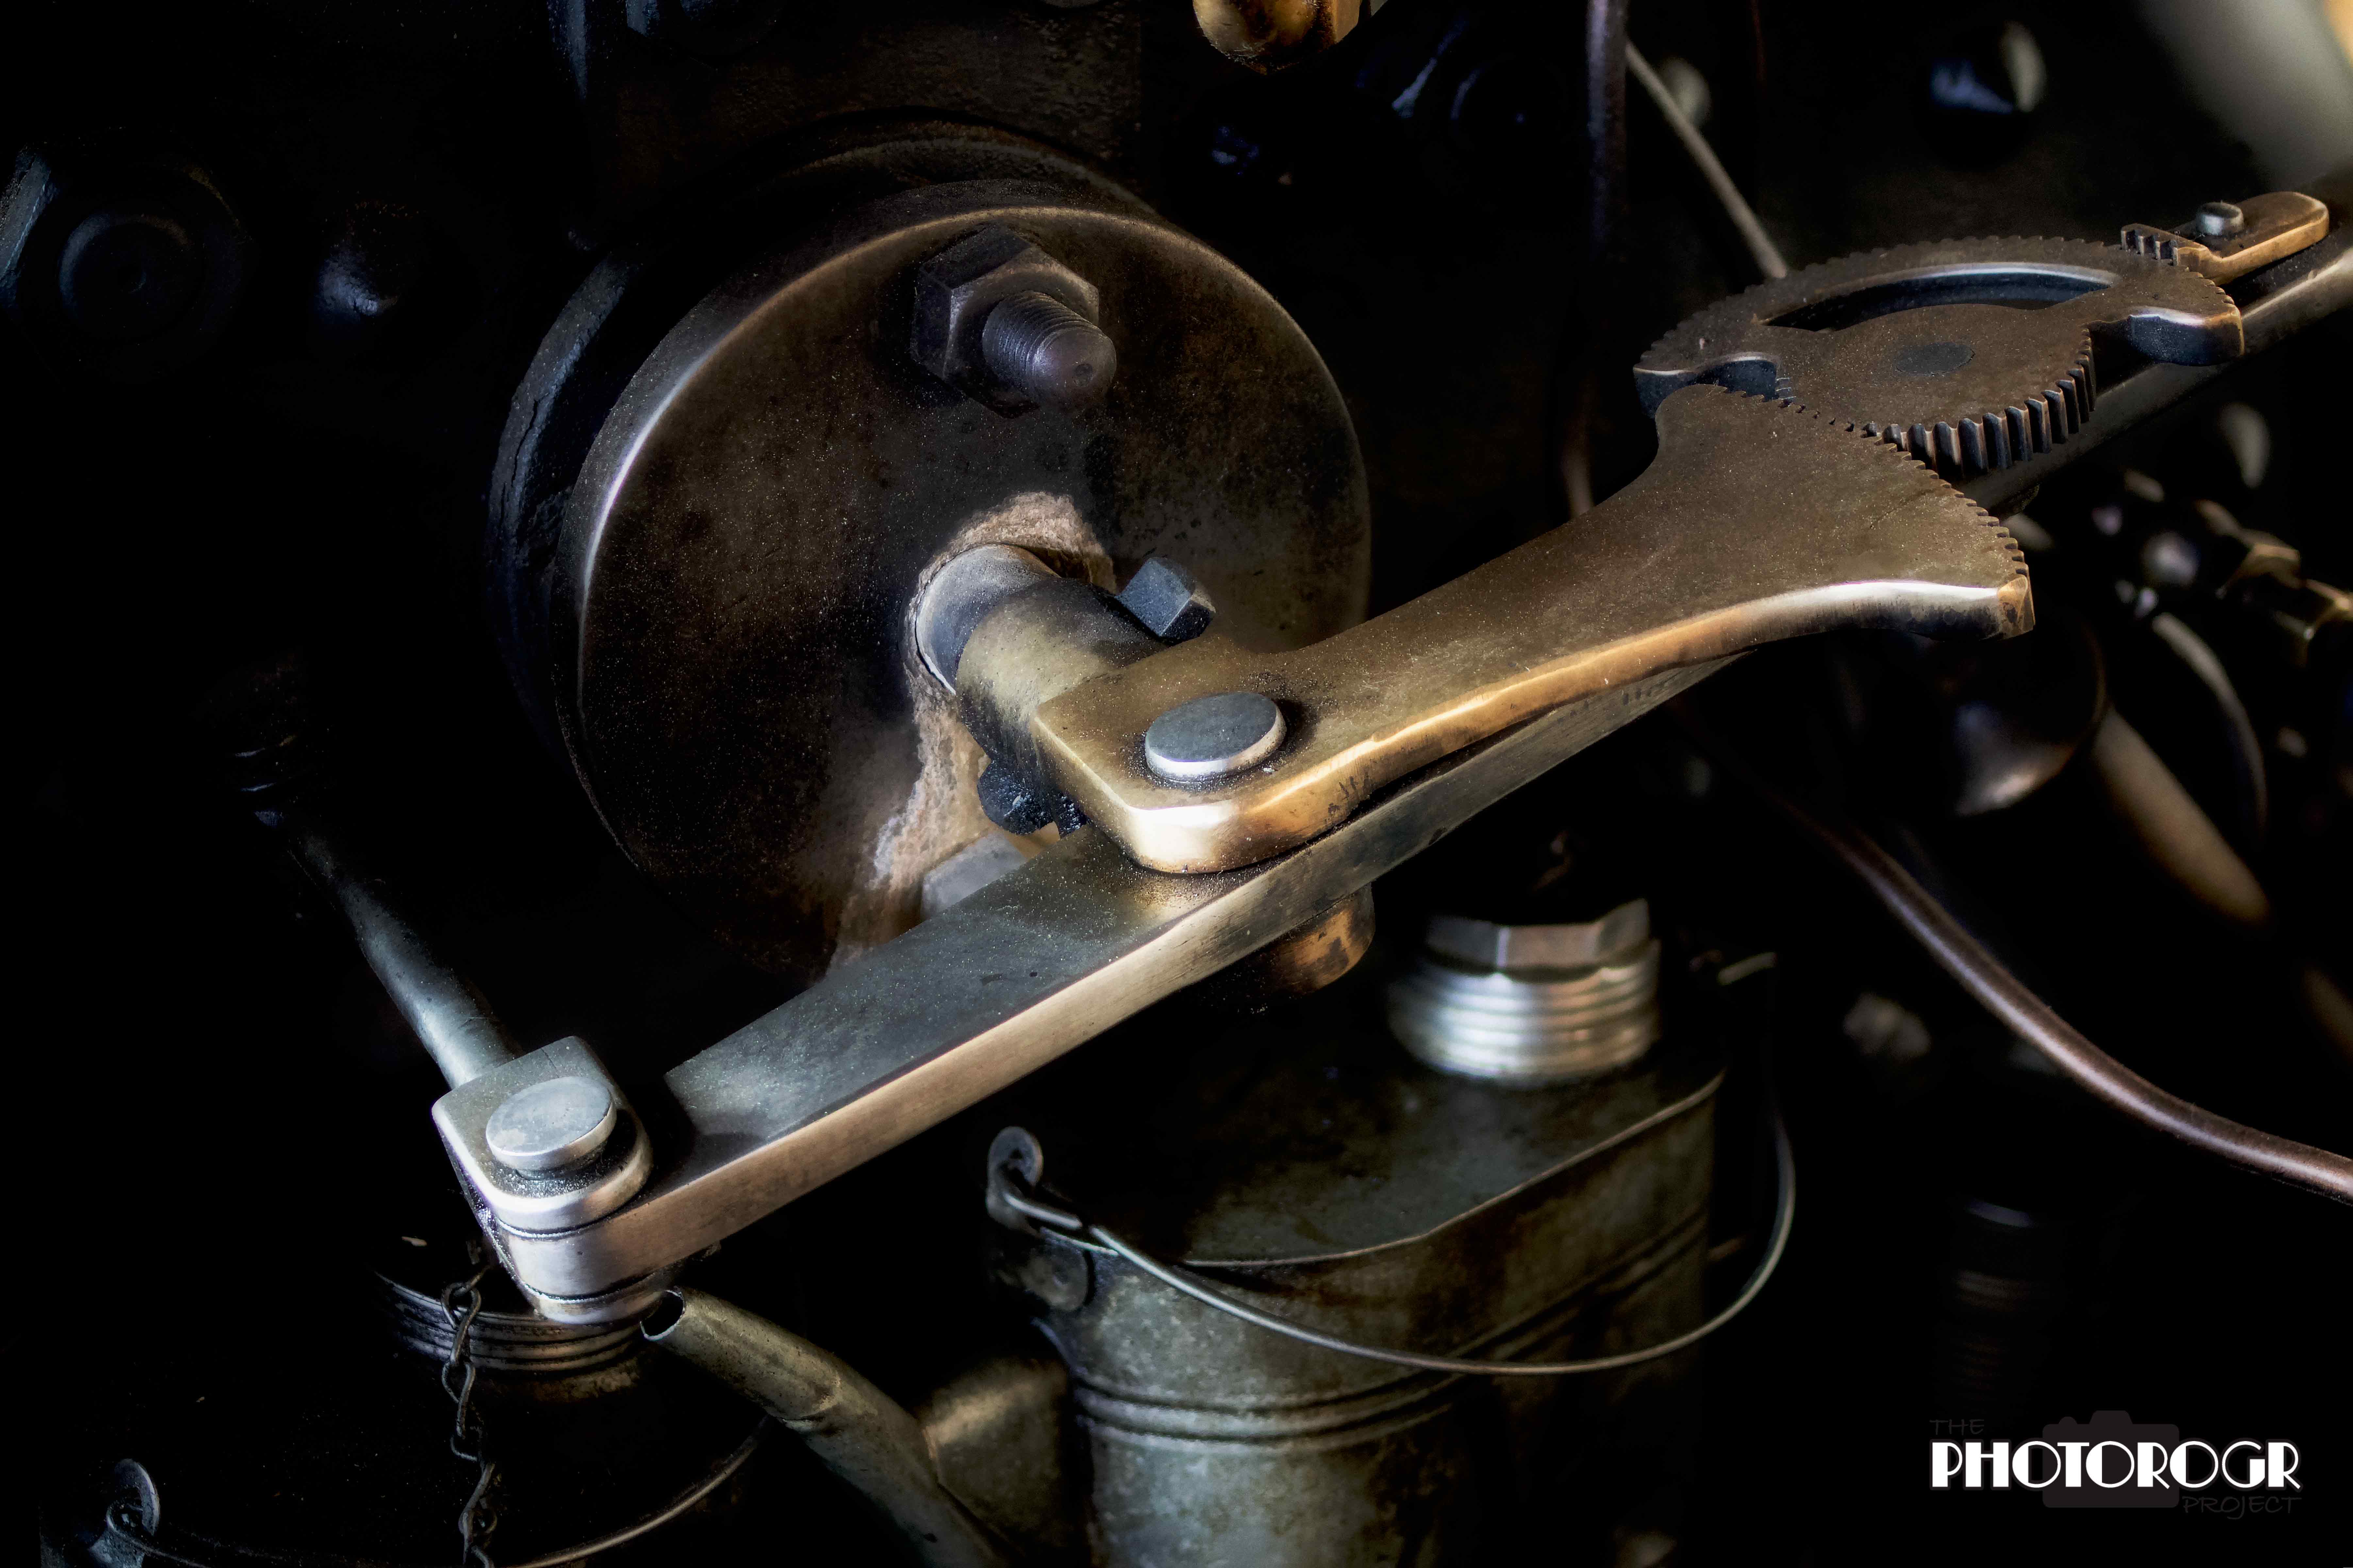
I was intrigued by this control lever, and made a focus stack using 8 focal planes along the length of the lever. This wouldn’t be possible in a single image, even at a small aperture maximizing depth of field.

The spherical object on the right presented the greatest focus stack challenge, as the gauges were all on the same focal plane.
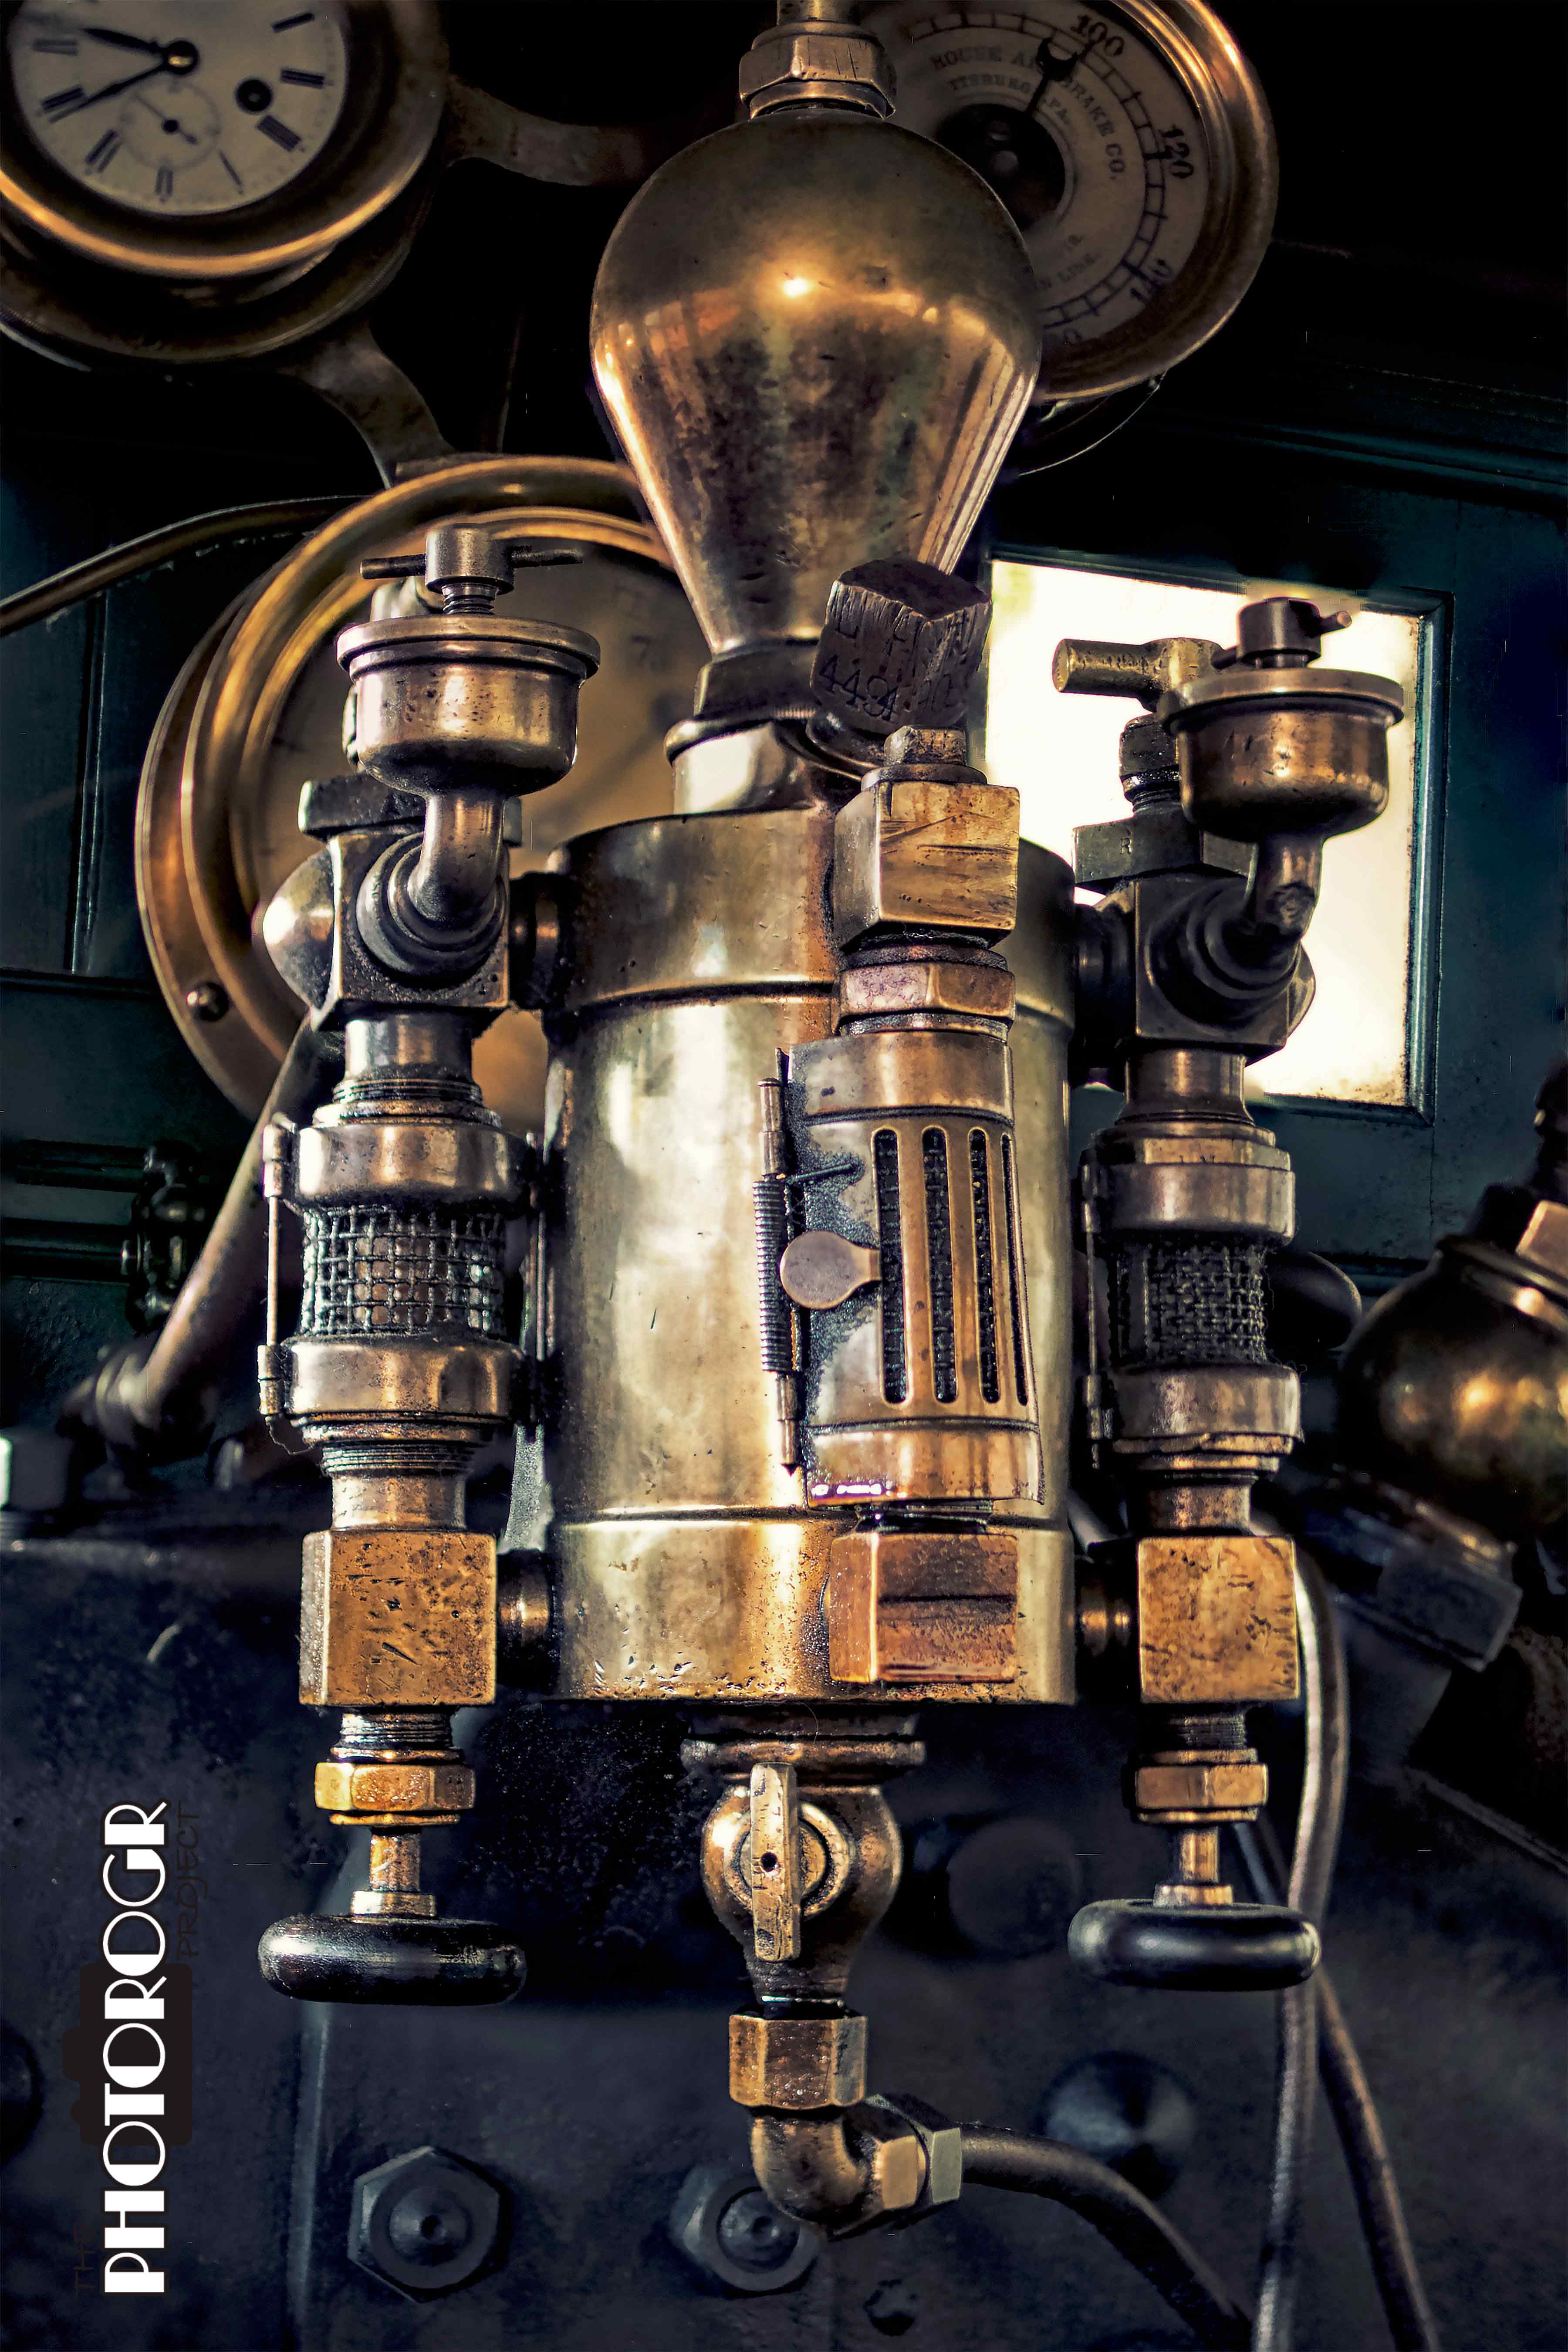
This is the entire apparatus, 7 focal planes. I worked the image to bring out the patina of the brass as well as the deep focus.

This is a shot from inside the passenger car. I loved how the old glass caused the somewhat rippled appearance of the Inyo cab, against the straight and in focus wood paneling. This was made from two exposures and focal planes, one for the interior and one for the Inyo.
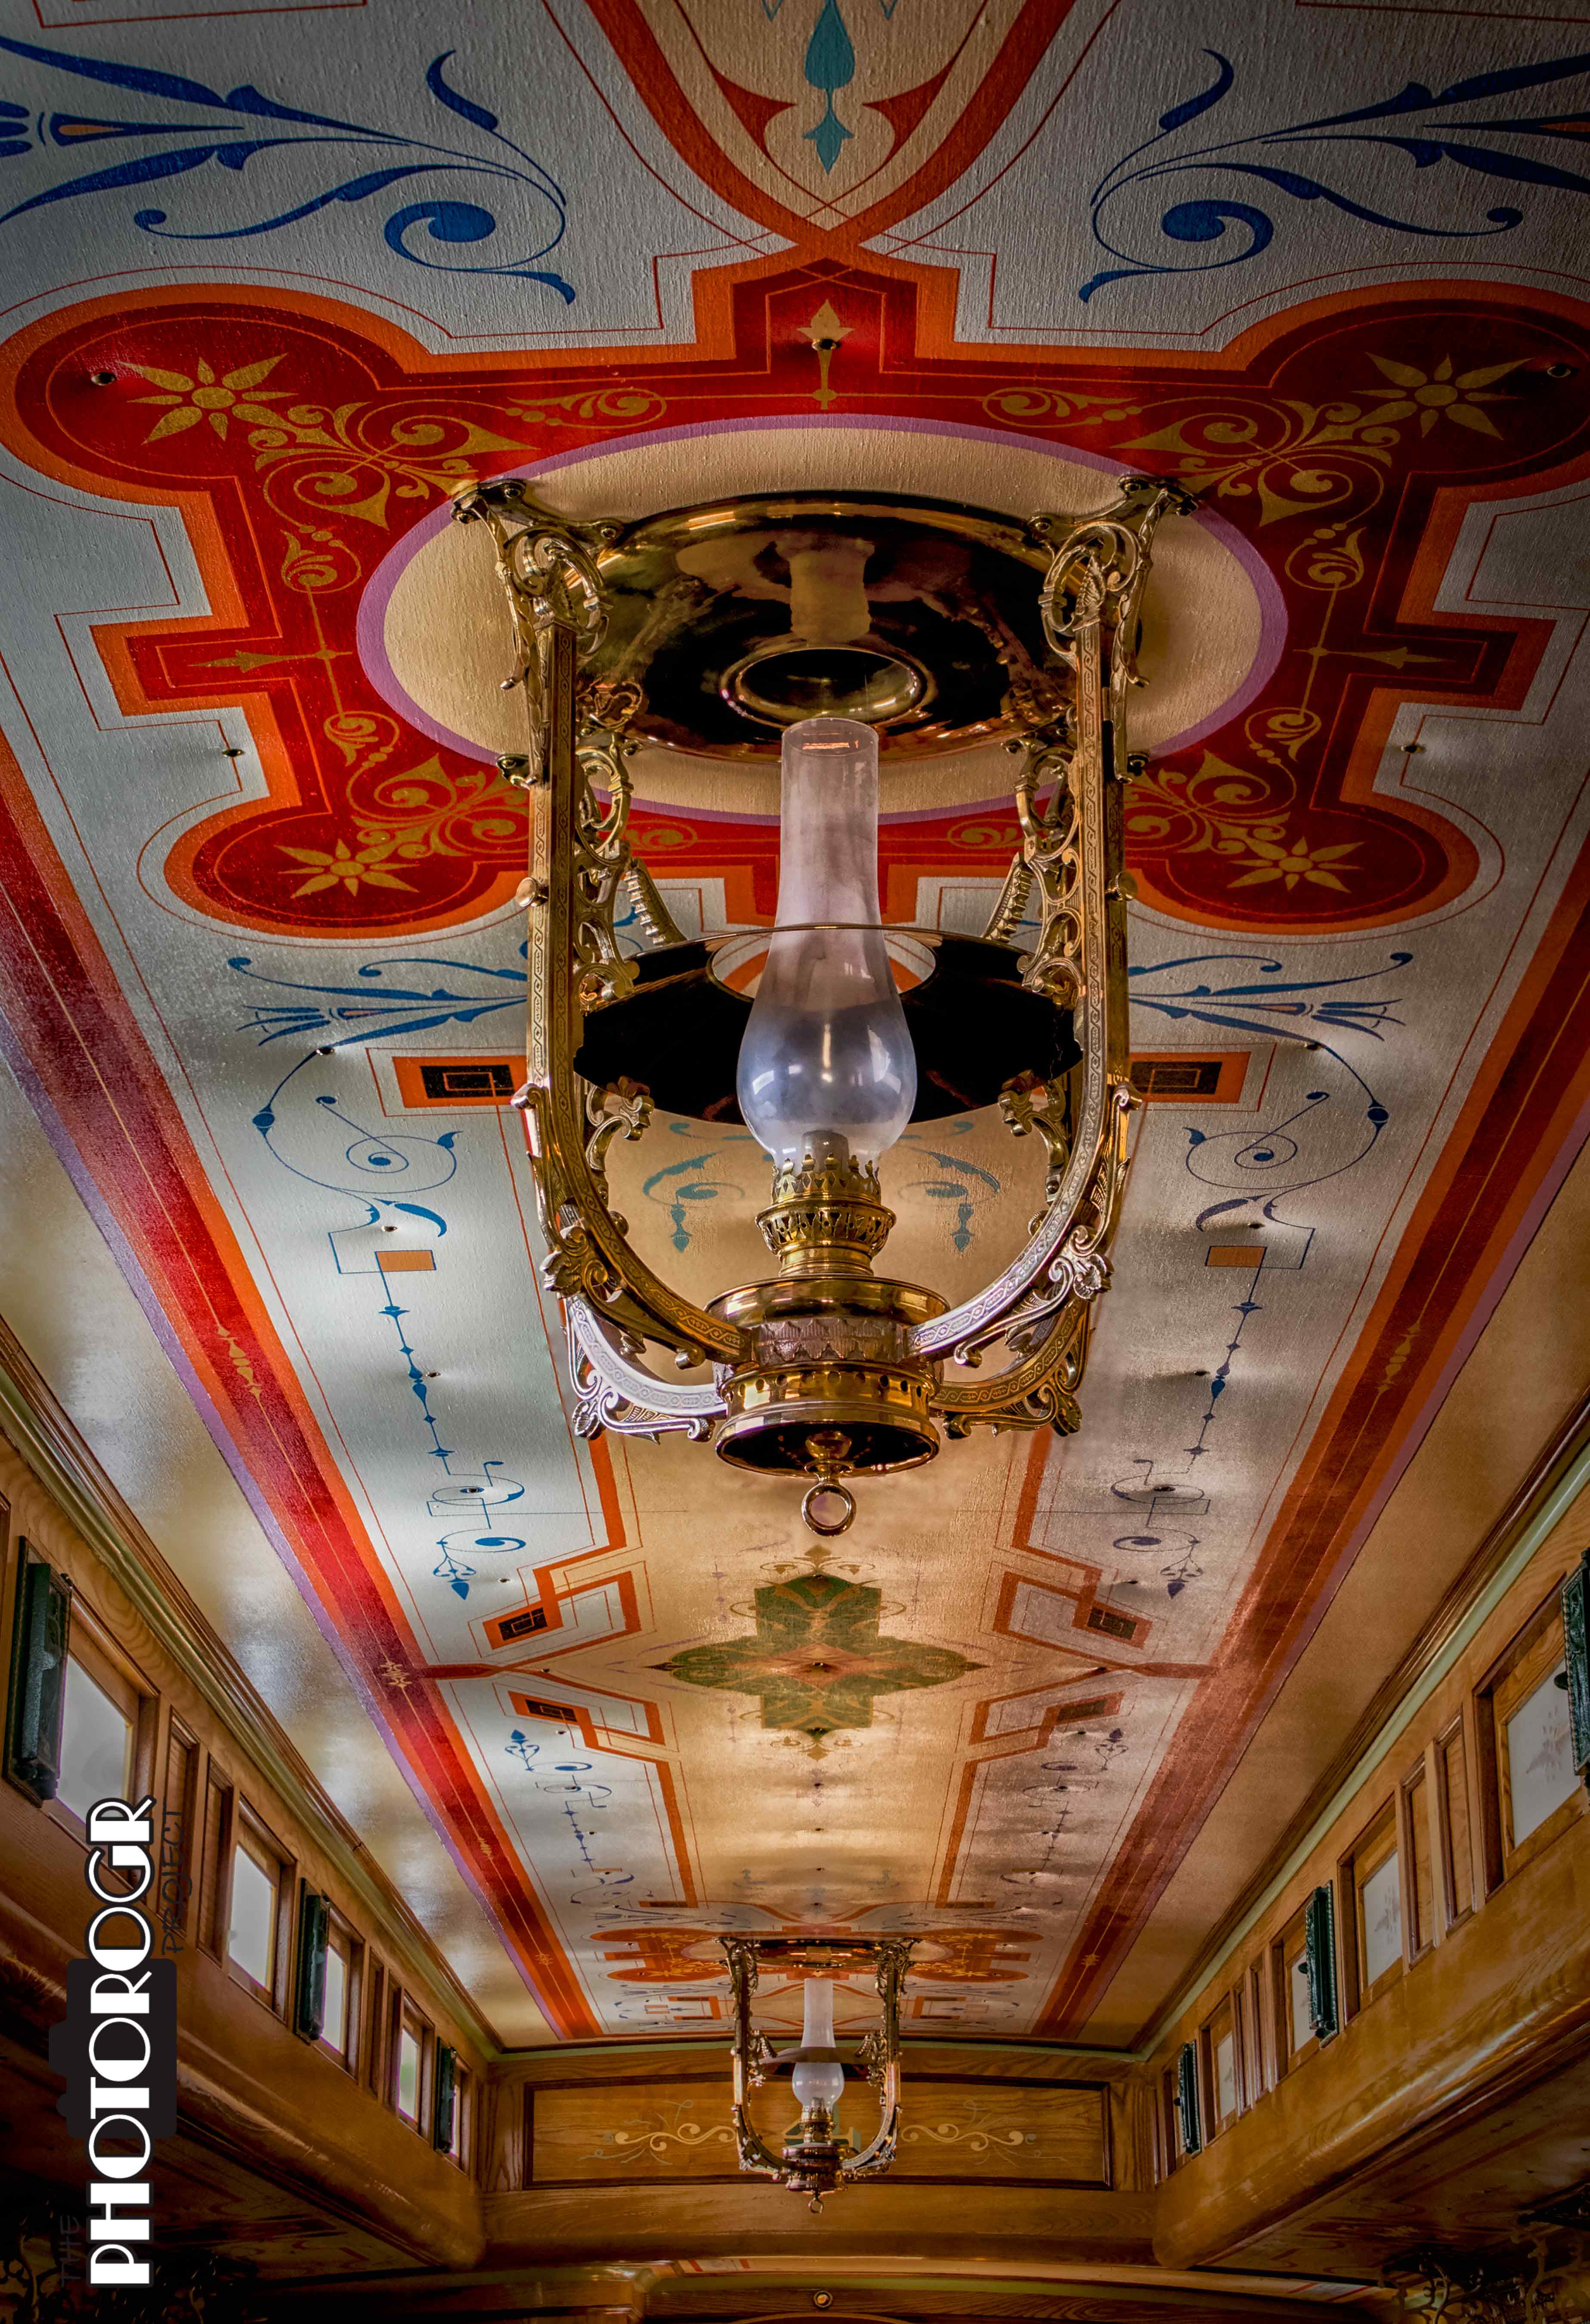
This is the ceiling of the passenger car. The artwork is amazing and the lamps are just gorgeous. I used 8 focal planes to make the image in focus from the front lamp to the wooden header behind the far lamp. As I refine my focus stacking technique, I will use more focal planes for better quality images.
I love focus stacking, and am happy to add it to my photography toolbox. Just like everything else in my toolbox, its best use is a work in progress. I hope you enjoyed my revelation and my trip to the Railroad Museum. A big thanks to the staff for allowing me to visit.
Enjoy – PHOTOROGR