All my life, I’ve used catch-phrases. During my brief law enforcement career, we all said, ‘Felons are inherently stupid!’ In my military career, I said , ‘Leadership is not a popularity contest!’ (Okay, I also used that one in my civilian work, too!) But now I have a new catch-phrase.
A few days ago, a good friend sent me some pictures of wildlife that were in his backyard. He commented that they weren’t like my pictures. His comment got me to thinking about how to respond. I came up with, ‘Don’t judge your photography using other people’s pictures!’
Then my mind exploded! I’ve avoided anything even remotely profound for many years and here I was. My mind is thinking – that’s good advice outside the photography world, too. Live your life and don’t use other people to determine your self-worth.
DON’T JUDGE YOUR PHOTOGRAPHY USING OTHER PEOPLE’S PICTURES!
With that said, here’s a few pictures from the past couple months. The first set is the result of chasing the Big Boy Locomotive around northern California earlier this month.
This is the Big Boy as it approached the Clio Grade Crossing!Our next contact was the Williams Loop!We hadn’t planned on this being our final contact as the Big Boy was between tunnels exiting the Keddie Wye, but traffic and construction zones had other plans!A family of Great Horned Owls visited our neighborhood every evening for a couple weeks. It’s nice when the wildlife comes to you for a change!I spent a few days in southern Oregon and northern California taking pictures of waterfalls!I made some new friends and had a wonderful time!We got up early and visited the Hot Air for Hope Balloon Festival!But we went out for breakfast with friends after the balloons took flight!A friend and I found some young Yellow Bellied Marmots who were very accommodating!And I’ll finish up with a few wildflowers from the nearby mountains!It was a hike that day, but what a glorious day!
In my last post, I introduced my recent trip to Albuquerque, New Mexico, to participate in a night photography workshop. I got several positive comments on those building shots – Thank You!
The day I arrived in Albuquerque, I connected with several friends who also love to photograph trains. After dinner, one of my friends and I drove to a secluded spot south of the city to see what Burlington Northern Santa Fe (BNSF) trains would come by. In the hour or so that we were there, we photographed many trains going by. Here’s a sampling of that evening.
The skies to the east were stunning and contributed to this composition!These three locomotives were pulling a very long train. I will admit to removing all the graffiti from this trestle to minimize distractions from the main subject.Approaching from the west, I zoomed in a bit to capture this one locomotive from the rest of the train.We were at this location in the evening so the light was intriguing. I love this composition that includes a signal.
The star of the weekend and the purpose of my trip was to photograph Santa Fe Steam Locomotive 2926. This locomotive, built by the Baldwin Locomotive Works in Philadelphia PA in May 1944, is currently owned and operated by the New Mexico Heritage Rail (NMHR). Locomotive 2926 was among the last group of steam passenger locomotives built for the Santa Fe Railway. This class of locomotives comprised the heaviest 4-8-4’s built in the United States. Locomotive 2926 was used by the Santa Fe from the time it was built until December 1953, with more than a million miles under its wheels. In 1956, the Locomotive was donated to the City of Albuquerque and placed on display in Coronado Park. Locomotive 2926 was acquired by the NMHR in July 1999 and restoration to operating condition began. In 2018, a fire was lit in the firebox for the first time in 65 years and 2926 moved under its own power on July 24, 2021. (Go to WWW.2926.US for more information.)
The NMHR brought the 2926 to the Albuquerque Rail Yards for our workshop, and what a subject it is!
This gorgeous sky wasn’t going to last, which was fine. We were there to shoot in the dark!The NMHR had great models for the shoot. Although, the Engineer on the front of the 2926 really was the Engineer!Lots going on here. Will it run? Is it on time?A little monochrome treatment for this shot. Is the Engineer talking to a traveler or a railroad executive?Our friendly Engineer set this lamp in front of the locomotive, making for a great and fun composition!
For this shoot, I used my Canon EOS R5 camera body with a Canon RF 15-35mm F2.8 L IS USM lens, tripod mounted (shutter speeds varied from 2-5 seconds to sync with the strobe lights). I prefer to shoot my night locomotive pictures with the camera no higher than 30 inches off the ground. The wide angle lens really added some drama to the compositions.
I hope you like these images. I had fun taking them and then making them in the digital darkroom!
After two days of class room and shooting around the East Ely Yard, on Day 3 we climbed aboard the train and headed out for Grand Landscape Day. It was chilly, but it wasn’t snowing so that was a big plus. We boarded the train and headed out to the Hy-Line. This section of track leaves the East Ely Yard and heads toward McGill, where the smelter was located.
For the workshop, I carried two camera bodies with different focal length zoom lenses. On the tripod, I had my Canon EOS R5 with a Canon RF 24-240mm lens. My Canon EOS 6D Mk II hung from my body with a Tamron 28-300 lens. When making images of trains, I love having my camera on a tripod. I set the tripod to a low height for the vantage point I want, and I have a stable platform for exposure bracketing and focus stacking. Sometimes the action is fast and a tripod-mounted camera is not ideal, so I carried my 6D II for those quick handheld shots. In addition, the second camera body provided redundancy in case I had a problem with my primary camera.
Workshop Instructor Mike Massee captured me a couple times during the workshop. Big thanks to Mike for letting me include these images.
Nevada Northern Railway Winter Photography Workshop on February 12 through February 14, 2021. Photo by Mike Massee while acting as the workshop instructor. This image was made on Friday – no snow on the ground!Nevada Northern Railway Winter Photography Workshop on February 12 through February 14, 2021. Photo by Mike Massee while acting as the workshop instructor. Sunday in Robinson Canyon. Note the height of the camera on the tripod, typical for my railroad photography.
And so, on to my images from the day.
A somewhat unique shot – the black smoke is from the boiler, while the white smoke is from the whistle.The train crew makes several runs at each location so we can change position for different views. I liked this one in black and white.A little different interpretation. Great sky in the background. Some participants rode in the Caboose (the yellow car) and the rest rode in the Outfit Car, just ahead of the Caboose. The view from the cupola of the Caboose is amazing.Since I’m in a line of photographers, I keep my eyes open for other perspectives. For this shot, I crossed the tracks and crouched down in a ditch (to stay out of the other photographers shots). I was by myself, so I was the only one to get this shot.
After several runs on the Hy-Line, we headed up to the Tunnel.
I love the east side of the Tunnel. Great background for the locomotive.
We returned to the East Ely Yard for lunch and prepared for the afternoon shoot at the Tunnel and Robinson Canyon. The crew reconfigured the train for a different look.
In that ‘road less traveled’ theme, I climbed the side of the Tunnel to shoot down on the train. Again, I was by myself.When a locomotive exits the Tunnel, the smoke does amazing things. Since the 93 is pulling uphill in this shot, it’s working hard and making a lot of smoke. This view from just behind the guardrail on U.S. 50.Robinson Canyon is a marvelous venue for shooting. For this shot, I went high on the slope. I had my Canon EOS R5 camera and tried some new techniques on this portion of the shoot. One of the great things I learned about this amazing camera is the AutoFocus system is wonderful. When used in combination with the Touch Sensor Shutter Release (touching the LCD screen on the back of the camera to release the shutter, the AF system focuses on the point that I touched), I adjusted the position of the camera body with the tripod head, recomposed for focal length and composition, and touched the screen to focus on my desired focal point and release the shutter. I need to perfect my technique, but I liked the process for slow action such as this moving train. The resulting image files were easier to process. On the way back from Robinson Canyon, we stopped at the grade crossing at County Road 19 for some shots. In this shot, I am looking east, with the East Ely Yard in the background. I processed this image using a different filter than I usually use, providing a softer look for the locomotive.
That ends three days of fun but challenging photography. I learned more about using flash, but also learned how to take pictures in driving snow and cold. A trip to the Nevada Northern Railway is always great, but also wonderful when one’s photographic skills are pushed to the limit.
On the drive home, I stopped by Eastgate Canyon. This canyon is located 5 miles from U.S. 50 on State Highway 722., and is the home to a band of Desert Bighorn Sheep. My lovely bride and I found them last October when we drove by, so I checked to see if I could find them. Sure enough, they were grazing on a hillside within range of my camera.
A young Ram, making sure I wasn’t getting too close.The view looking west towards U.S. 50 through the entrance to Eastgate Canyon.
Thanks for reading. I hope you enjoyed this series from the Nevada Northern Railway. Enjoy – PHOTOROGR
Due to the extreme weather conditions all morning (described in my previous post), our workshop facilitators did a wonderful job of getting the shots but also caring about the comfort of the participants. We split the outside shooting into a couple of sessions, allowing us to get inside more frequently and stay warm.
One of the great elements of this particular workshop is the lighting. Steve Crise has been a photographer for many years (no, I won’t tell you how many so you don’t guess how old he is!), and is a master of setting up a lighting system. His classroom sessions on lighting are wonderful, but then we got to put that information into practice. Because of the weather, he devised some lighting schemes inside the Machine Shop and Engine House to teach us more. For these sessions, he has each participant put the light controller on their hot shoe and control the shot.
We had a couple of scenes to shoot. This is one of the NNRY employees in the Blacksmith Shop. There were two strobe lights on him, and one strobe inside the furnace. The furnace strobe had a gel to create the yellow color.
Of course, once I got my turn at the strobe lights, my attention turned to other areas.
In the Machine Shop, a fun composition of one of the walls.This is the NNRY’s Rotary Snow Plow. The machinery is probably 10 feet in diameter. I bracketed exposures and then had some fun playing with different filters in post processing. This is a yellowed filter in Nik Silver Efex.
When the light begins to fade, we settle in for the evening session. Our facilitators got very creative for this year’s evening session. I call it, “Fun With Fire!”
We’re all in the Machine Shop, in total darkness. We hear Steve say, “3…2…1…open shutters!” We open our shutters and several strobes fire, lighting up NNRY worker Ben who is standing on the front of Locomotive 81 making lots of sparks. After a few seconds, the shutters close and we repeat the process.
With the number of participants, space was a little tight in the Machine Shop so I looked for different places to stand. For this shot, I stood on the stairs to mechanical equipment in the ceiling and got this shot looking down.We stopped and allowed everyone to change their view every few minutes. For this shot, I went low and perpendicular to the locomotive.From the front of the locomotive, and I mistimed my shutter and missed the strobe light. In some ways, I think it’s better than other images I made. Note the wet floor – not for safety, but for lighting effect.In automotive photography, this is called a 3/4 view because the front of the vehicle is about a quarter of the total image. I timed the strobe well, as I got great light in the scene. For these shots, I tried several different settings. I settled in at ISO 250, f/7.1, 2.5 – 4 seconds of shutter speed.For this shot, I stood at the top of the landing for the exterior door. One of the early shots on the night, I overexposed and clipped the center of the spark shower. Not fatal, as this is still a nice composition.
And so, a day of challenging conditions and much learning for me. Shooting in a driving snow storm, followed by strobes and fun with fire – new experiences all day.
A quick note about post processing. I always shoot in RAW format, which requires that all image files are processed on a computer before being able to share them. For the snow images, I still had to tone down highlights and bring out the shadows. The interiors just needed some tone adjustments and filters. The FWF images were lots of fun. Due to the strobe lighting in some (but not all) combined with the bright sparks, each image file had to be processed independently to bring out the strengths of every image. I also use filters from the DxO Nik Collection or Topaz Studio, and I used both – sometimes together – to make the image really pop.
One more cold day in Ely, but it wasn’t snowing! Until next time – enjoy! PHOTOROGR
I knew it was going to be an interesting day of photography when I looked out the hotel room window at the driving snow storm outside. There are numerous books on taking pictures in extreme weather, and I felt prepared. The camera batteries were fully charged. I had the weather covers all ready. (I did ask the nice folks at the front desk for a couple of the hotel shower caps – they came in very handy for covering the second camera body I was carrying. It’s a great tip for those times you don’t have a rain cover in your kit!) I put on my long underwear, insulated boots, photo gloves (so I can use fingertips without freezing my entire hand), and numerous layers, and headed out.
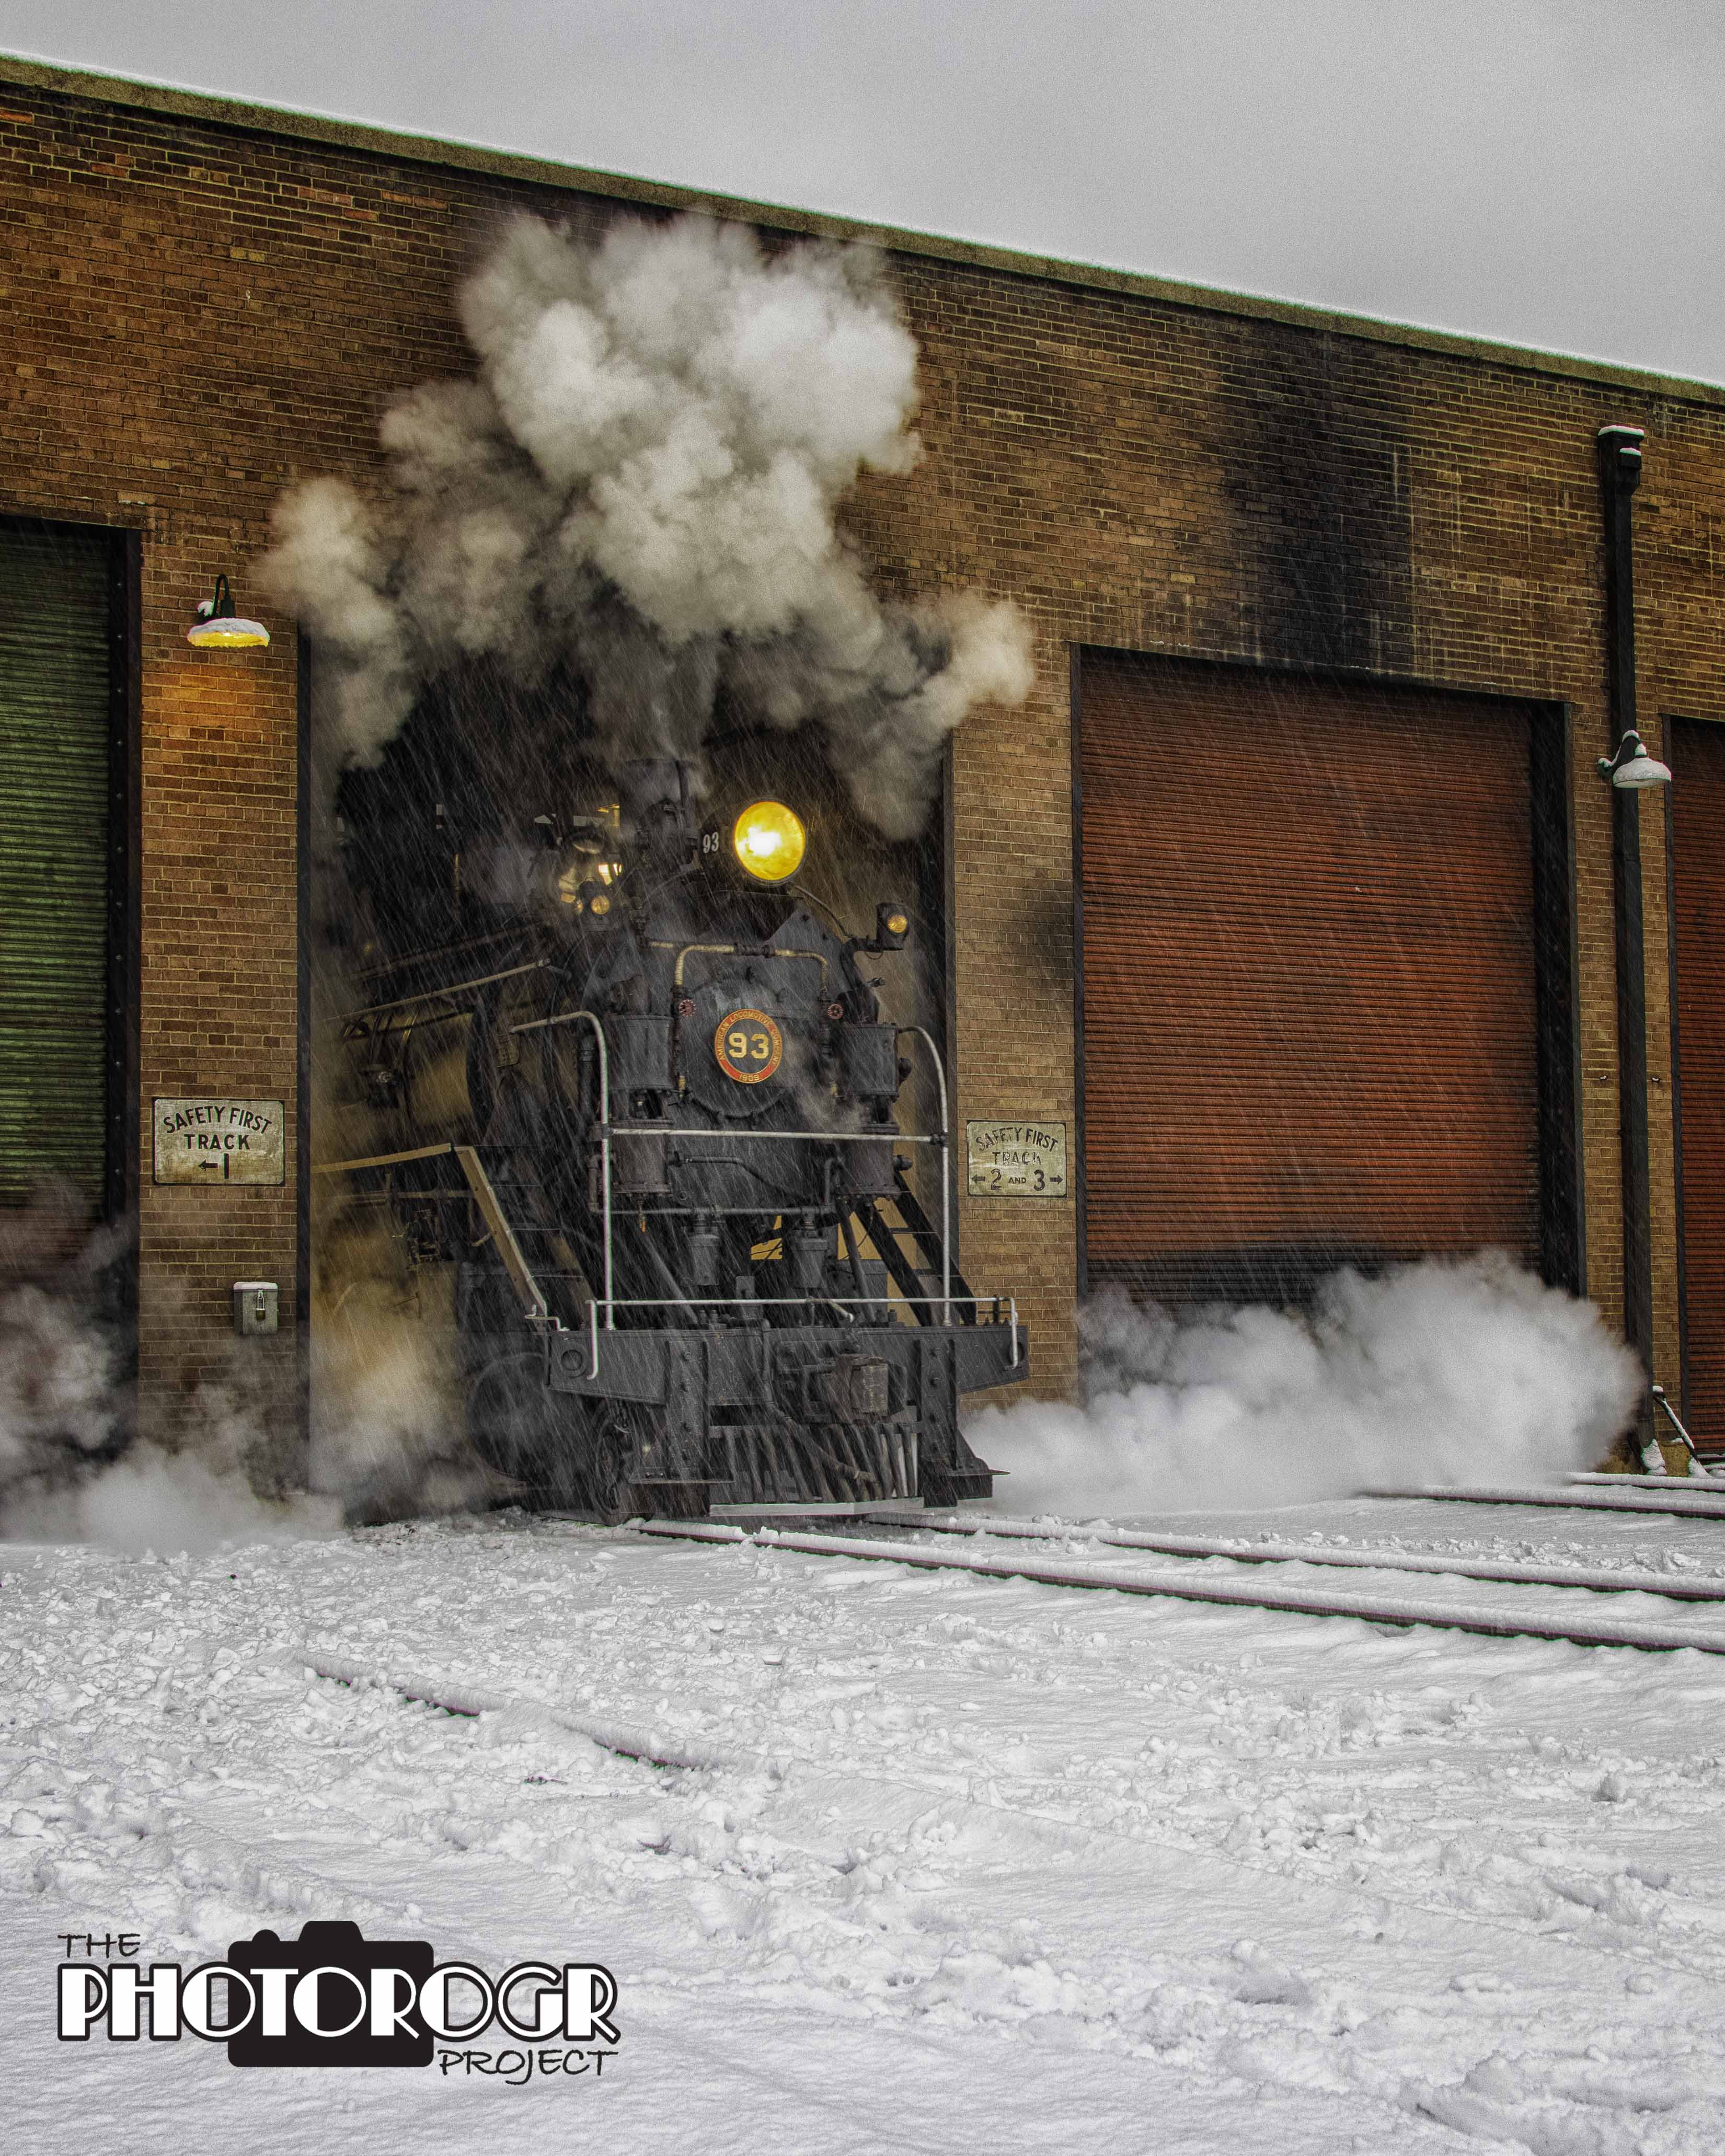
Our first shoot is always the locomotives exiting the Engine House. On sunny days, this side of the building is in full early morning sun and the light is fantastic. This year, not so much. Still good light, but not the great direct sunlight.
The 93 leaving the Engine House.The 93 was the only locomotive running for this year’s workshop, which limited our options for shooting. Some images just look better in black and white, especially with the snow.The snow and the smoke dominated this composition, but the Topaz filter created an ethereal feel.
I had just read Jason Bradley’s article, Winter Exposures, in the December 2020 issue of Outdoor Photographer magazine. In the article, author Bradley discusses the challenges of winter exposures: extreme contrast and highlights “off the charts.” He discusses the challenges of film versus digital regarding winter exposures. Basically, with film one must “get it right the first time.” With digital, “…our goal is to maximize the amount of collectible RAW data without blowing out highlights in critical areas of our composition.”
Then he gets into a lengthy discussion about ETTR, or Expose to the Right. Using this technique, the photographer will push the histogram as far to the right as possible without clipping. To explain, I defer to National Geographic’s Complete Photography.
“A histogram displays all of the brightness levels of the image, from dark to light, left to right. If high peaks slam up against the left or right sides of the graph, the image is “clipped” – it may contain areas of pure black or pure white, meaning no detail was recorded. A well exposed image will have detail throughout the entire range of darks, midtones, and bright areas.”
(Note: histograms are also used to show levels of RGB (red, green, and blue) color in an image file. Camera sensors record color as differing levels of RGB in individual pixels, but that’s another big topic altogether.)
Many cameras can be programmed to show clipped highlights using “blinkies.” Author Bradley says this, “The blinkies are terribly useful. While histograms can tell us if our highlights are going off the charts, the blinkies show us where in our composition that’s occurring.” Go to your camera’s playback menu to turn on or turn off blinkies.
Lots of things to think about while setting up for our shoot. But wait, there’s more! (…to quote a commercial…) For static subjects (like landscapes), a photographer can account for bright highlights and dark shadows using exposure bracketing (shooting the same composition using different exposures) and blend those exposures using HDR (high dynamic range) techniques. (I’ve discussed HDR in other blogs, so I won’t get into them here.) What about white balance? The built in meter will be going wild because of the snow.
So, the stage is set, except for the most important thing – I’m shooting a MOVING, BLACK locomotive in BLOWING SNOW. Exposure bracketing is not an option because the locomotive is moving. If I want a nice middle of the histogram exposure, I lose detail in the locomotive. Well, I decided the locomotive was the most important so I exposed for it and didn’t worry about the snow. By overexposing one stop, I could account for some of the white balance and keep some detail in the black locomotive. Now, did I do it for every shot? No! But these were the things on my mind as I approached shooting during the day.
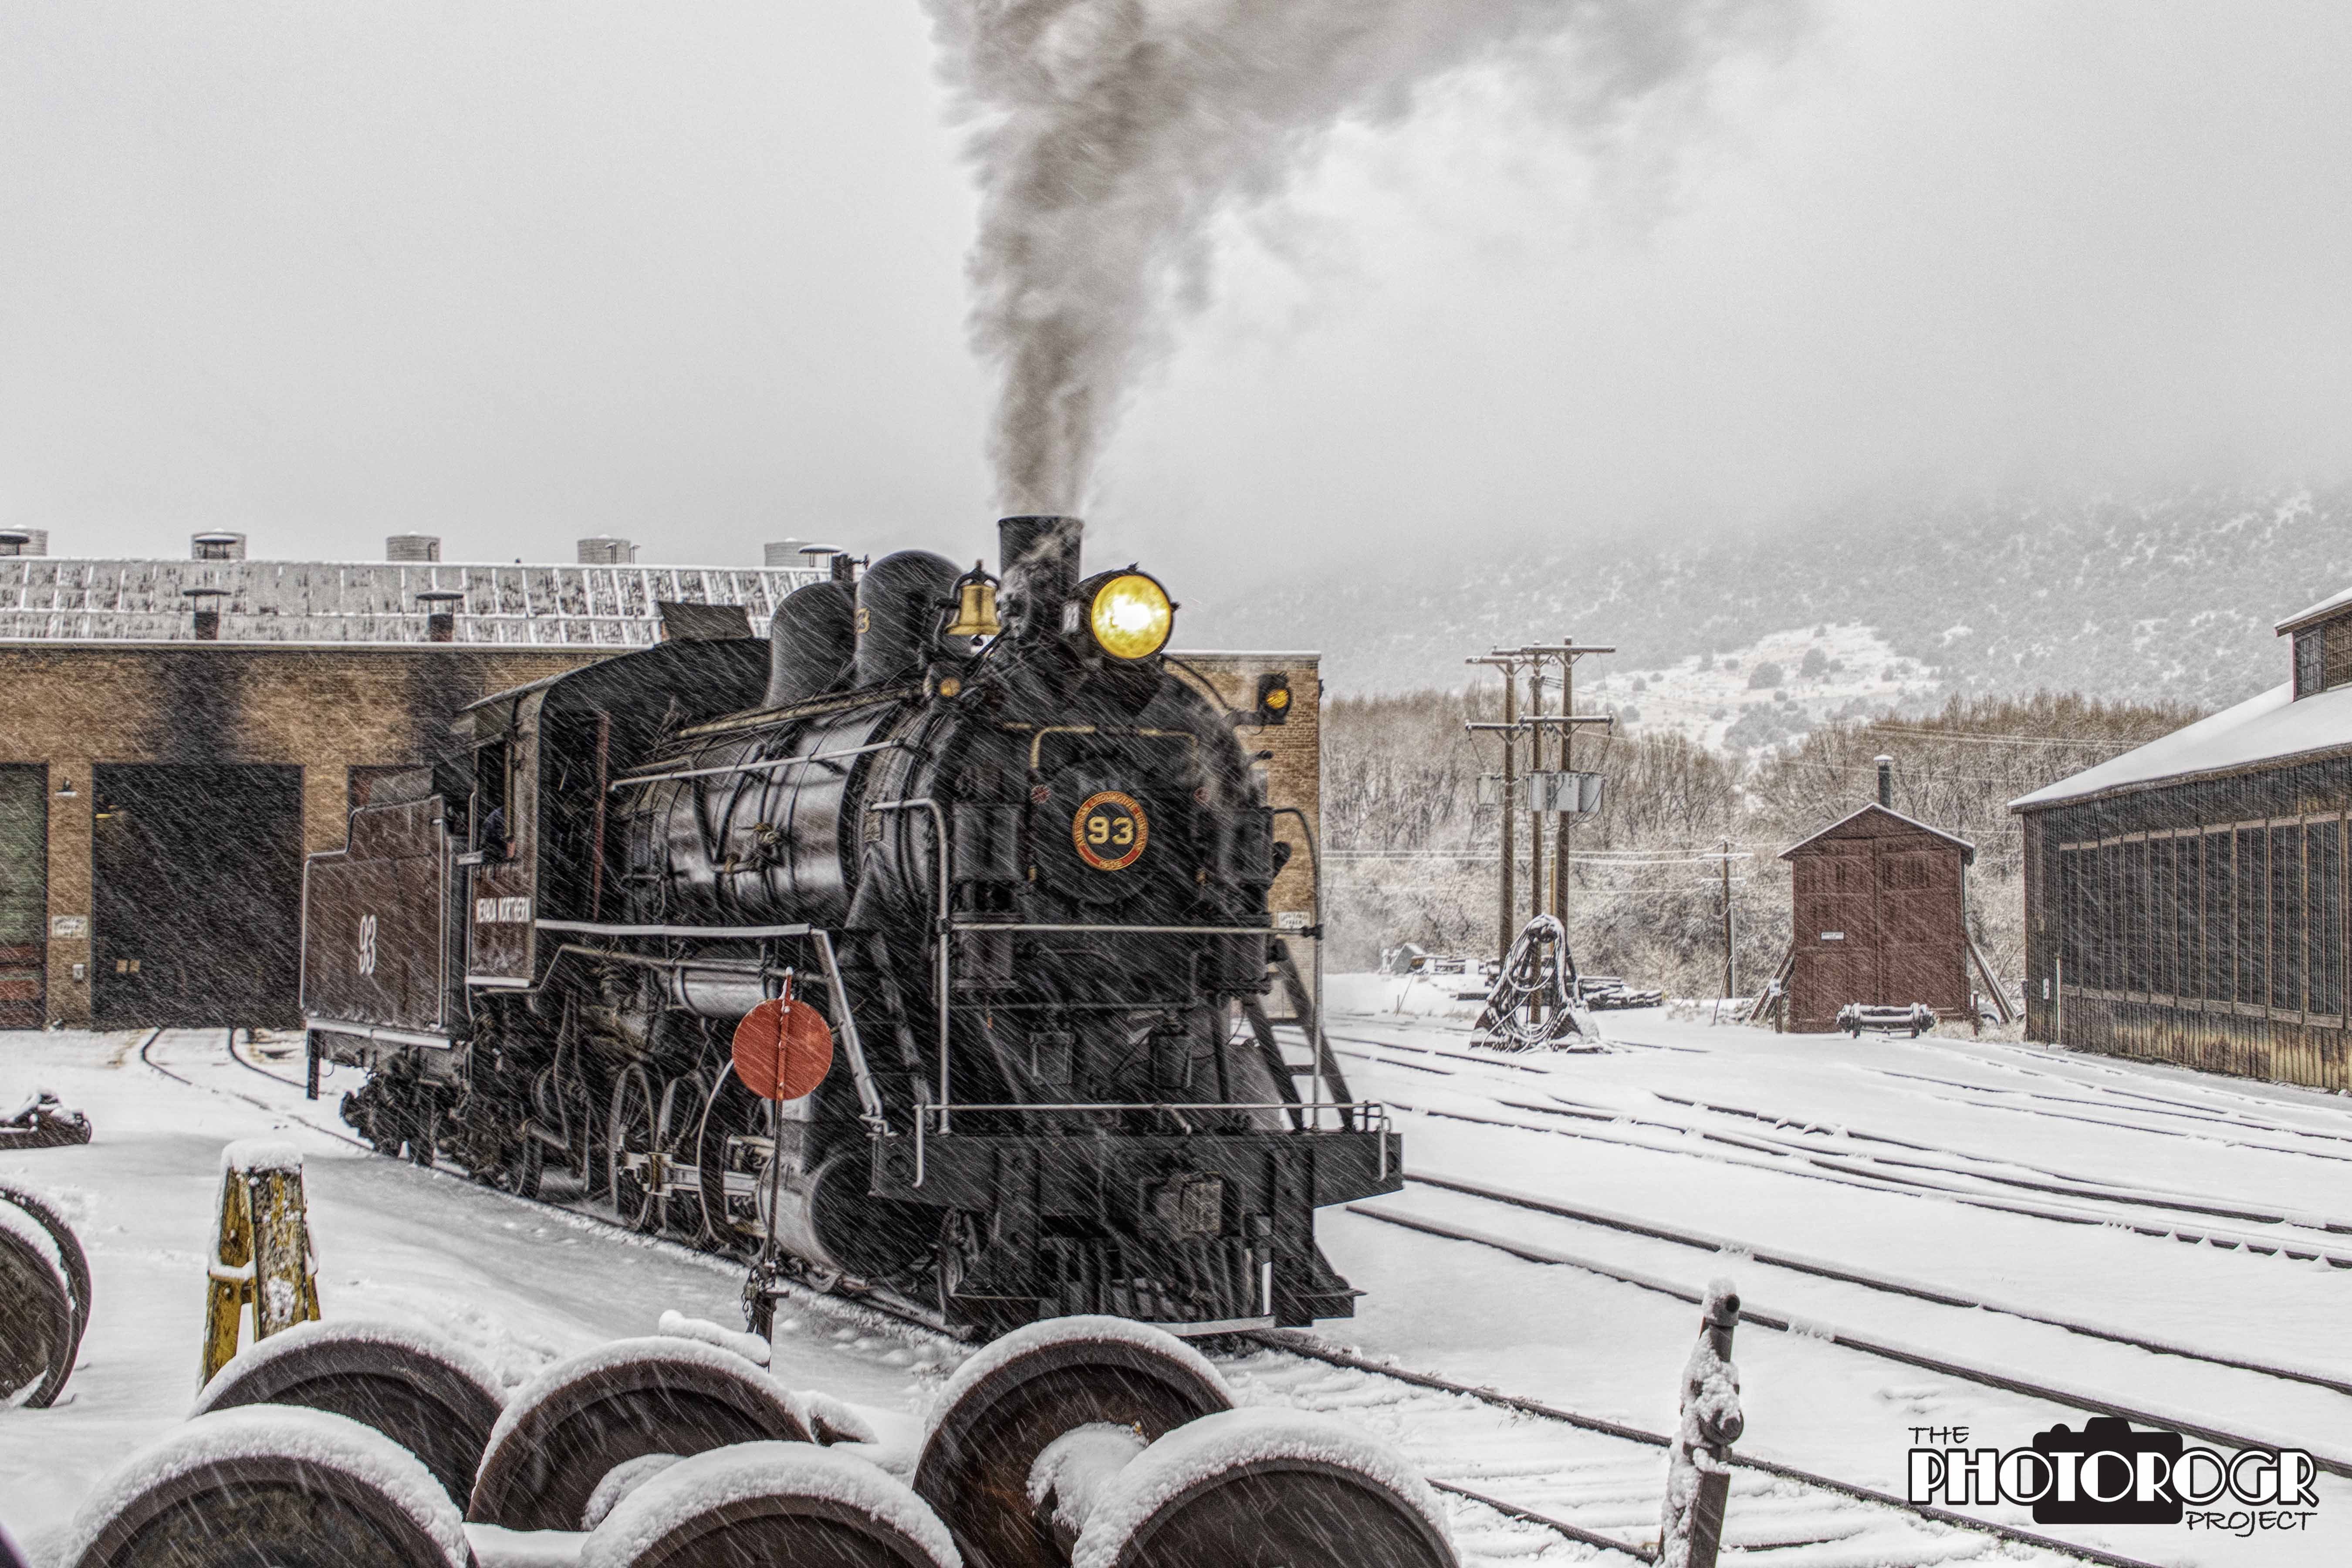
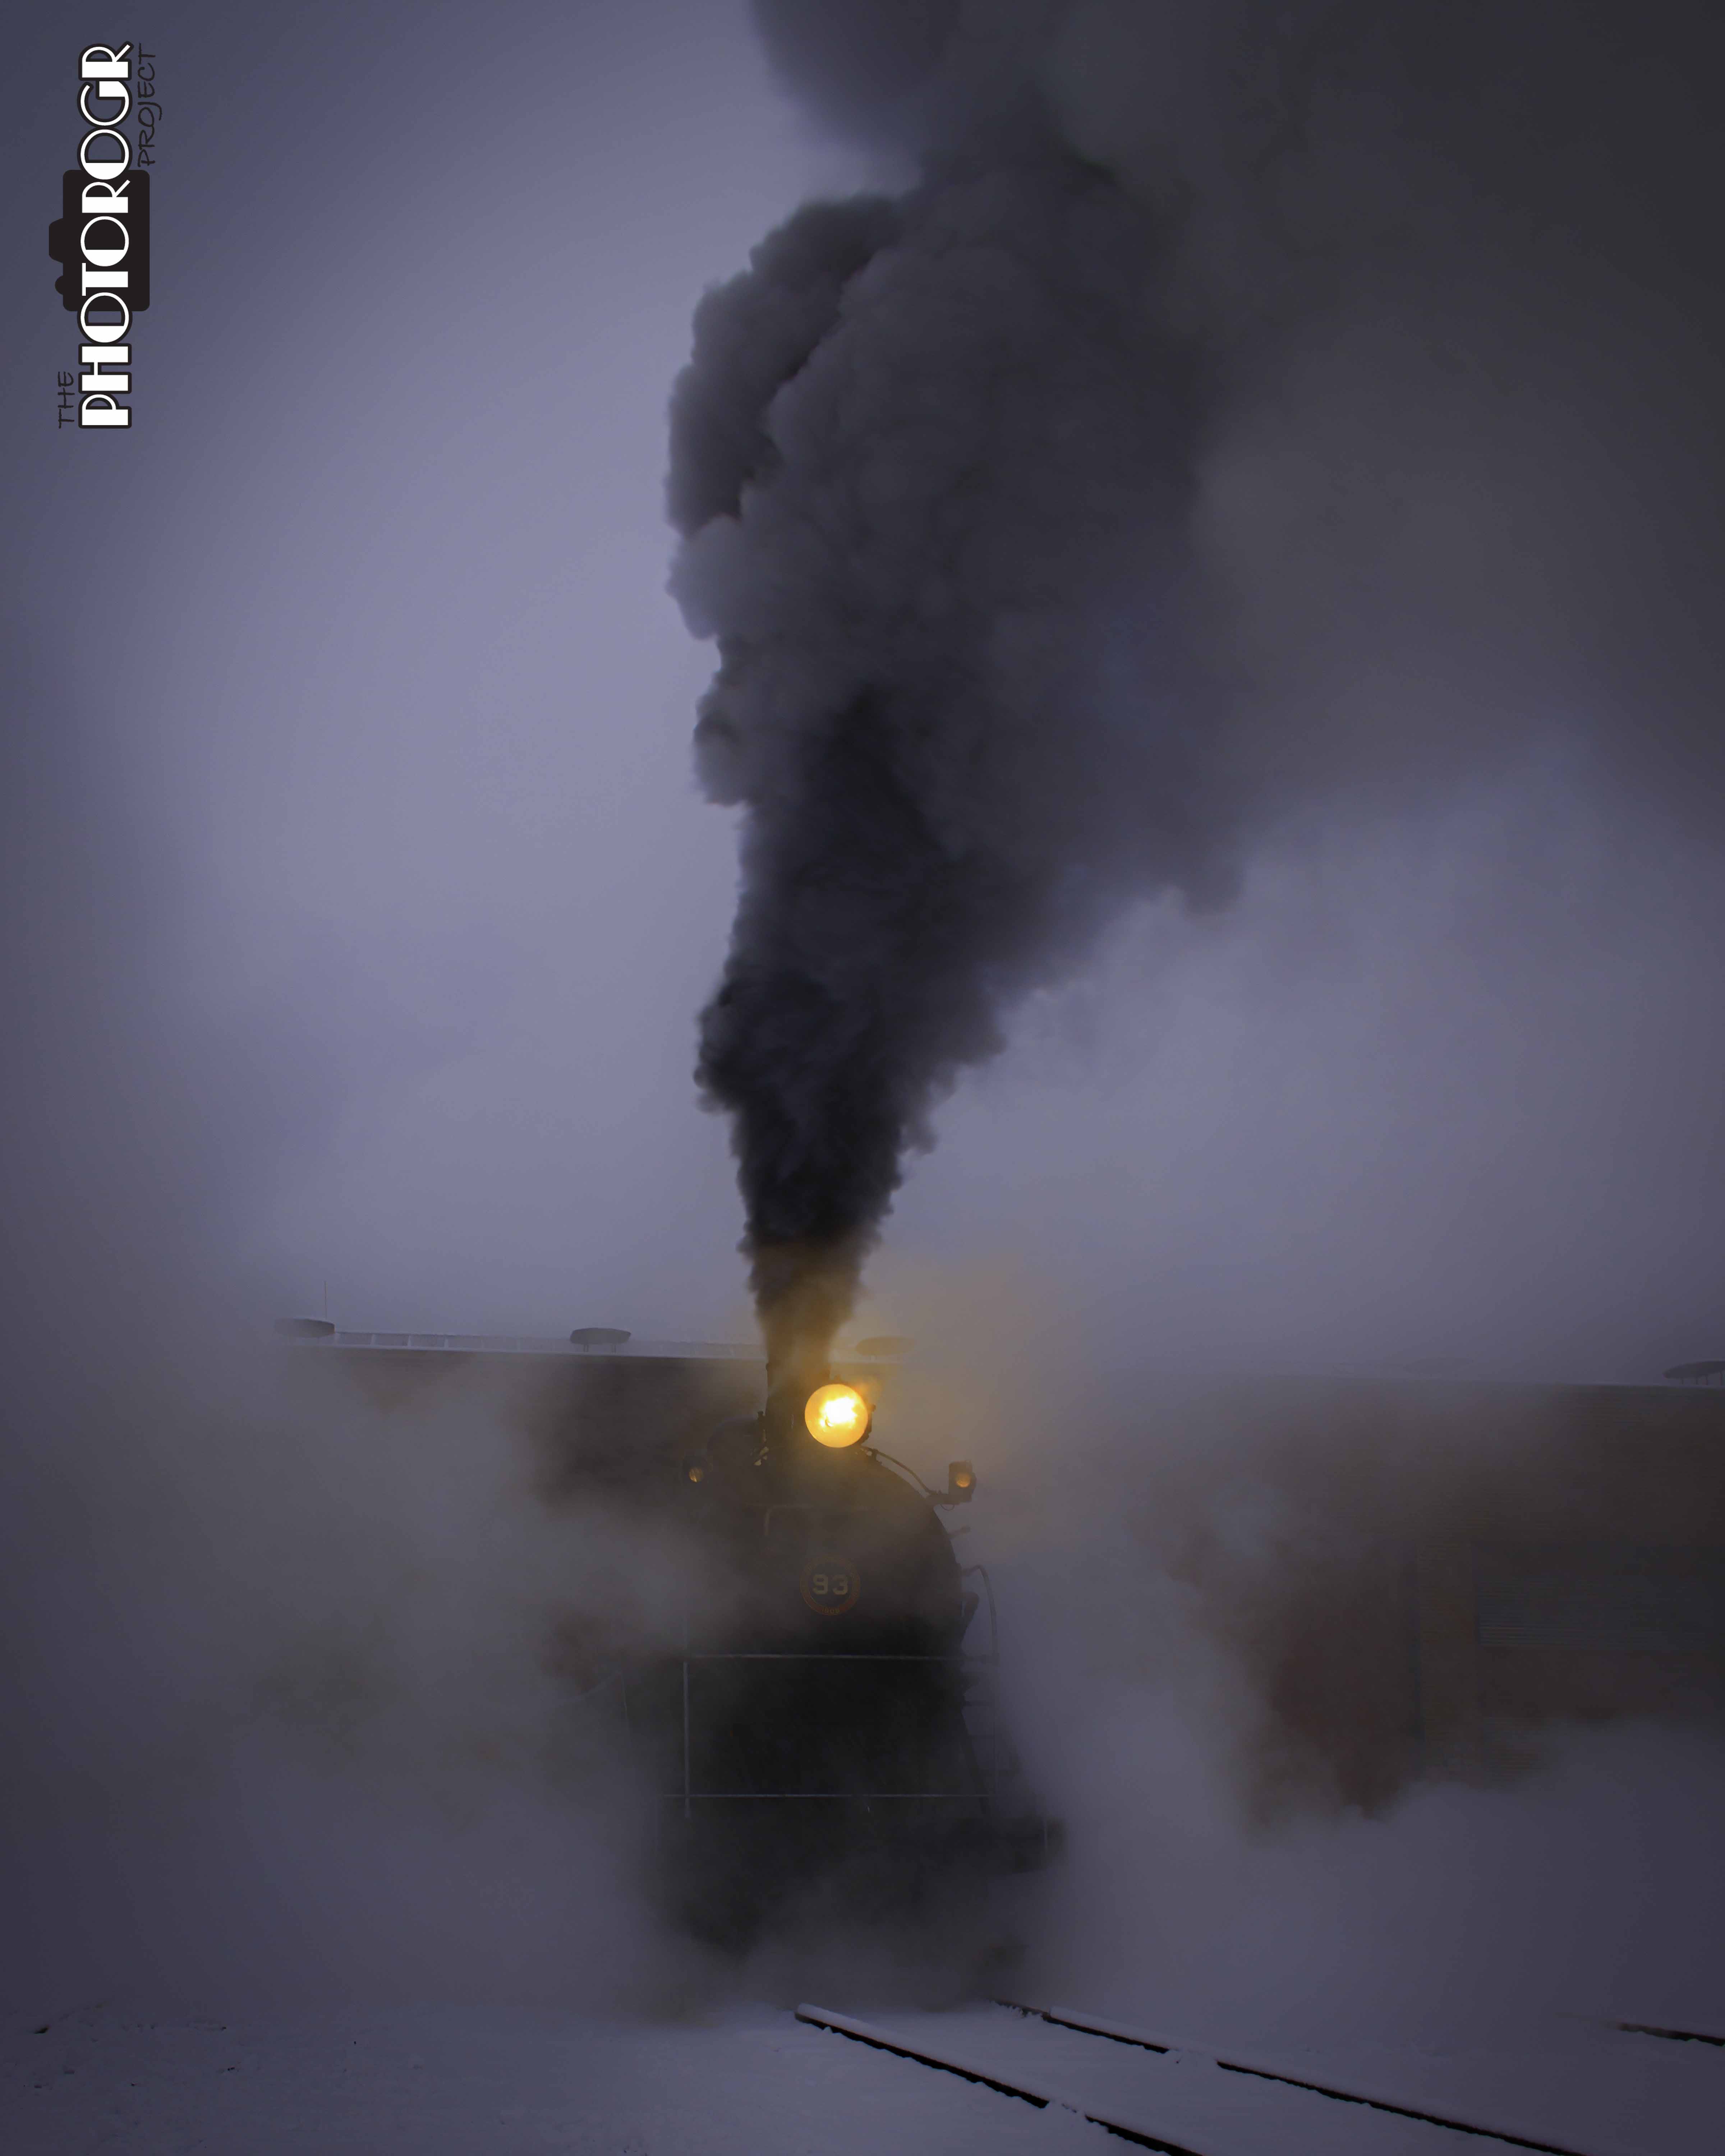
One of my favorite images on the day, and my current cover photo on Facebook. I was able to freeze the action but still allow the snow to streak a bit. I decided to go black and white during processing.I played with this as a color image and in black and white. The green trees and reds in the locomotive and ore car added enough to show the color version. I pushed the highlights even higher during post production to create a white foreground and background.A nice winter picture.The RIP Building sure helped, although we were in shade on this side of the building. To get enough exposure to keep the details, I will often bump up my ISO. That could introduce noise if set too high, so one must be careful.I didn’t discuss the light on the front of the locomotive earlier, but it didn’t cause too many problems during the day. The light dominates this image, but I love the ethereal feel.
That’s my discussion on shooting in the snow. Lots of challenges, but the results speak for themselves. In my next blog, we’ll get out of the snow for some indoor shooting. Enjoy – PHOTOROGR
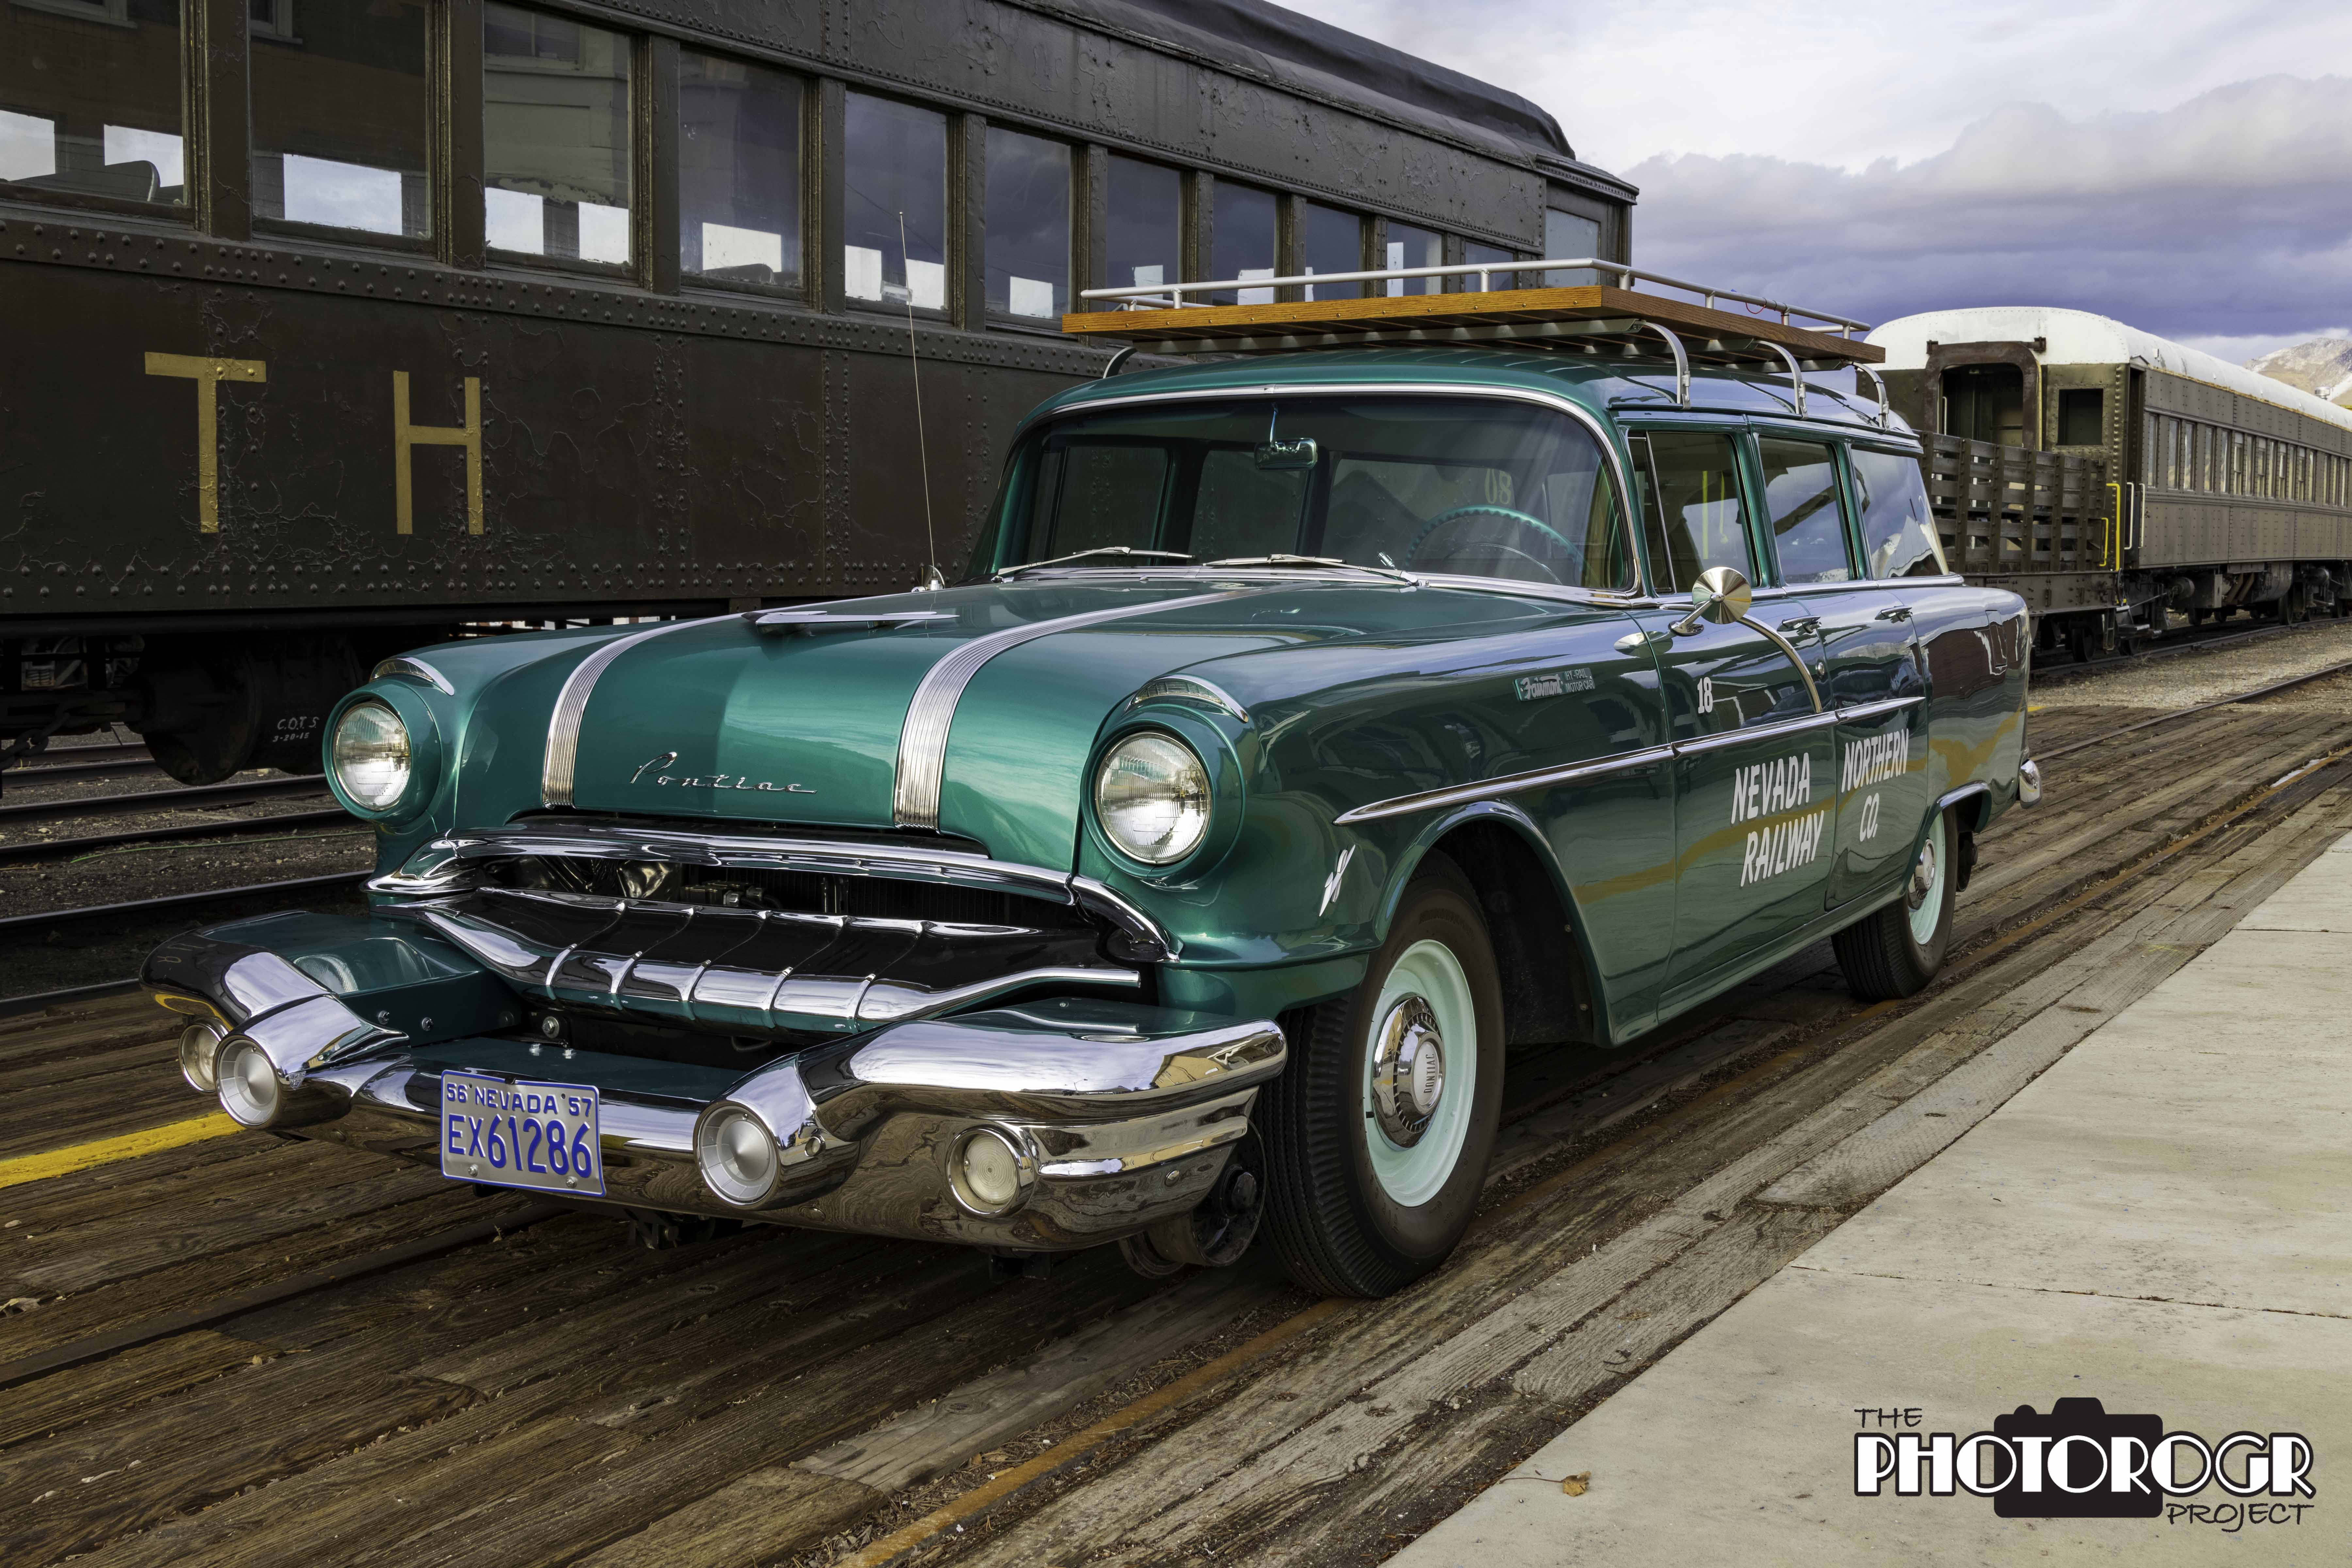
Friday morning dawned cool but otherwise nice. The workshop participants gathered in the East Ely Depot to begin the day. We all brought some pictures of our work so we could get to know one another and the instructors could assess our photography skills, then we headed into the East Ely Yard for some pictures.
One of my favorite images from the weekend. I was able to process the image file in Adobe Camera Raw and cleanup some clutter in Photoshop. No need to use other software for a filter.
This is the NNRY’s 1956 Pontiac Hy-Rail car, used by the NNRY for track inspection. Look close and you can see the wheels that keep the car on the tracks just behind the bumper in front of the tire.
I took advantage of the open door at the RIP Building. Just inside, I found this line of wheels and axles, so I did a little focus stacking. There are four different focal planes and five exposures of each focal plane to create the image. I blended the RAW image files in Helicon Focus 7, then applied a black and white filter in Nik Silver Efex.
This is the interior of the Outfit Car, used by the crews to travel to work locations. This was our base of operations for our shoot on Sunday. For this image, I used three image files with different exposures blended in Adobe Camera Raw, some clean up in Photoshop, then a filter from Topaz Studio.
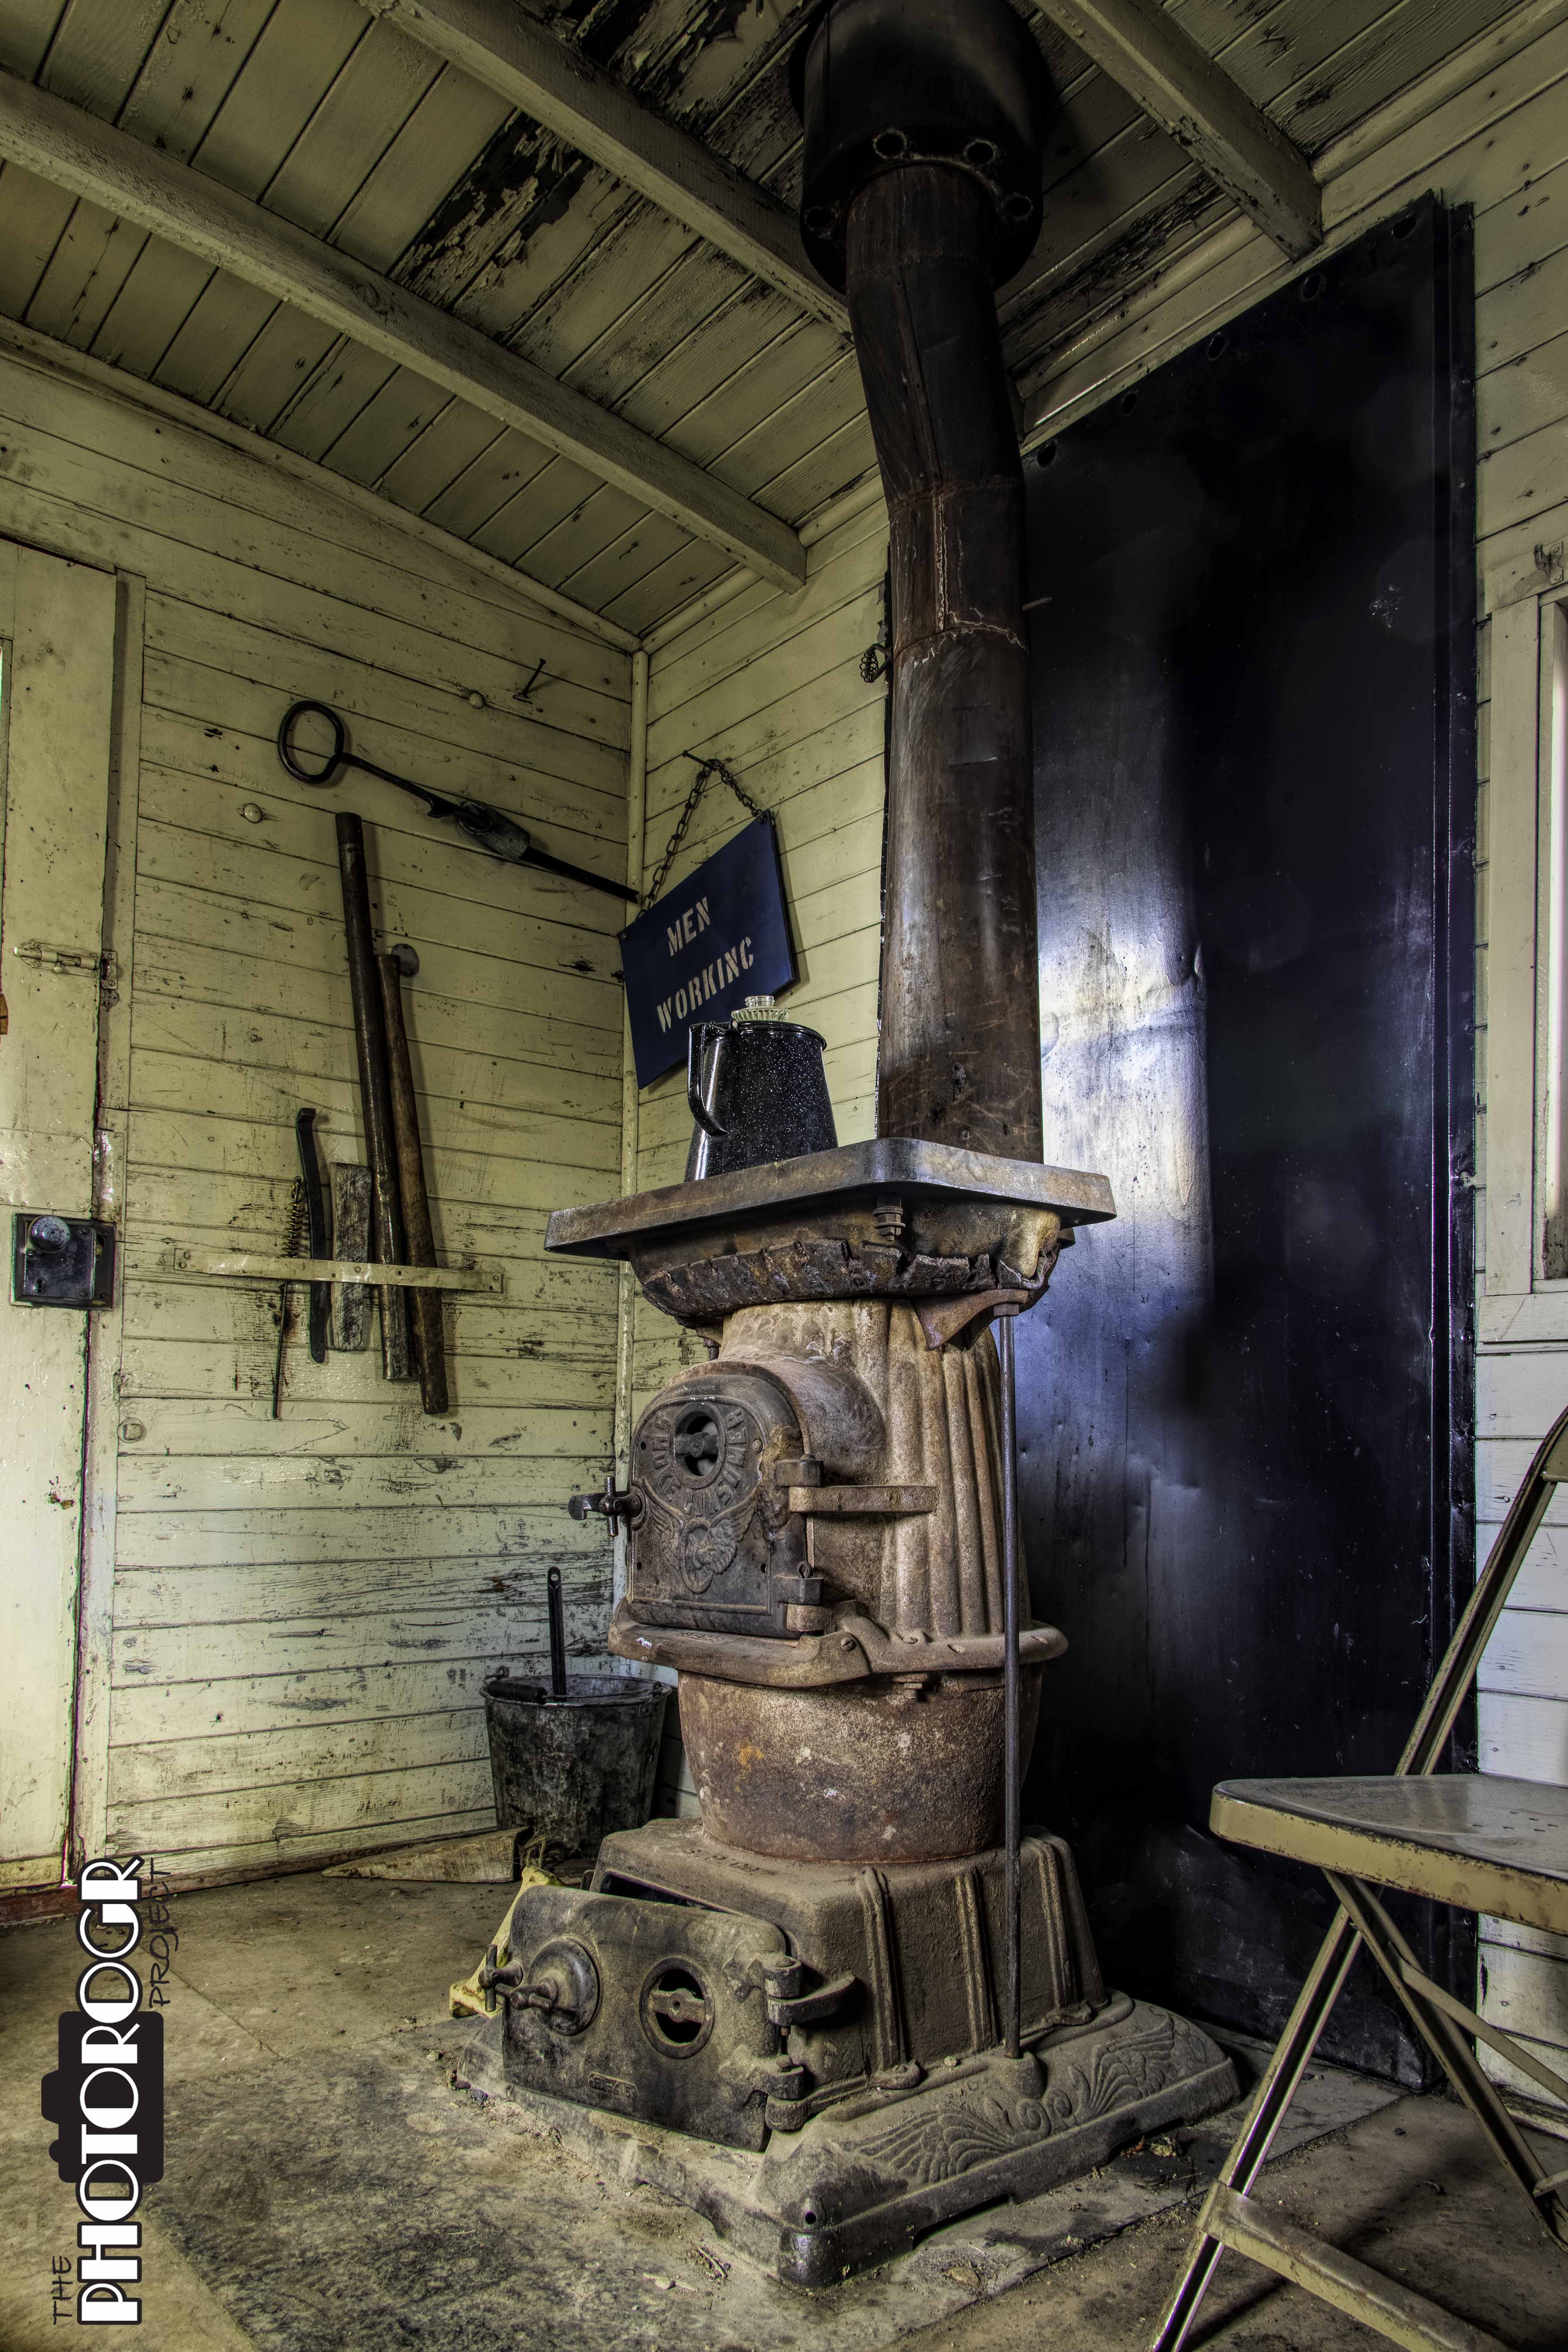
This is the interior of a Caboose, taken from the door.
This is the scene when you walk through the cupola and into the back of the Caboose from the previous image. I paused before taking the picture…thinking about the men who spent their working lives in this space. Do you think they had to sneak a little coal from the Tender to keep the Caboose warm?
After the morning in the Yard, we returned to the Depot for some lunch and the lighting class. Then we headed back into the Yard to finish the day.
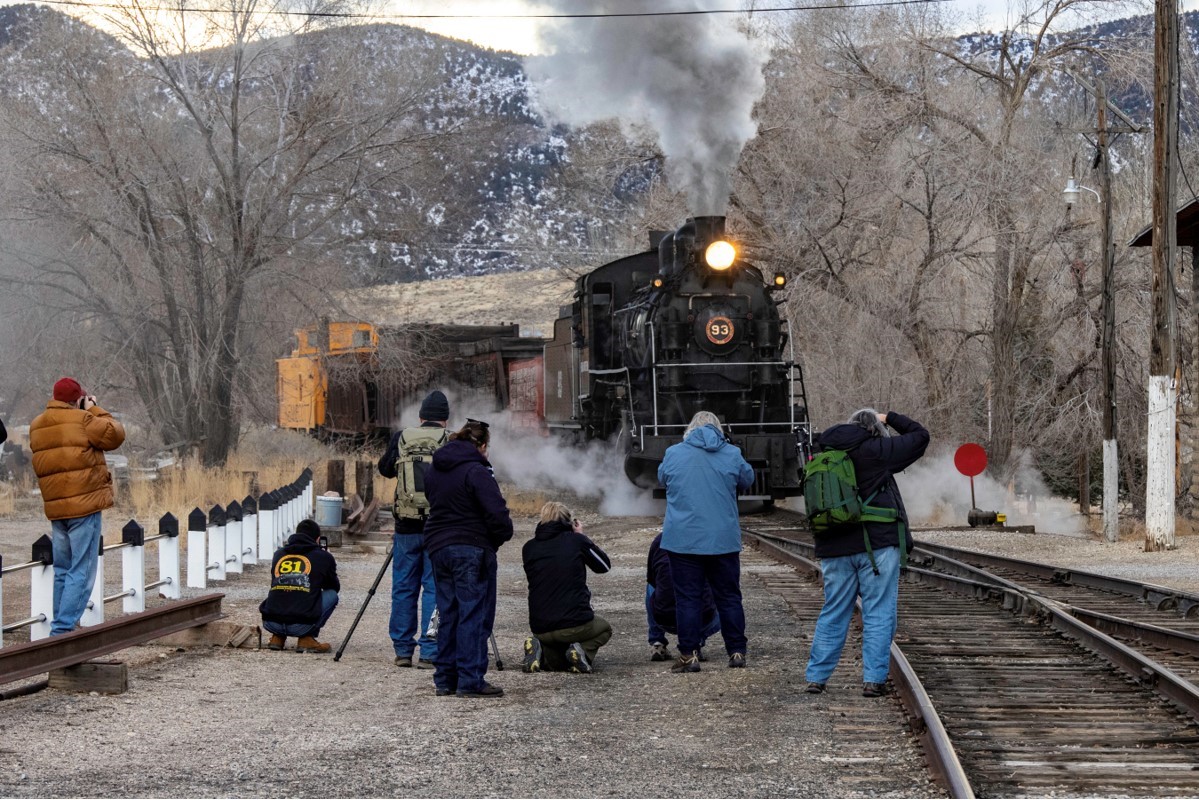
This is the Photo Line. And this one was easy because of the low number of photographers.
We’re all going for shots like this…
…and this!
Keep your eyes open and camera ready. Every now and then you turn and see something like this.
As the light began to fade, we set up in the Freight Depot and the 93 made several runs by us. Shutter speed is key here, depending on what you want your image to show. I used a fast shutter speed to freeze the action in this shot. I also made some shots with the 93 ‘blurring’ by.
That’s not everything from the day, but it’s a nice representation. Lots to see and lots of images to make. But wait ’til the next post – cuz the weather went bonkers on us!