Nevada Northern Railway 2021 – Day 1

Friday morning dawned cool but otherwise nice. The workshop participants gathered in the East Ely Depot to begin the day. We all brought some pictures of our work so we could get to know one another and the instructors could assess our photography skills, then we headed into the East Ely Yard for some pictures.

One of my favorite images from the weekend. I was able to process the image file in Adobe Camera Raw and cleanup some clutter in Photoshop. No need to use other software for a filter.

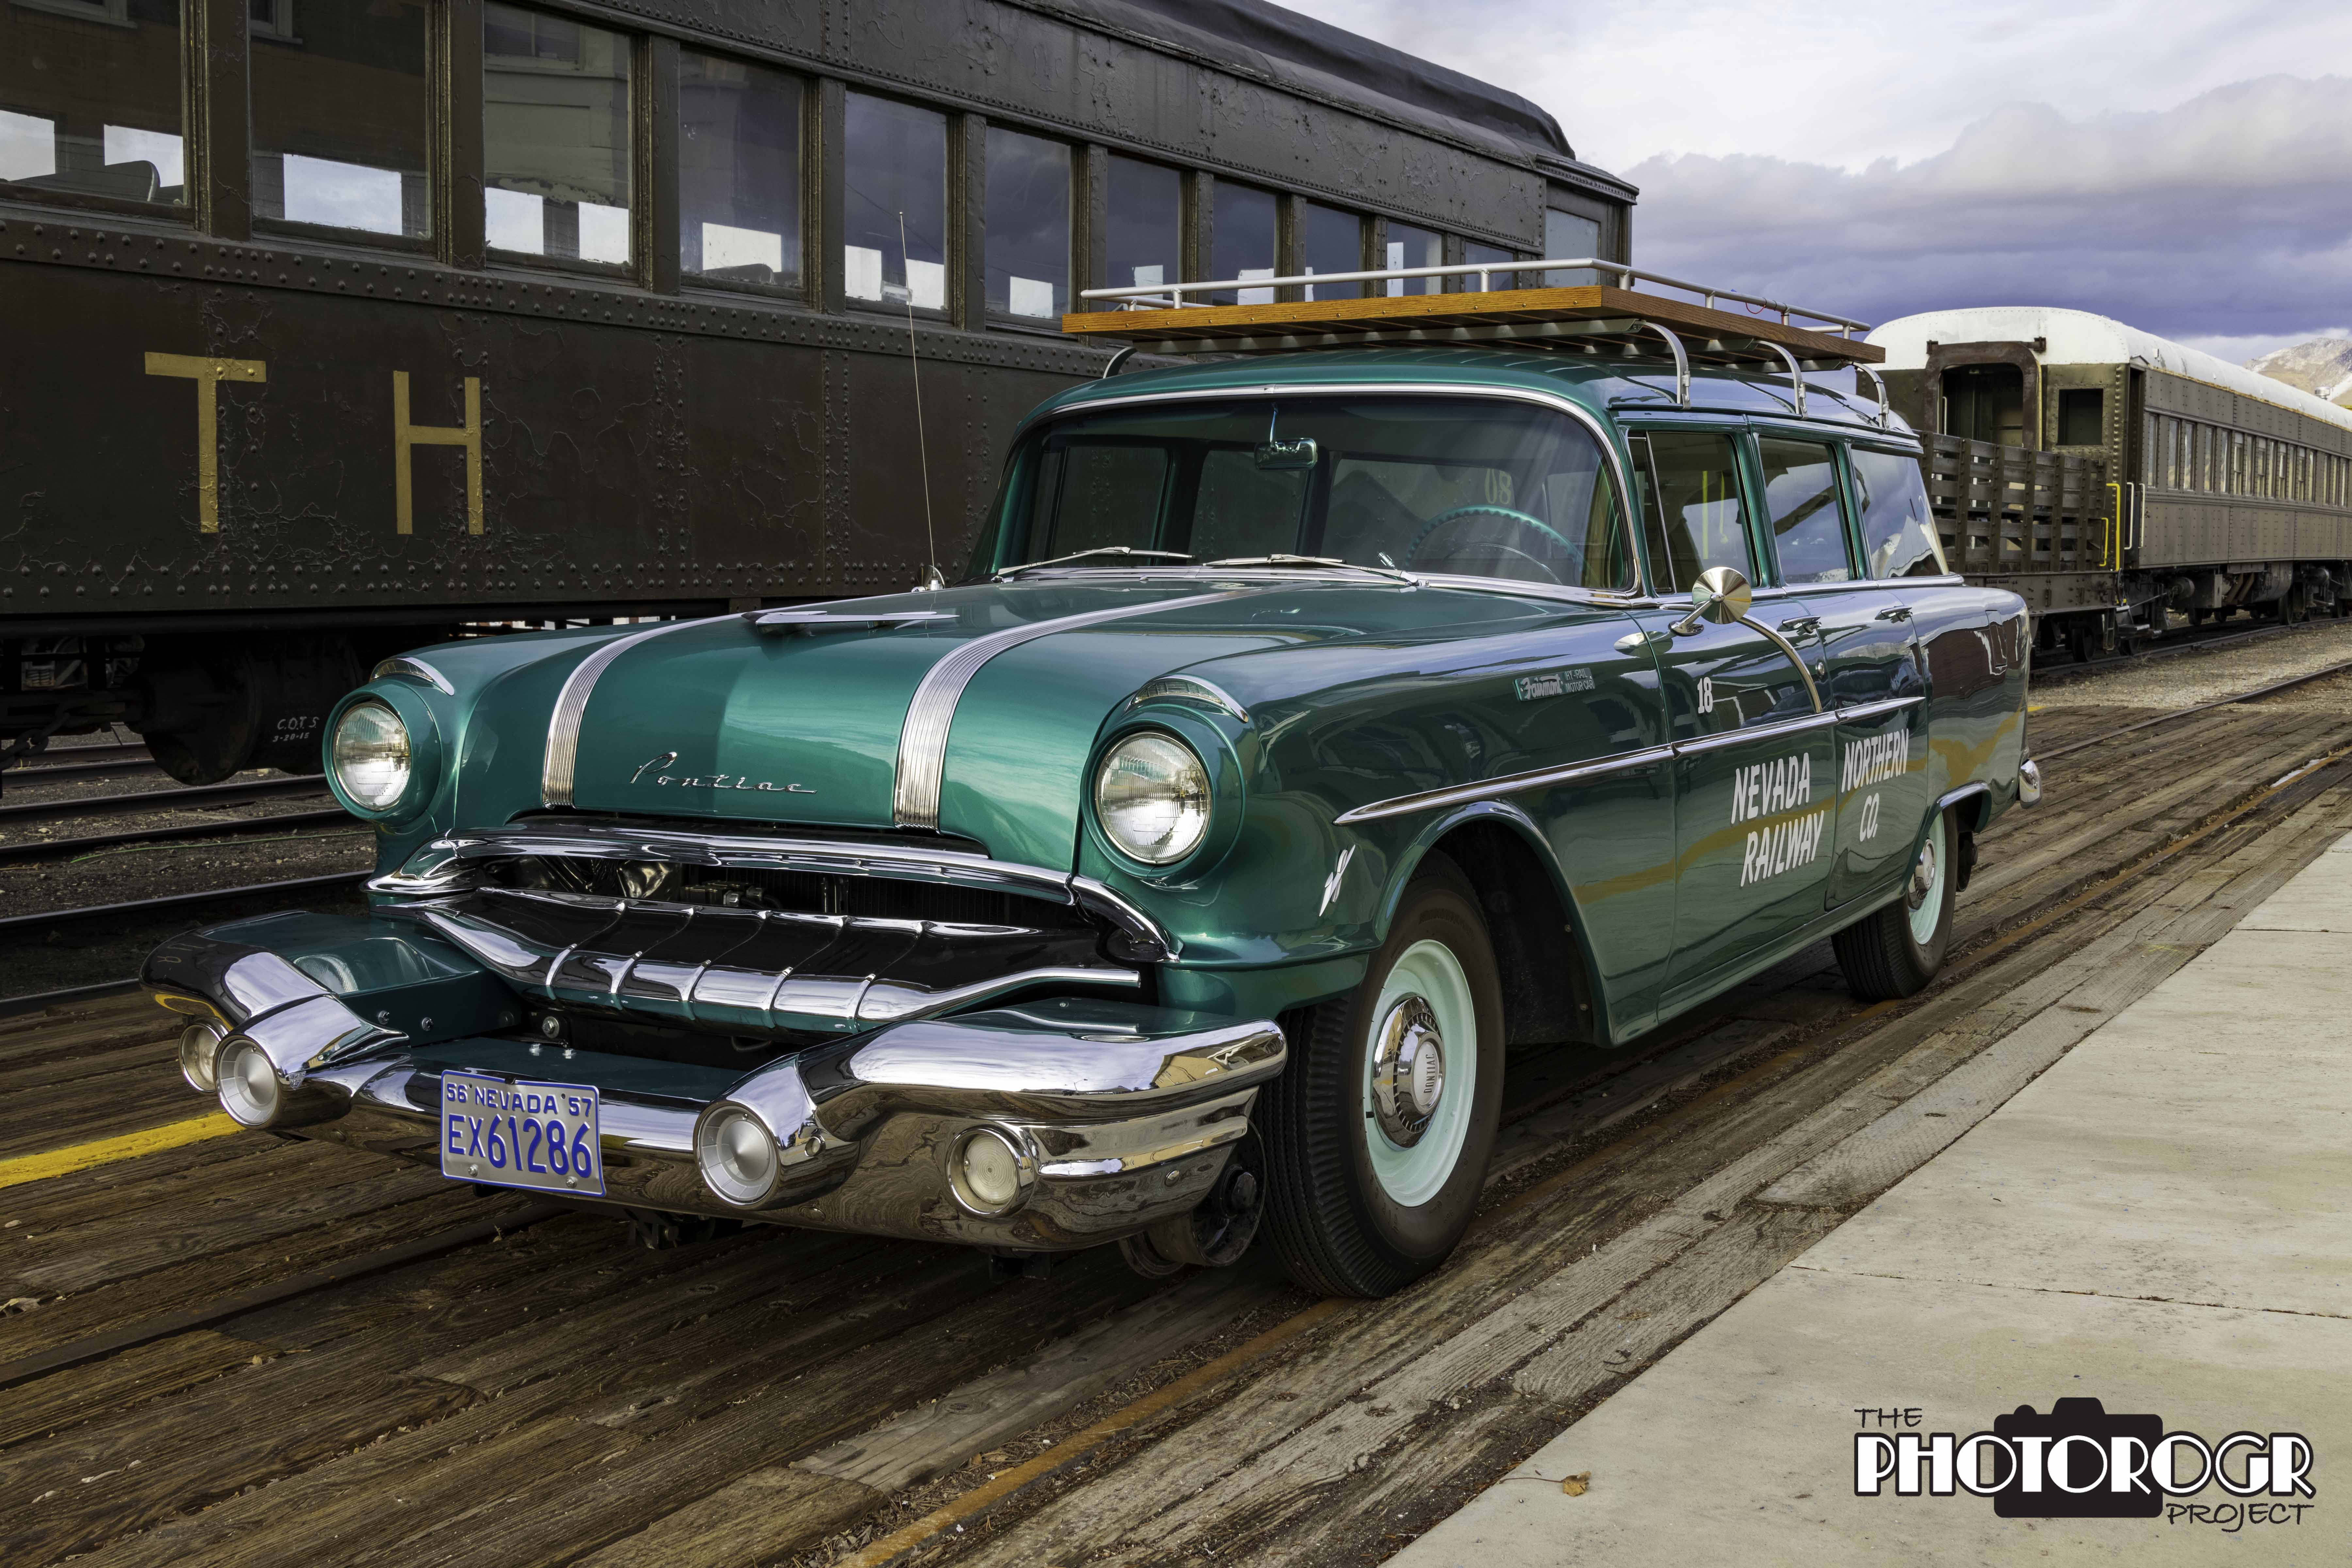
This is the NNRY’s 1956 Pontiac Hy-Rail car, used by the NNRY for track inspection. Look close and you can see the wheels that keep the car on the tracks just behind the bumper in front of the tire.

I took advantage of the open door at the RIP Building. Just inside, I found this line of wheels and axles, so I did a little focus stacking. There are four different focal planes and five exposures of each focal plane to create the image. I blended the RAW image files in Helicon Focus 7, then applied a black and white filter in Nik Silver Efex.

This is the interior of the Outfit Car, used by the crews to travel to work locations. This was our base of operations for our shoot on Sunday. For this image, I used three image files with different exposures blended in Adobe Camera Raw, some clean up in Photoshop, then a filter from Topaz Studio.

This is the interior of a Caboose, taken from the door.

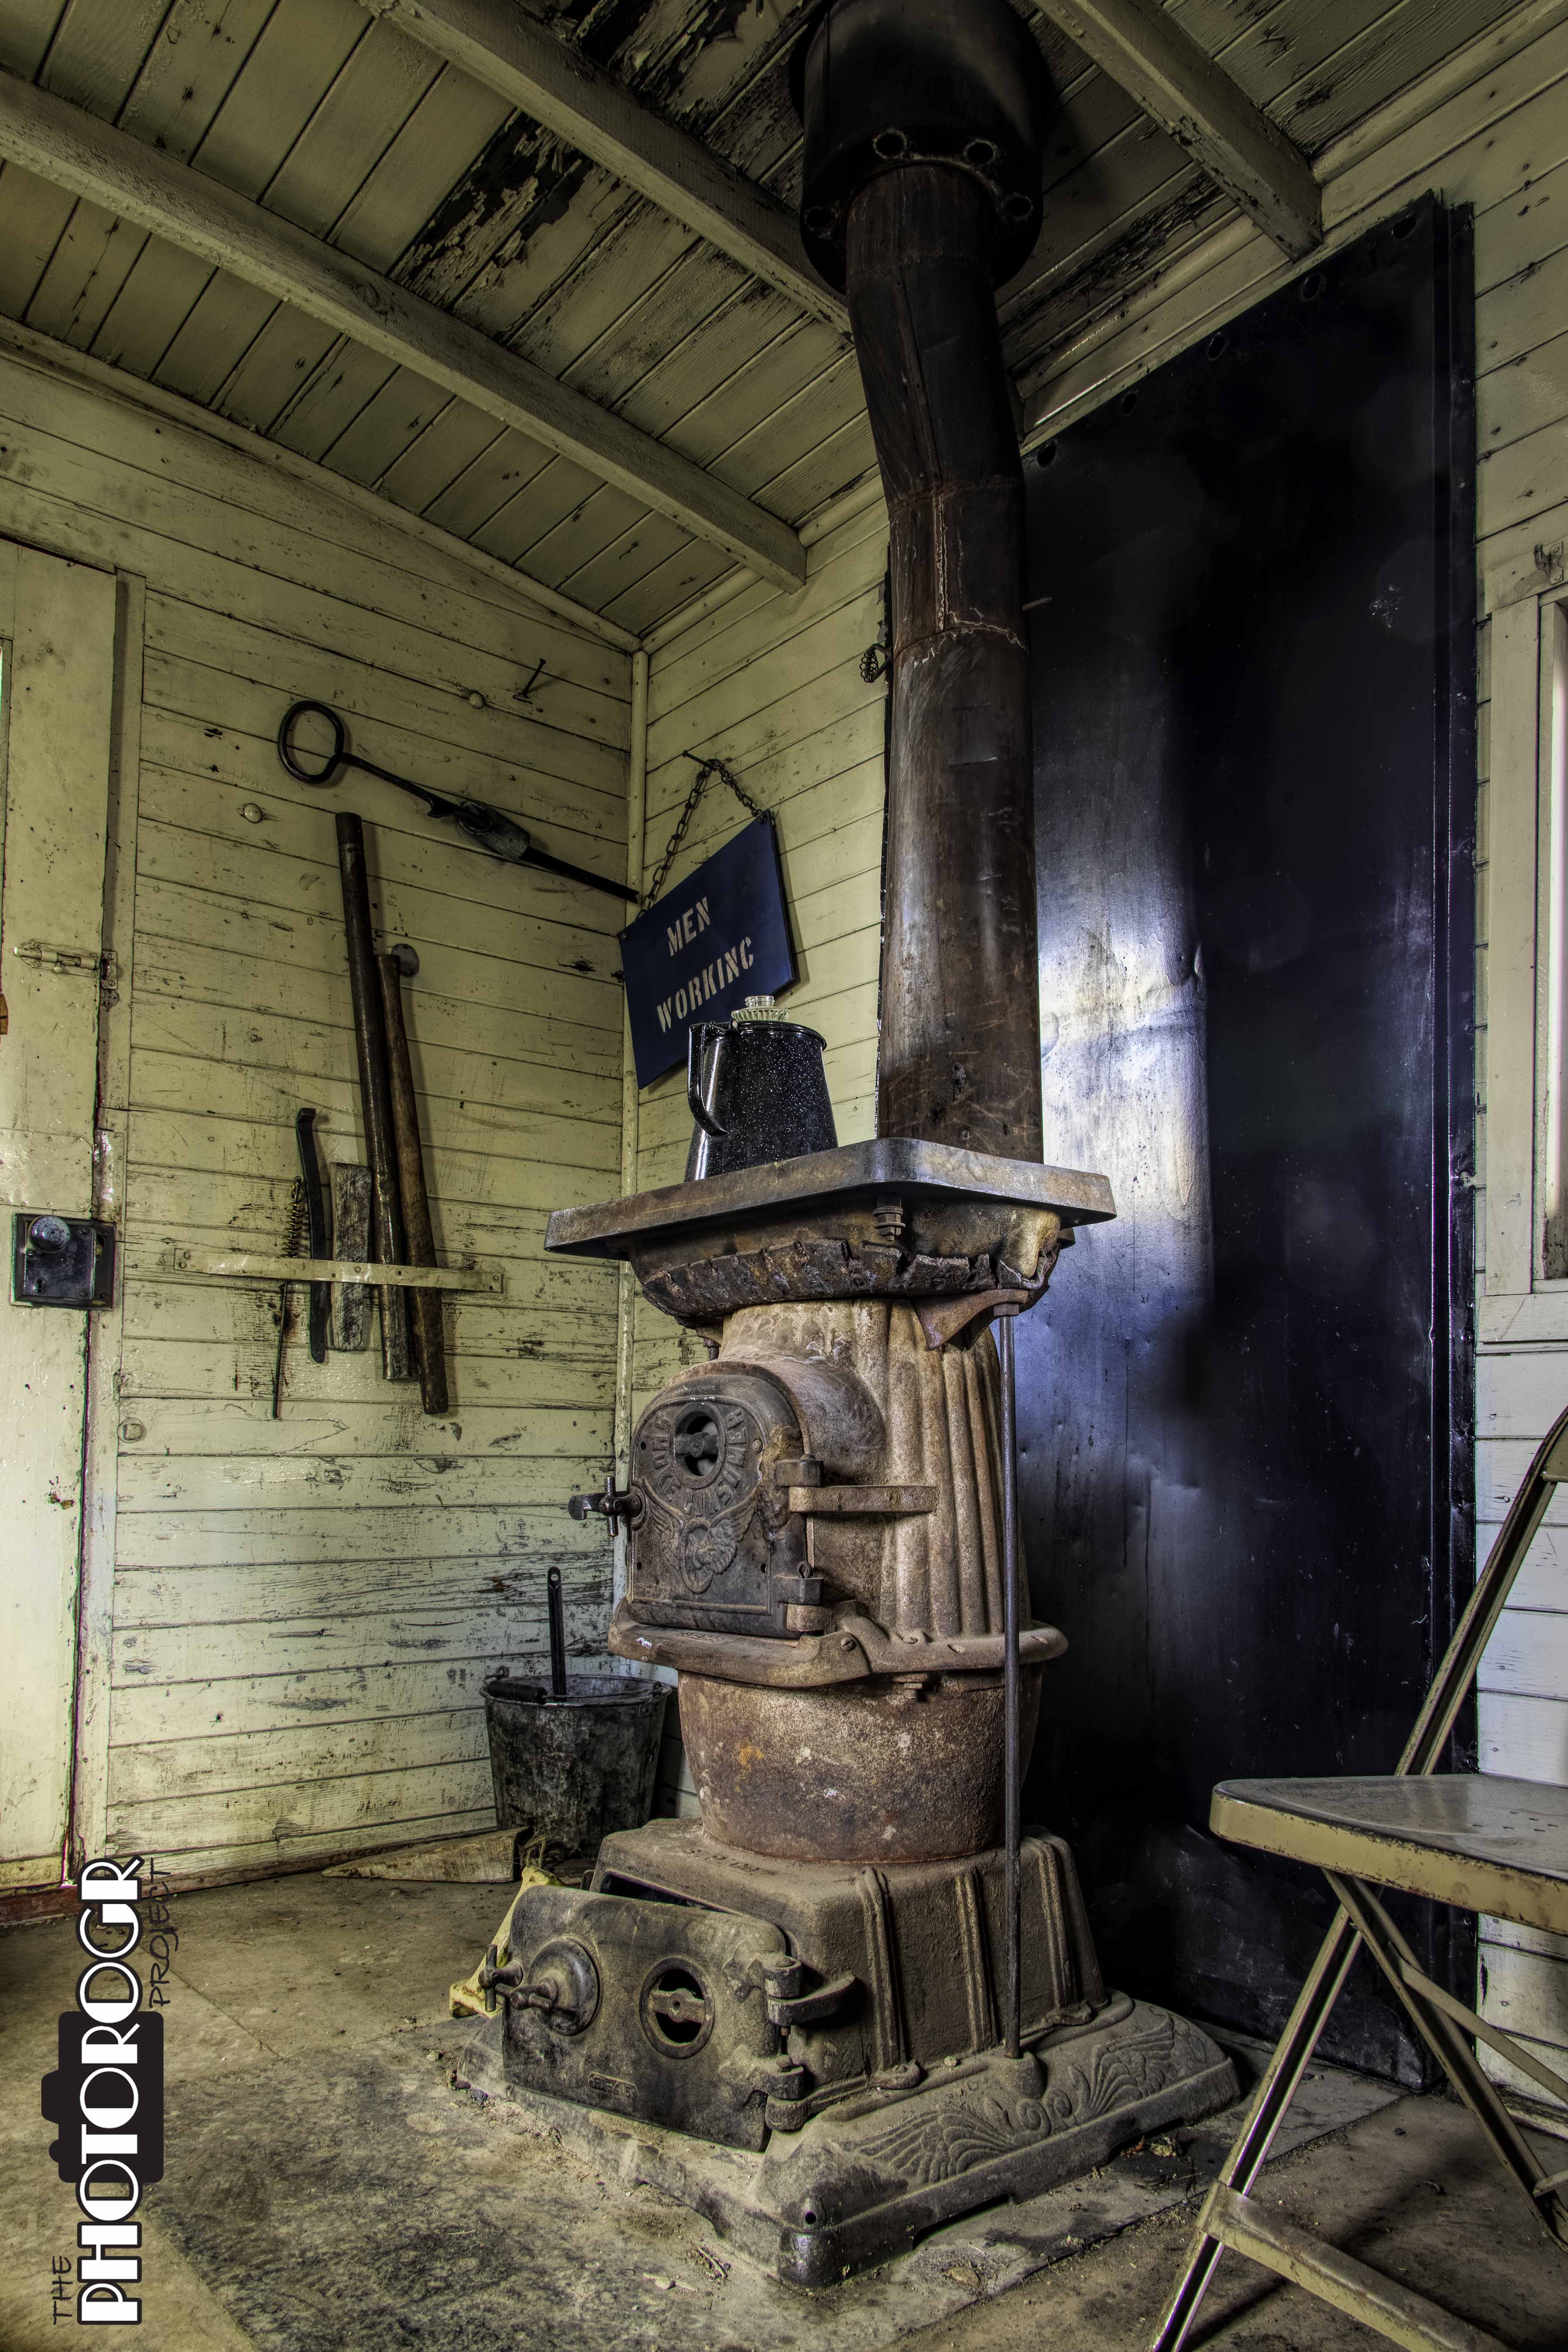
This is the scene when you walk through the cupola and into the back of the Caboose from the previous image. I paused before taking the picture…thinking about the men who spent their working lives in this space. Do you think they had to sneak a little coal from the Tender to keep the Caboose warm?

After the morning in the Yard, we returned to the Depot for some lunch and the lighting class. Then we headed back into the Yard to finish the day.

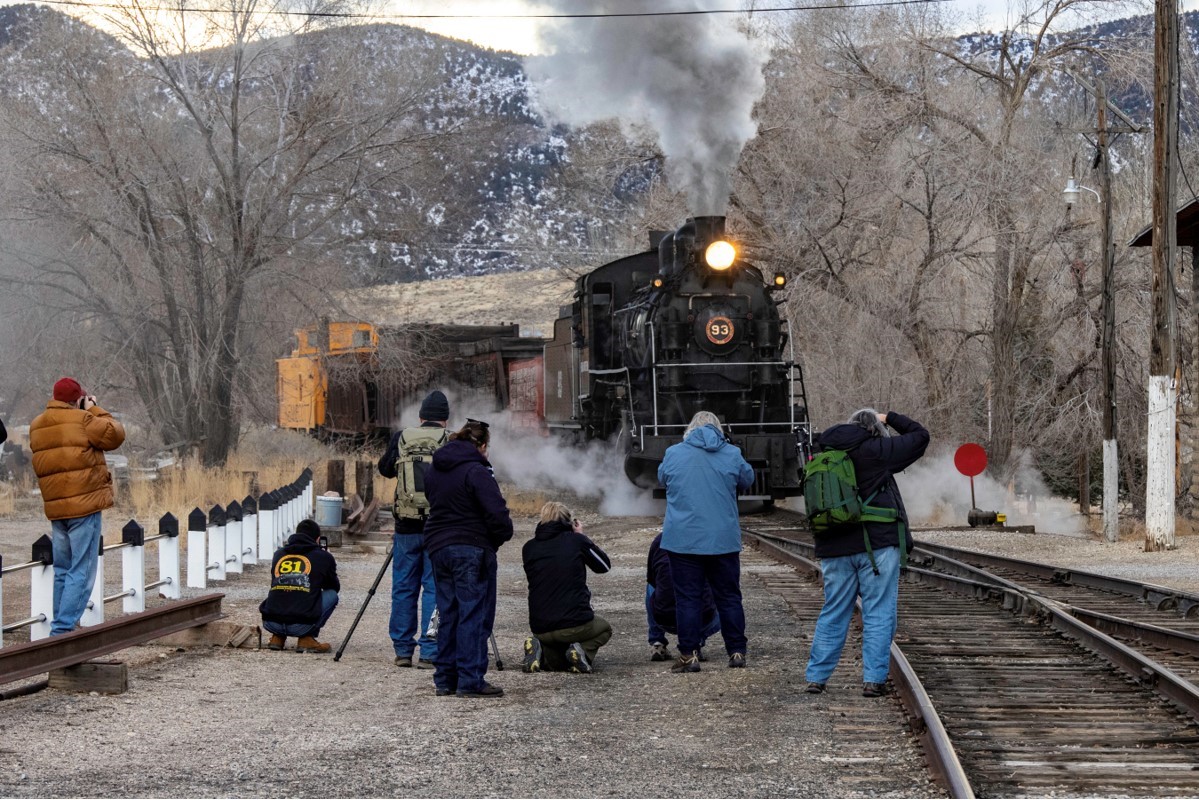
This is the Photo Line. And this one was easy because of the low number of photographers.

We’re all going for shots like this…

…and this!

Keep your eyes open and camera ready. Every now and then you turn and see something like this.

As the light began to fade, we set up in the Freight Depot and the 93 made several runs by us. Shutter speed is key here, depending on what you want your image to show. I used a fast shutter speed to freeze the action in this shot. I also made some shots with the 93 ‘blurring’ by.

That’s not everything from the day, but it’s a nice representation. Lots to see and lots of images to make. But wait ’til the next post – cuz the weather went bonkers on us!

Enjoy – PHOTOROGR

Ready for my Close Up, Mr. DeMille…

One of the reasons I love photography is that I never stop learning. Whether it’s a new technique or equipment or subject or even just a different way of seeing things, there’s always something to learn. Now that the Raptors have moved on to other places, my eye has turned to smaller and closer subjects – the pollenators and flowers in the back yard!

Over the years, my cameras and I have spent a lot of time in the yard and have enjoyed some success. Although Spring is still fairly new this year, I’ve had a good time so far. This is a Hyacinth, and it was the first flower to bloom in our yard. I put my Canon 6D Mk II with a 50 mm lens on a low tripod and got as close as the minimum focus distance would allow. I did not use focus stacking, but it may happen this year.

All images processed in Adobe Camera RAW and PhotoShop, with a Nik ColorEfex Pro filter.

I upgraded my mobile phone to an iPhone XS a couple months ago and I’m slowly exploring its photographic capabilities. With Spring so young, the Bees are working very hard and are tough to capture…but it can be done…even with an iPhone.

This flying critter was on our Peach tree – looking forward to those peaches!I also bought a new Super Telezoom lens this year and decided to see what it would do on close up shots. Mounted on my 6D Mk II body – a full frame sensor camera – and with a minimum focus distance of more than 8 feet, the Bees are very small so the following images are heavily cropped. The end result, however, is very nice.

This Bee is on one of our Chanticleer Pear trees.

Our Flowering Plum tree has been very popular with the Bees this year.

And so it begins. Spring has sprung and it’s time for some close up. I’m ready Mr. DeMille…

Enjoy – PHOTOROGR

Silhouettes as Fine Art…

Last month I shared some silhouette images with you – images I made during one of the classes I took at the Winter Wings Festival. I also took a class in wildlife as fine art which is the subject of today’s post.

I was out the other day and I found these two Geese floating in one of the irrigation ditches in the Carson Valley. Geese aren’t my favorite subject and the light wasn’t in my favor, but I decided to try something new using the techniques I learned in Klamath Falls and seeing if I could make some ‘fine art.’ I made several images using various exposures. Fortunately, the Geese were just floating along so they weren’t disappearing into the distance or making great ripples in the water.

When I downloaded the images and began processing, I tried several different ideas – color versus monochrome, variations in contrast and color, and a variety of filters. I ultimately chose this single color image, processing the dark areas into silhouettes to accentuate the position of the Geese on the water and in the frame using Adobe Camera RAW, and then finishing in Photoshop and Topaz Studio.

I hope you like it. Enjoy – PHOTOROGR

Double D and PSC…interpretations on the Sierra Nevada Range!

In my last post, I talked about the Digital Darkroom (or Double D) and the fun I was having while exploring the application of creative filters. For today’s post, I used an image made with my PowerShot G9X Mk II point and shoot camera (hence the PS Challenge piece of the title).

I don’t remember where I was going last week, but I remember that the light on the Sierra Nevadas was gorgeous. I pulled over and got out of the truck, grabbing my trusty PowerShot, and began clicking. I always bracket exposures for my landscape shots to decide during post processing what I am going to do. I bracket up and down one stop with this camera. I used all 3 exposures to merge them into an HDR in Adobe Camera Raw, then applied filters using Topaz Studio.

Just for fun, I processed this using three different filters.

Enjoy – PHOTOROGR


It’s Still August – More Backyard Challenge!

The days are getting shorter and the nights cooler, but the wildfires in California are still wreaking havoc on the views and the air quality. My lovely bride’s efforts in the backyard are paying great dividends for me, however – take a look!

This is a Julia Child Rose.

It’s beautiful from all angles. My lovely bride planted this on while I was away this last Spring.

These were the last Blackberries in our yard. We had a decent crop this year – very tasty at breakfast.

I love our Hibiscus and it’s a favorite subject when blooming. I saw this bloom with a portion backlit by the morning sun and the lower portion of the bloom in shadow. I made bracketed exposures, merged them in Adobe Camera Raw, and applied a custom filter in Nik Color Efex Pro. I wanted to emphasize the texture in the leaves, so I combined a little Glamour Glow with the Detail Extractor to make it happen!

Enjoy – PHOTOROGR

PS Challenge – September 7, 2017

Round Top, above Winnemmucca Lake as seen from near Frog Lake, on the trail from Carson Pass.

I shot this image using bracketed exposure, merged in Adobe Camera Raw, processed further in PhotoShop with a filter from On1 Photo RAW.

Enjoy – PHOTOROGR

PS Challenge – August 27, 2017

I’m slowly working my way through my images from Yosemite National Park. I tackled some of the images from our trip on the Tioga Pass Road, crossing the Tuolumne Meadows, last Saturday. There weren’t as many people in that part of the Park compared to the Yosemite Valley, but the road had plenty of traffic and parking was a bit of a challenge. The smoke was much less, too.

This image is Lembert Dome, and I made the image looking northeast in the early afternoon. I blended the zero exposure and underexposed RAW format images in Adobe Camera Raw to bring out the sky, and applied a filter in Nik ColorEfex.

Enjoy – PHOTOROGR

PS Challenge – August 7, 2017

Today’s PS Challenge image comes from the Kinney Reservoir, taken a couple weeks ago on my adventure up CA 4 to Ebbett’s Pass.

As usual, I bracketed exposures, merged and toned in Adobe Camera Raw, then edited in PhotoShop with a Nik Color Efex filter. The image was made mid-day, just after lunch.

Enjoy – PHOTOROGR

PS Challenge – August 3, 2017

Today’s PS Challenge image is a close up of some Phlox blooms, from our back yard. I bracketed exposures but only used the under and normal exposures. I merged them in Adobe Camera Raw, cropped in PhotoShop, applied a Nik filter, and finished the image with a little more sharpening in PhotoShop. Please note, this is natural lighting – no flash used.

Enjoy – PHOTOROGR