Sharpening continued…and other fun stuff!

In my last post, I introduced the sharpening process and described my first footsteps into its intricacies (yes, I had to look this one up to make sure).  The study is going well, but there’s an amazing amount of information to digest.  I am surprised by the number of tools available.  Unsharp Mask, for example, has its roots in film photography, where wet-darkroom magicians would use a duplicate negative to create a mask to increase the apparent sharpness of a photographic print by increasing contrast along edges.  From the descriptions I read, it was quite a process.  Other digital sharpening tools in Photoshop include Smart Sharpen and Shake Reduction.  Of course, the flip side of digital sharpening is the introduction of digital noise.  (Noise is the grainy appearance of a photograph, and is beyond the scope of this blog, so we’ll save it for another day.)  Lightroom and Camera Raw’s sharpening and noise reduction tools work the same way – very easy to use, and the Nik filters have Define (for noise reduction) and Sharpener (for sharpening).  My head is swimming.

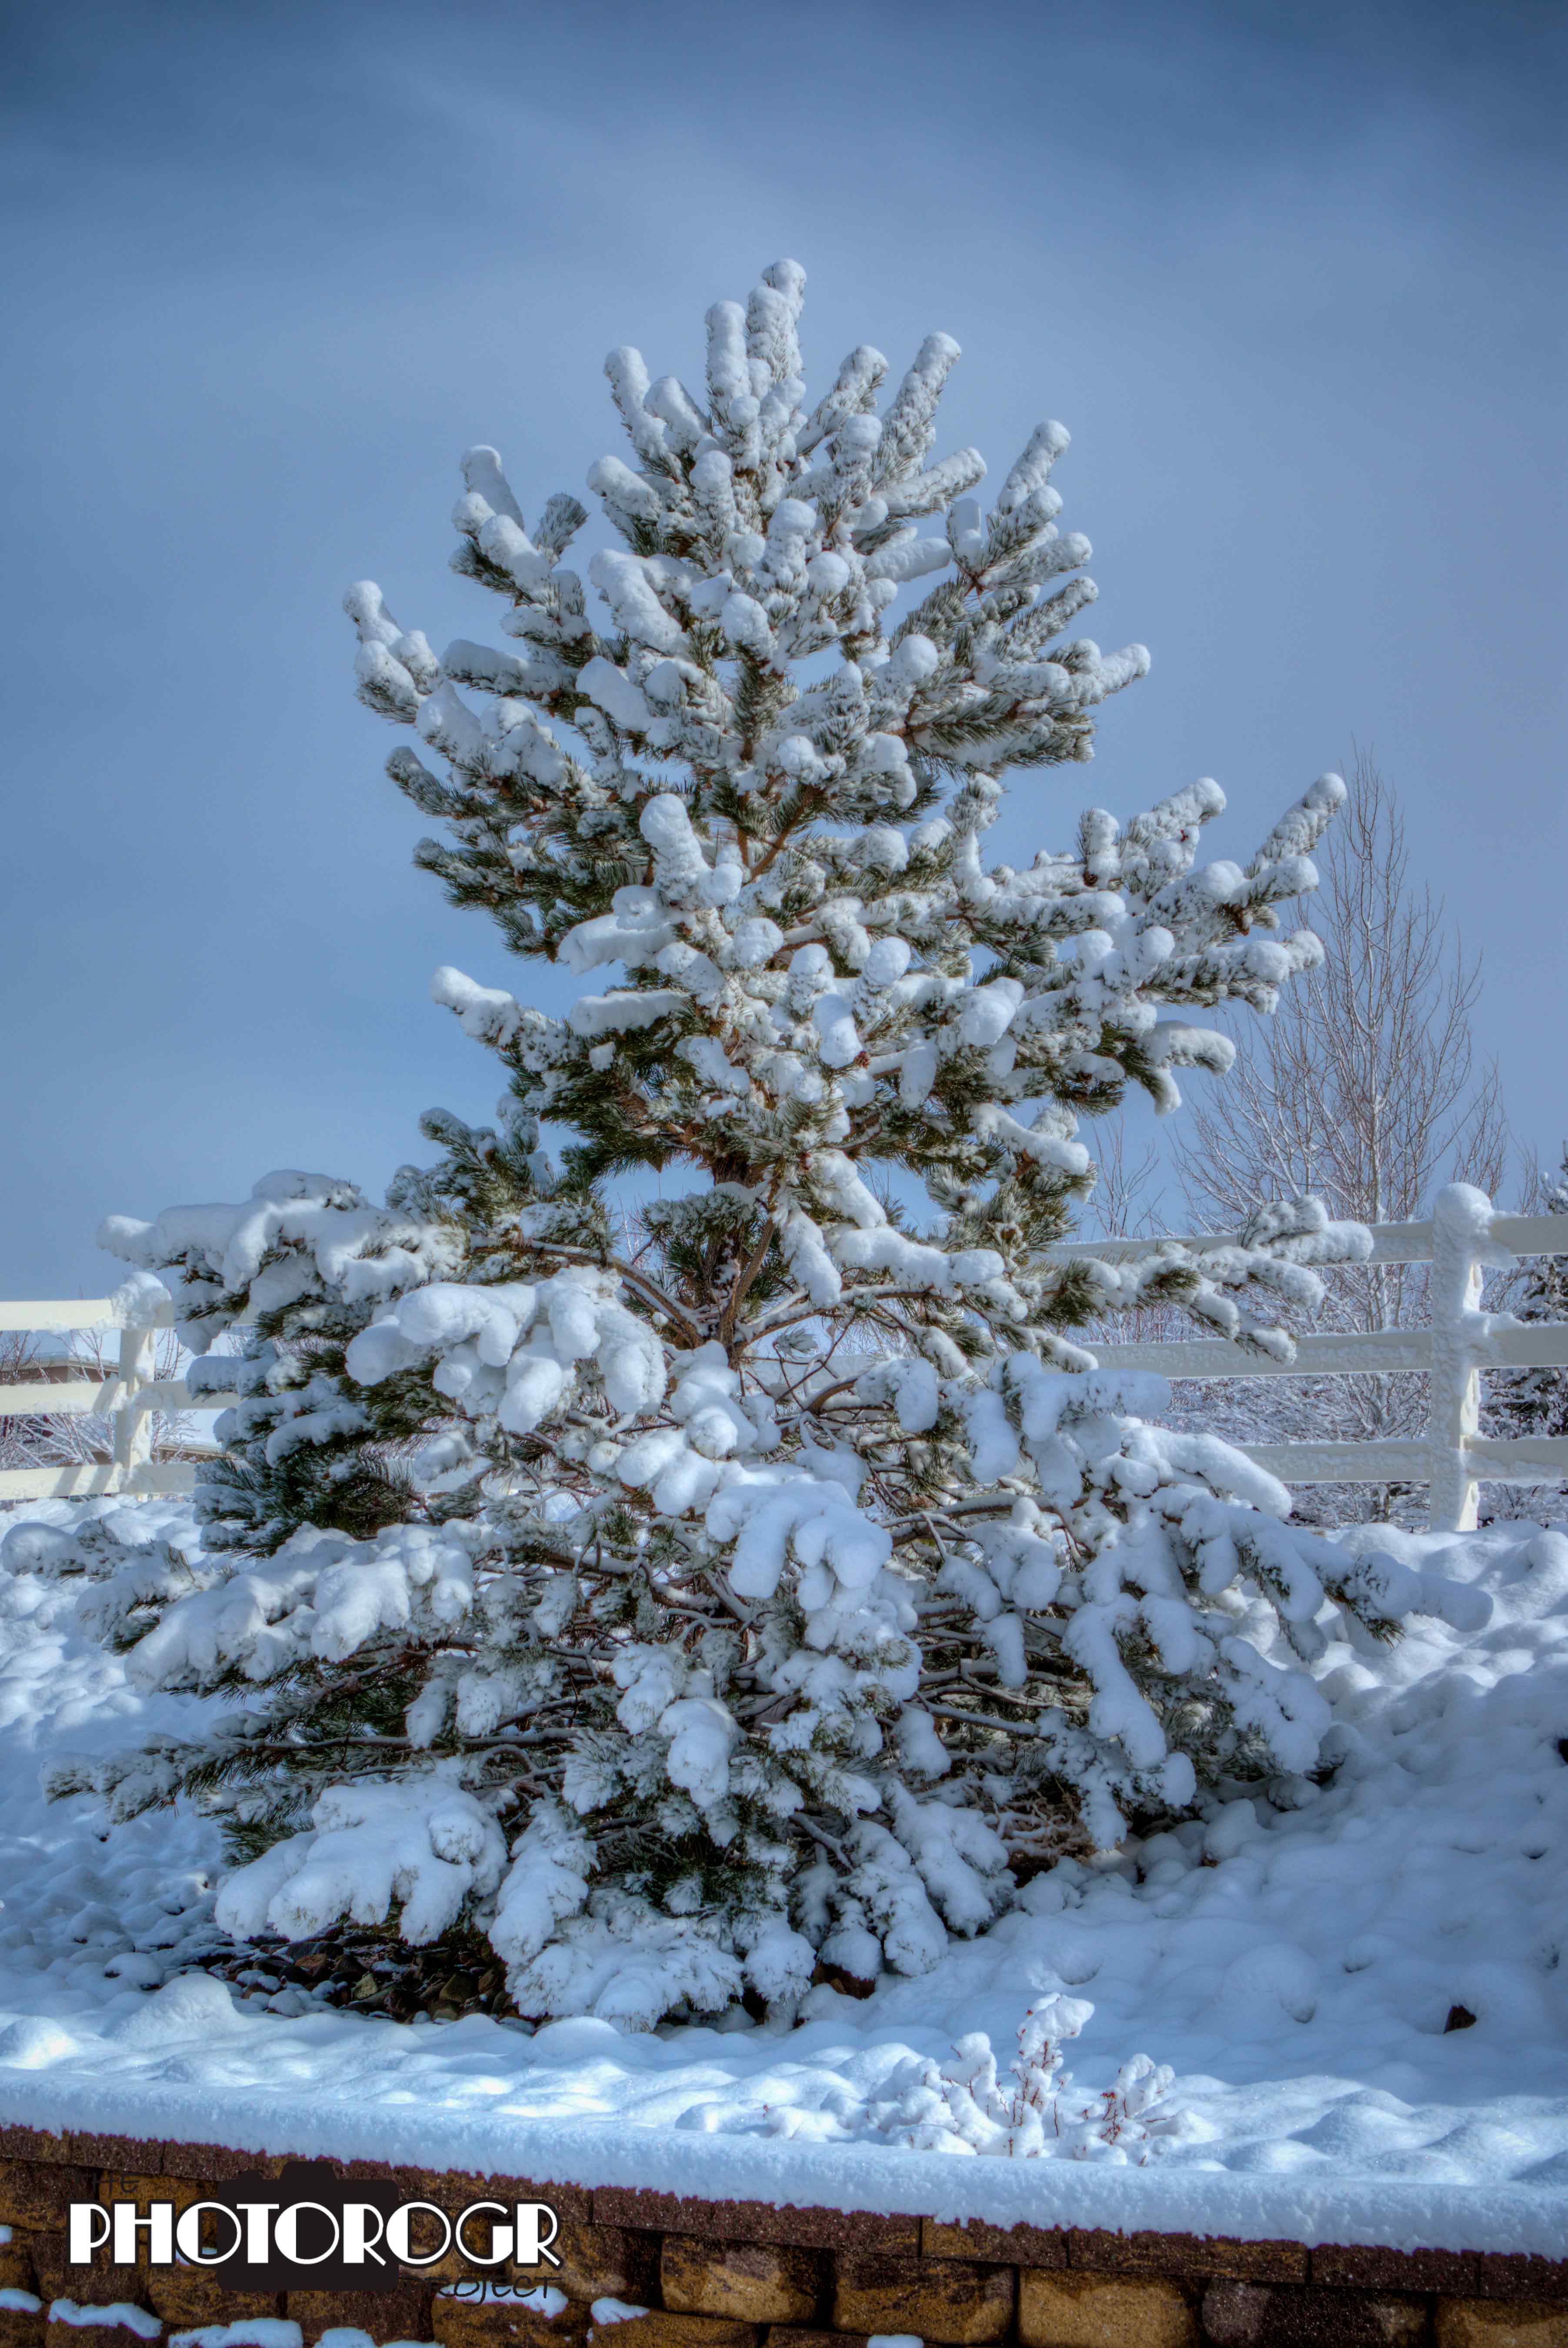
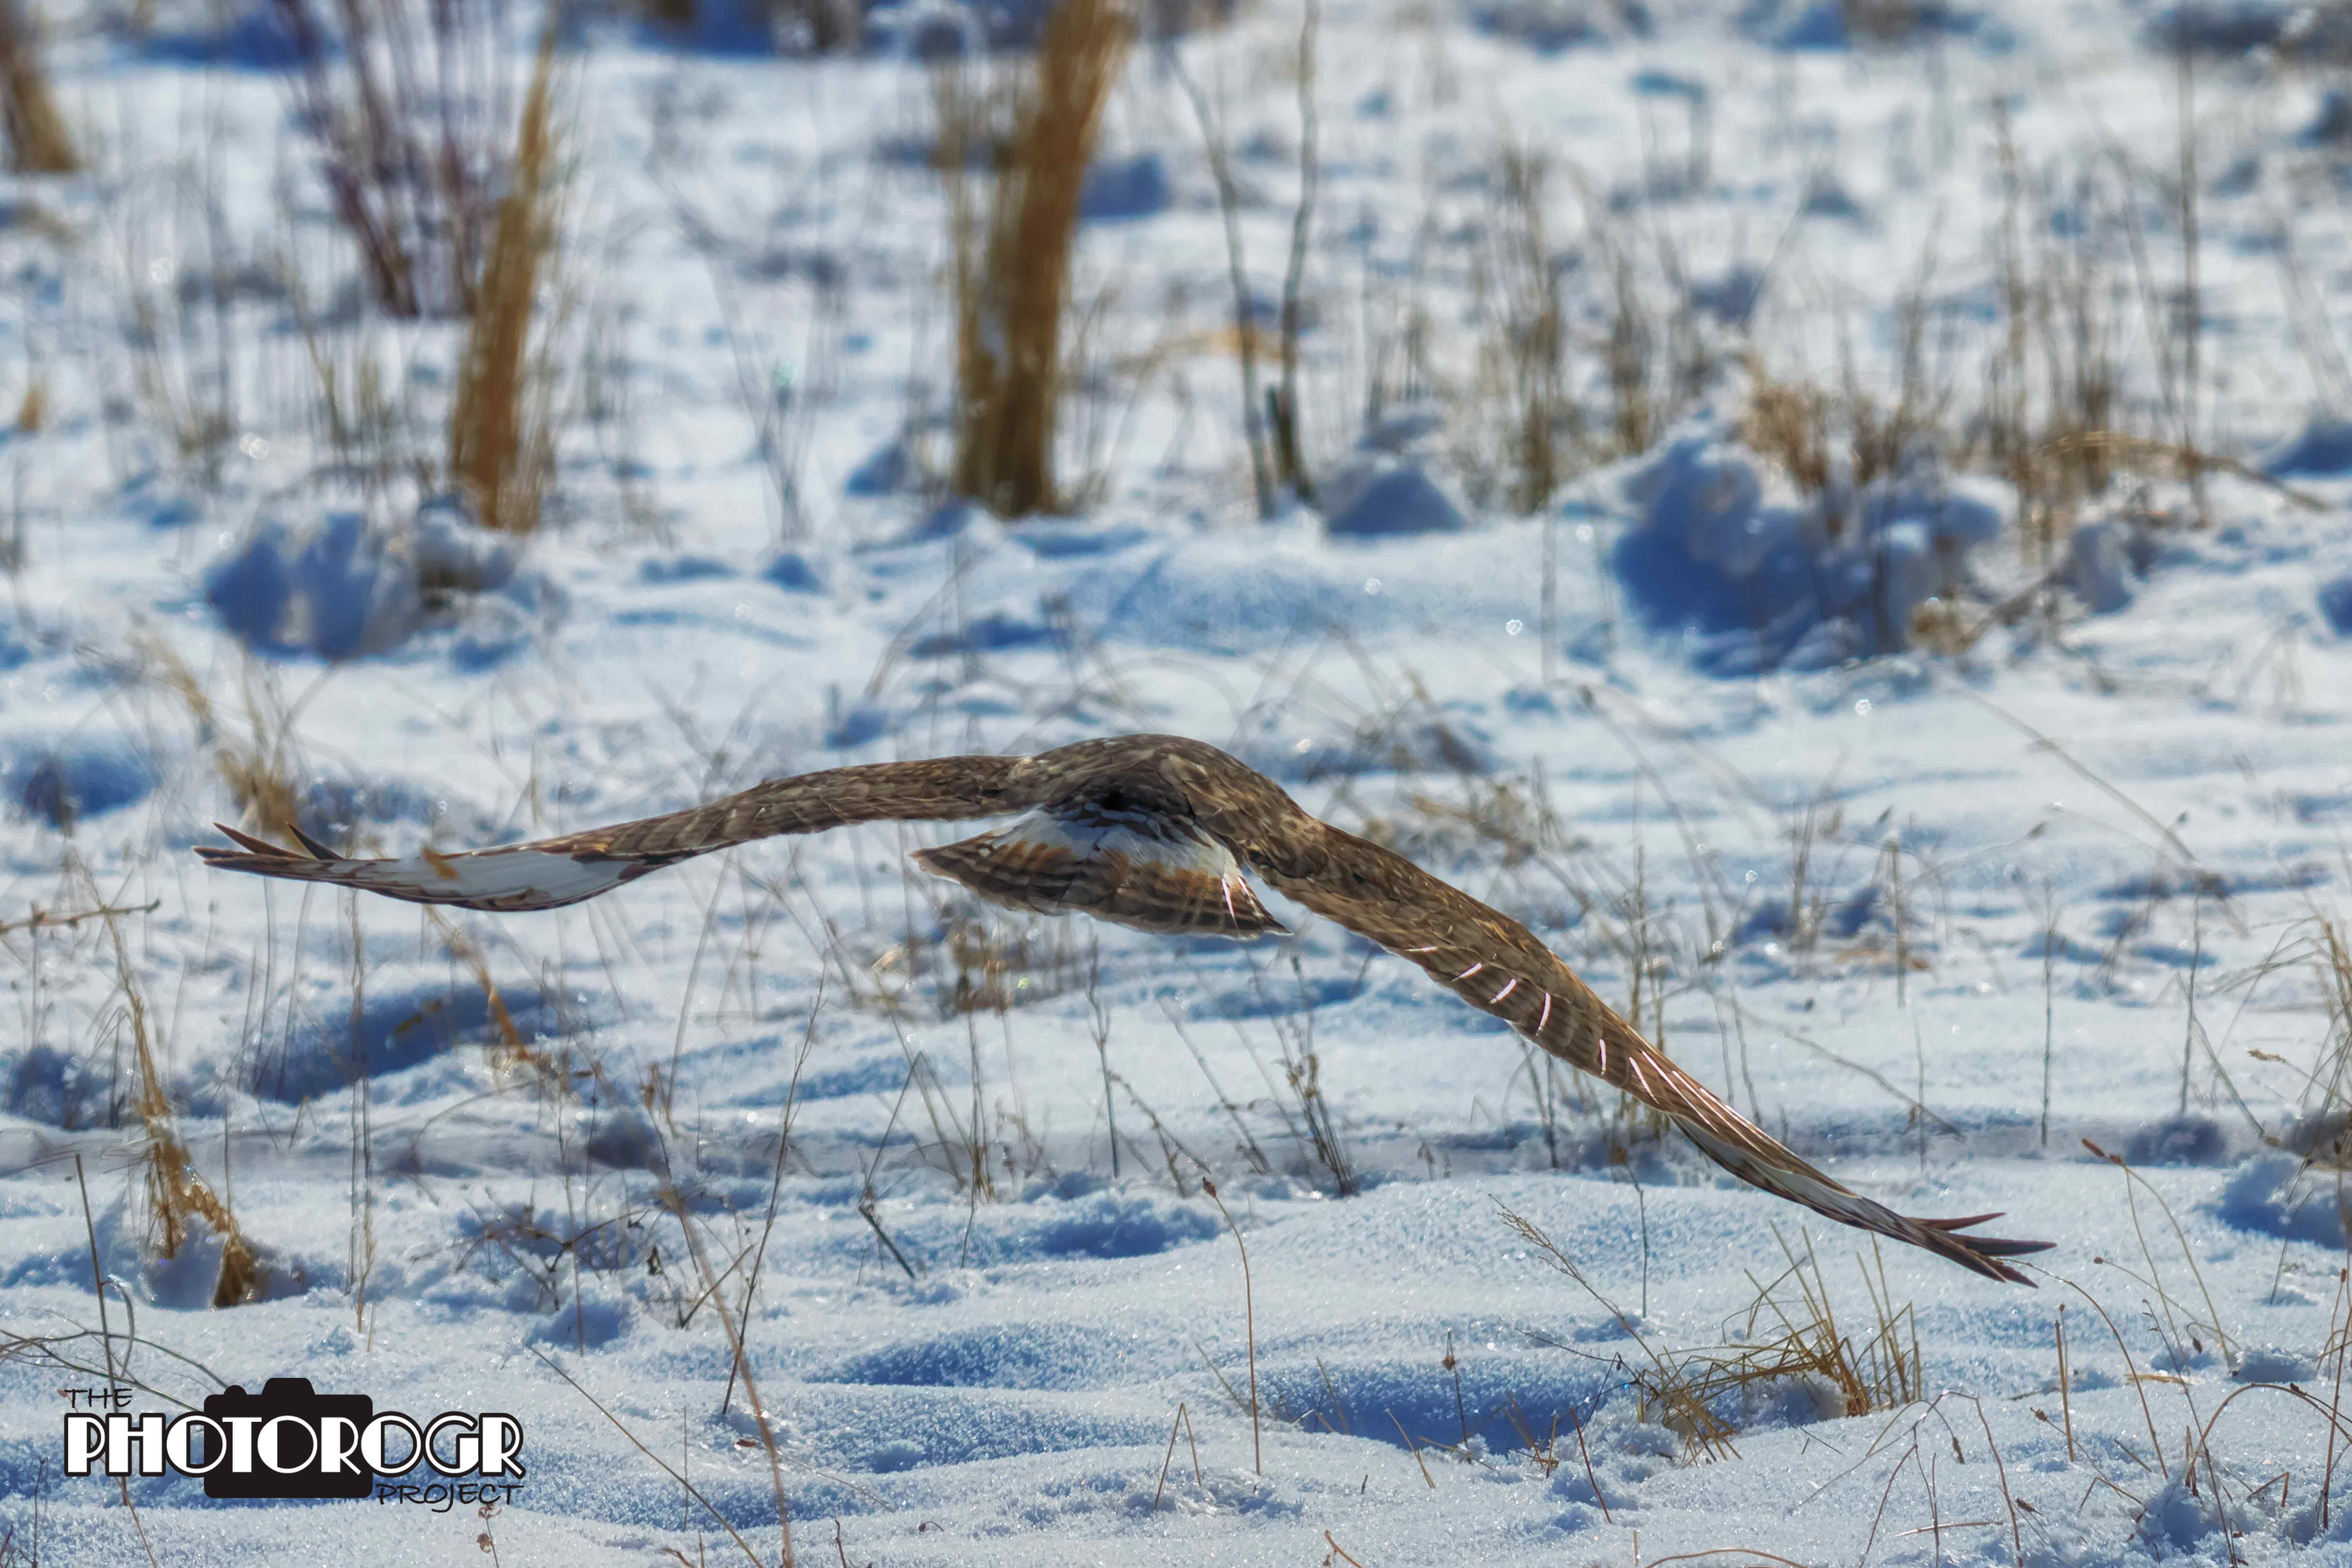
In a feeble attempt to keep myself somewhat sane (those who know me will attest that it’s as good as we can expect) while I’m learning sharpening, I’m still out there looking for great subjects and trying new techniques.  Here’s a few pictures from the last couple weeks.

blnd0053-5-txt0253-w

Okay, this isn’t really a new technique for me, but it’s fun and worthy of continued exploration. For this image, I overlaid a picture of the Ward Charcoal Ovens onto a picture of a wood floor (beautiful texture). I’m looking for a little constructive critique (CC), please!

rogr7170-a-z-w

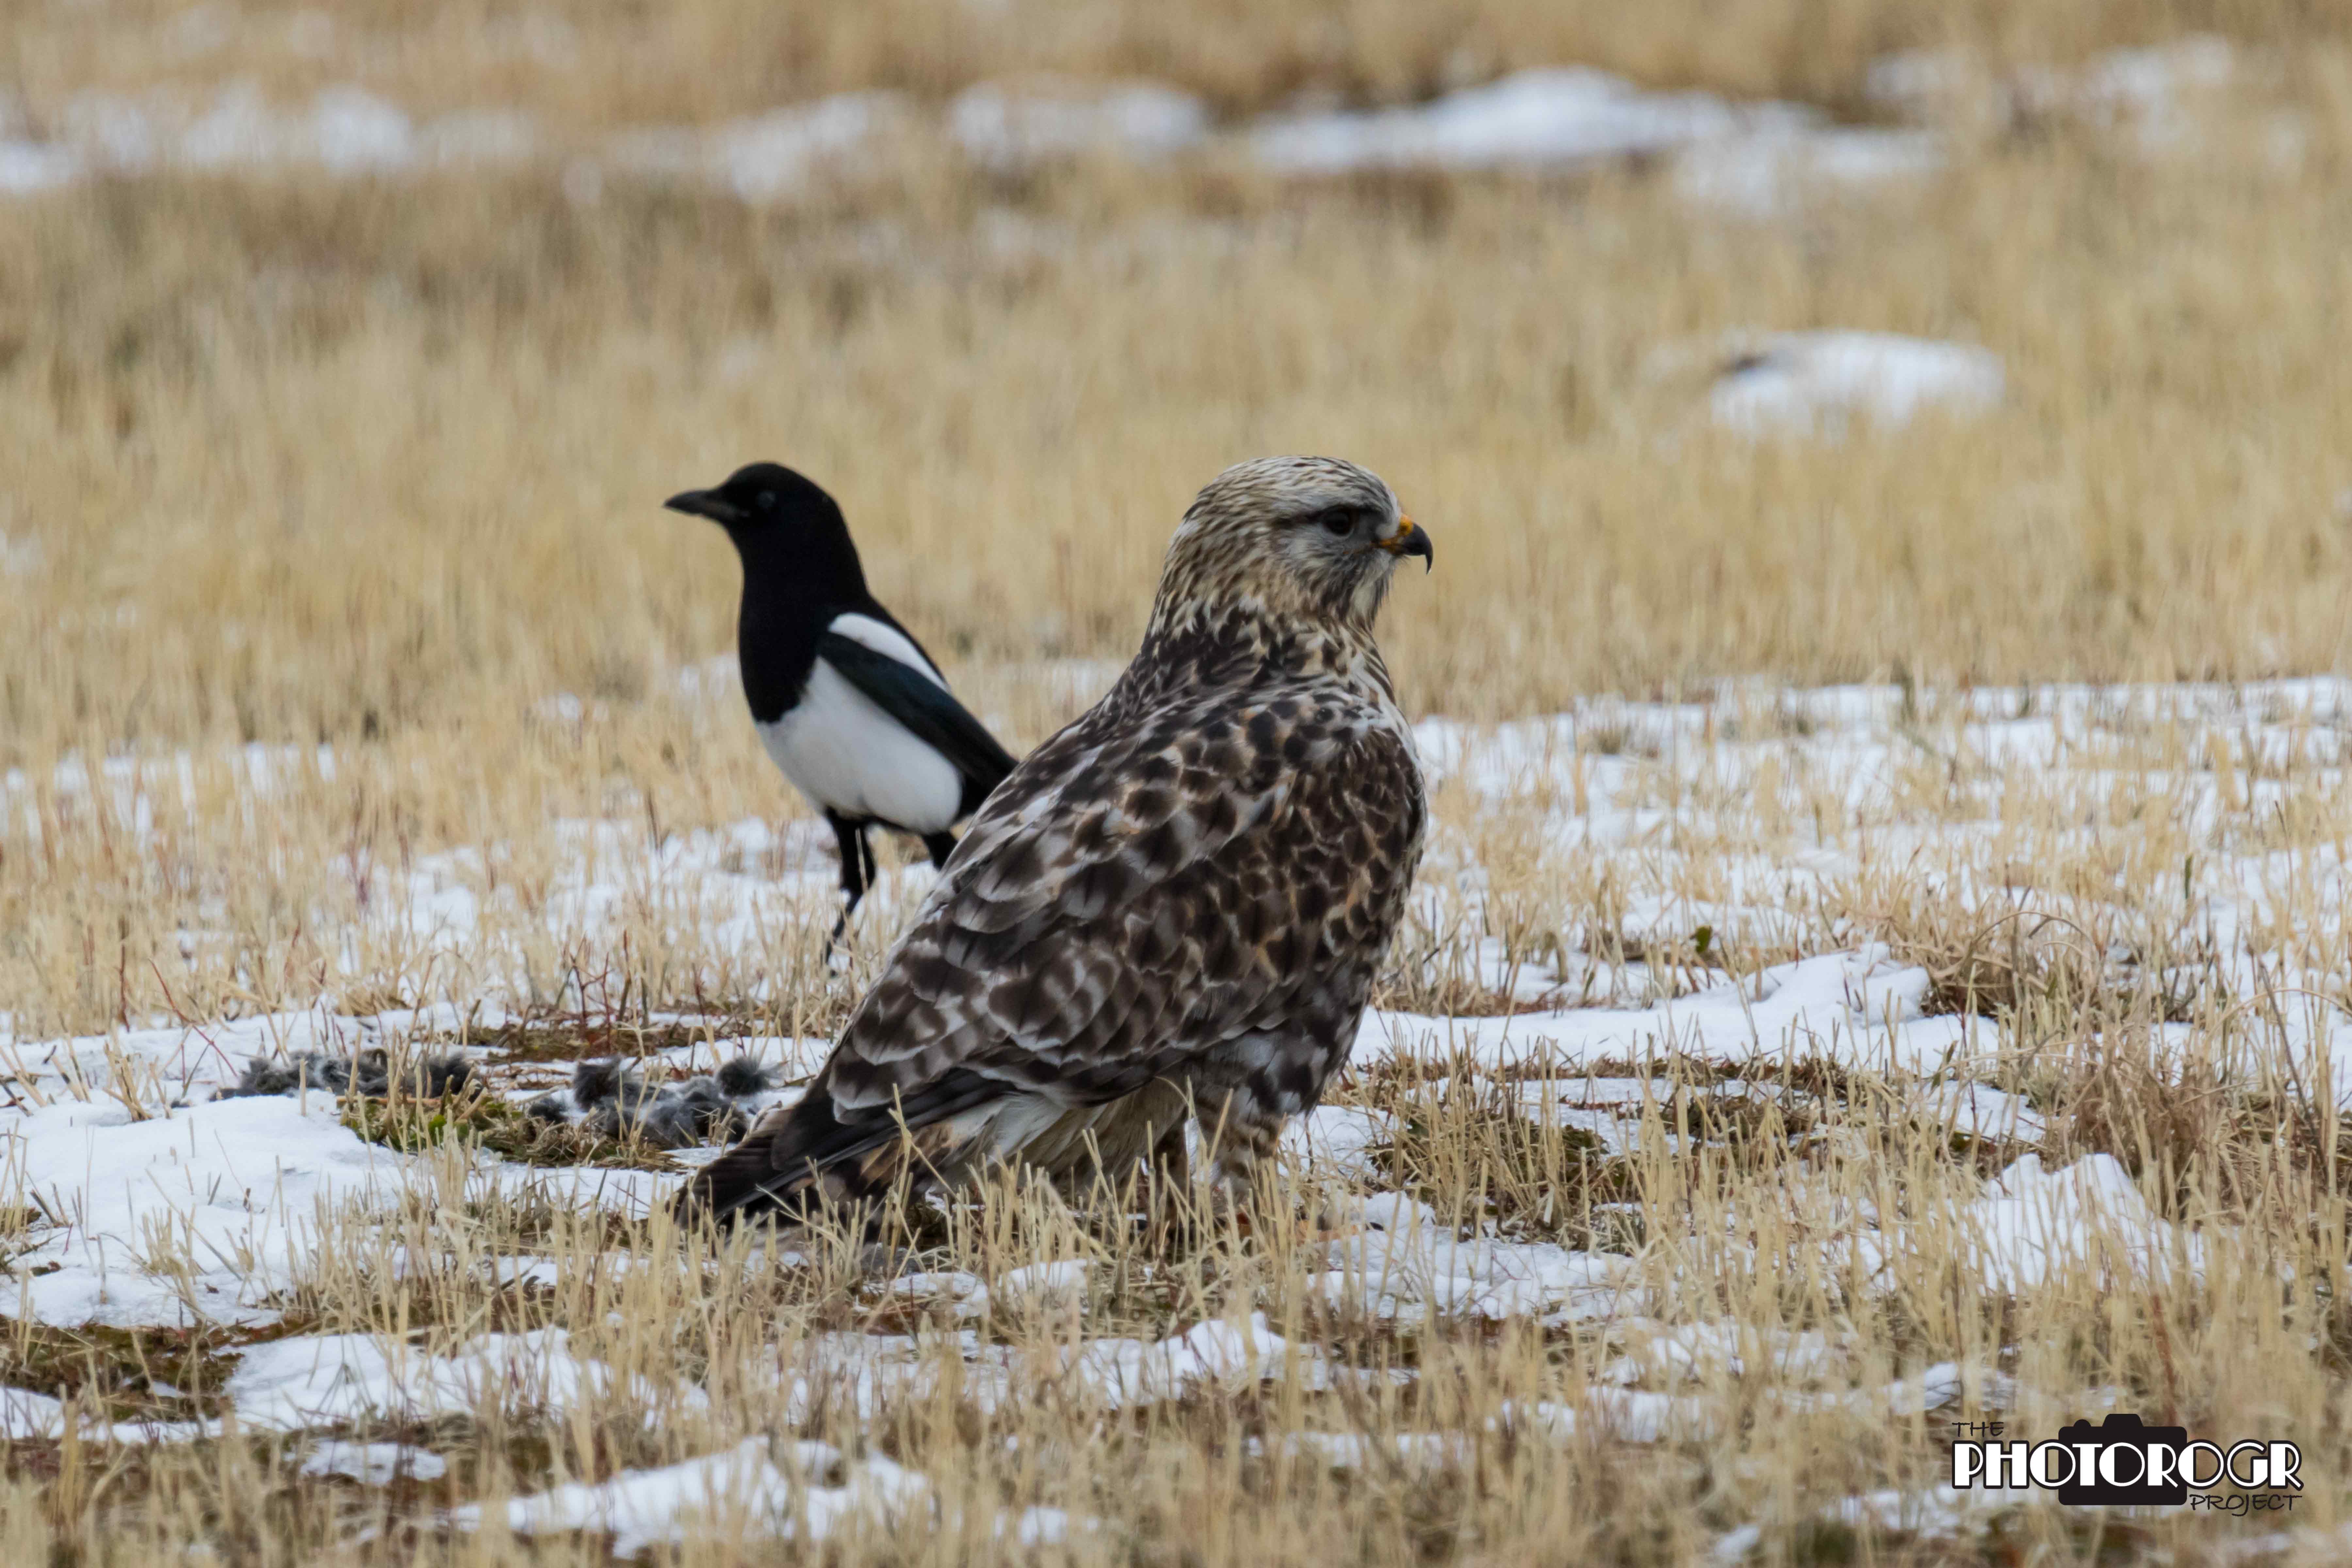
This is a Merlin, and it’s the latest capture in my quest for new raptor species. (Recall that I also got a Northern Harrier and a Rough Legged Hawk this year.) Merlins are in the Falcon family, and only get to about 12″ tall with a 25″ wingspan – just a little bigger than a Kestrel. This little one was in a tree in my neighbor’s yard and, uncharacteristically, sat for me for several minutes.

rogr7438-e1-w

My lovely bride was with me the other day and she is an excellent spotter. She saw this Great Horned Owl in a tree as we drove by. Some of my friends thought it was a Long Eared Owl, but my resident expert on bird identification confirmed Great Horned (thanks Larry!).

rogr7415-e1-w

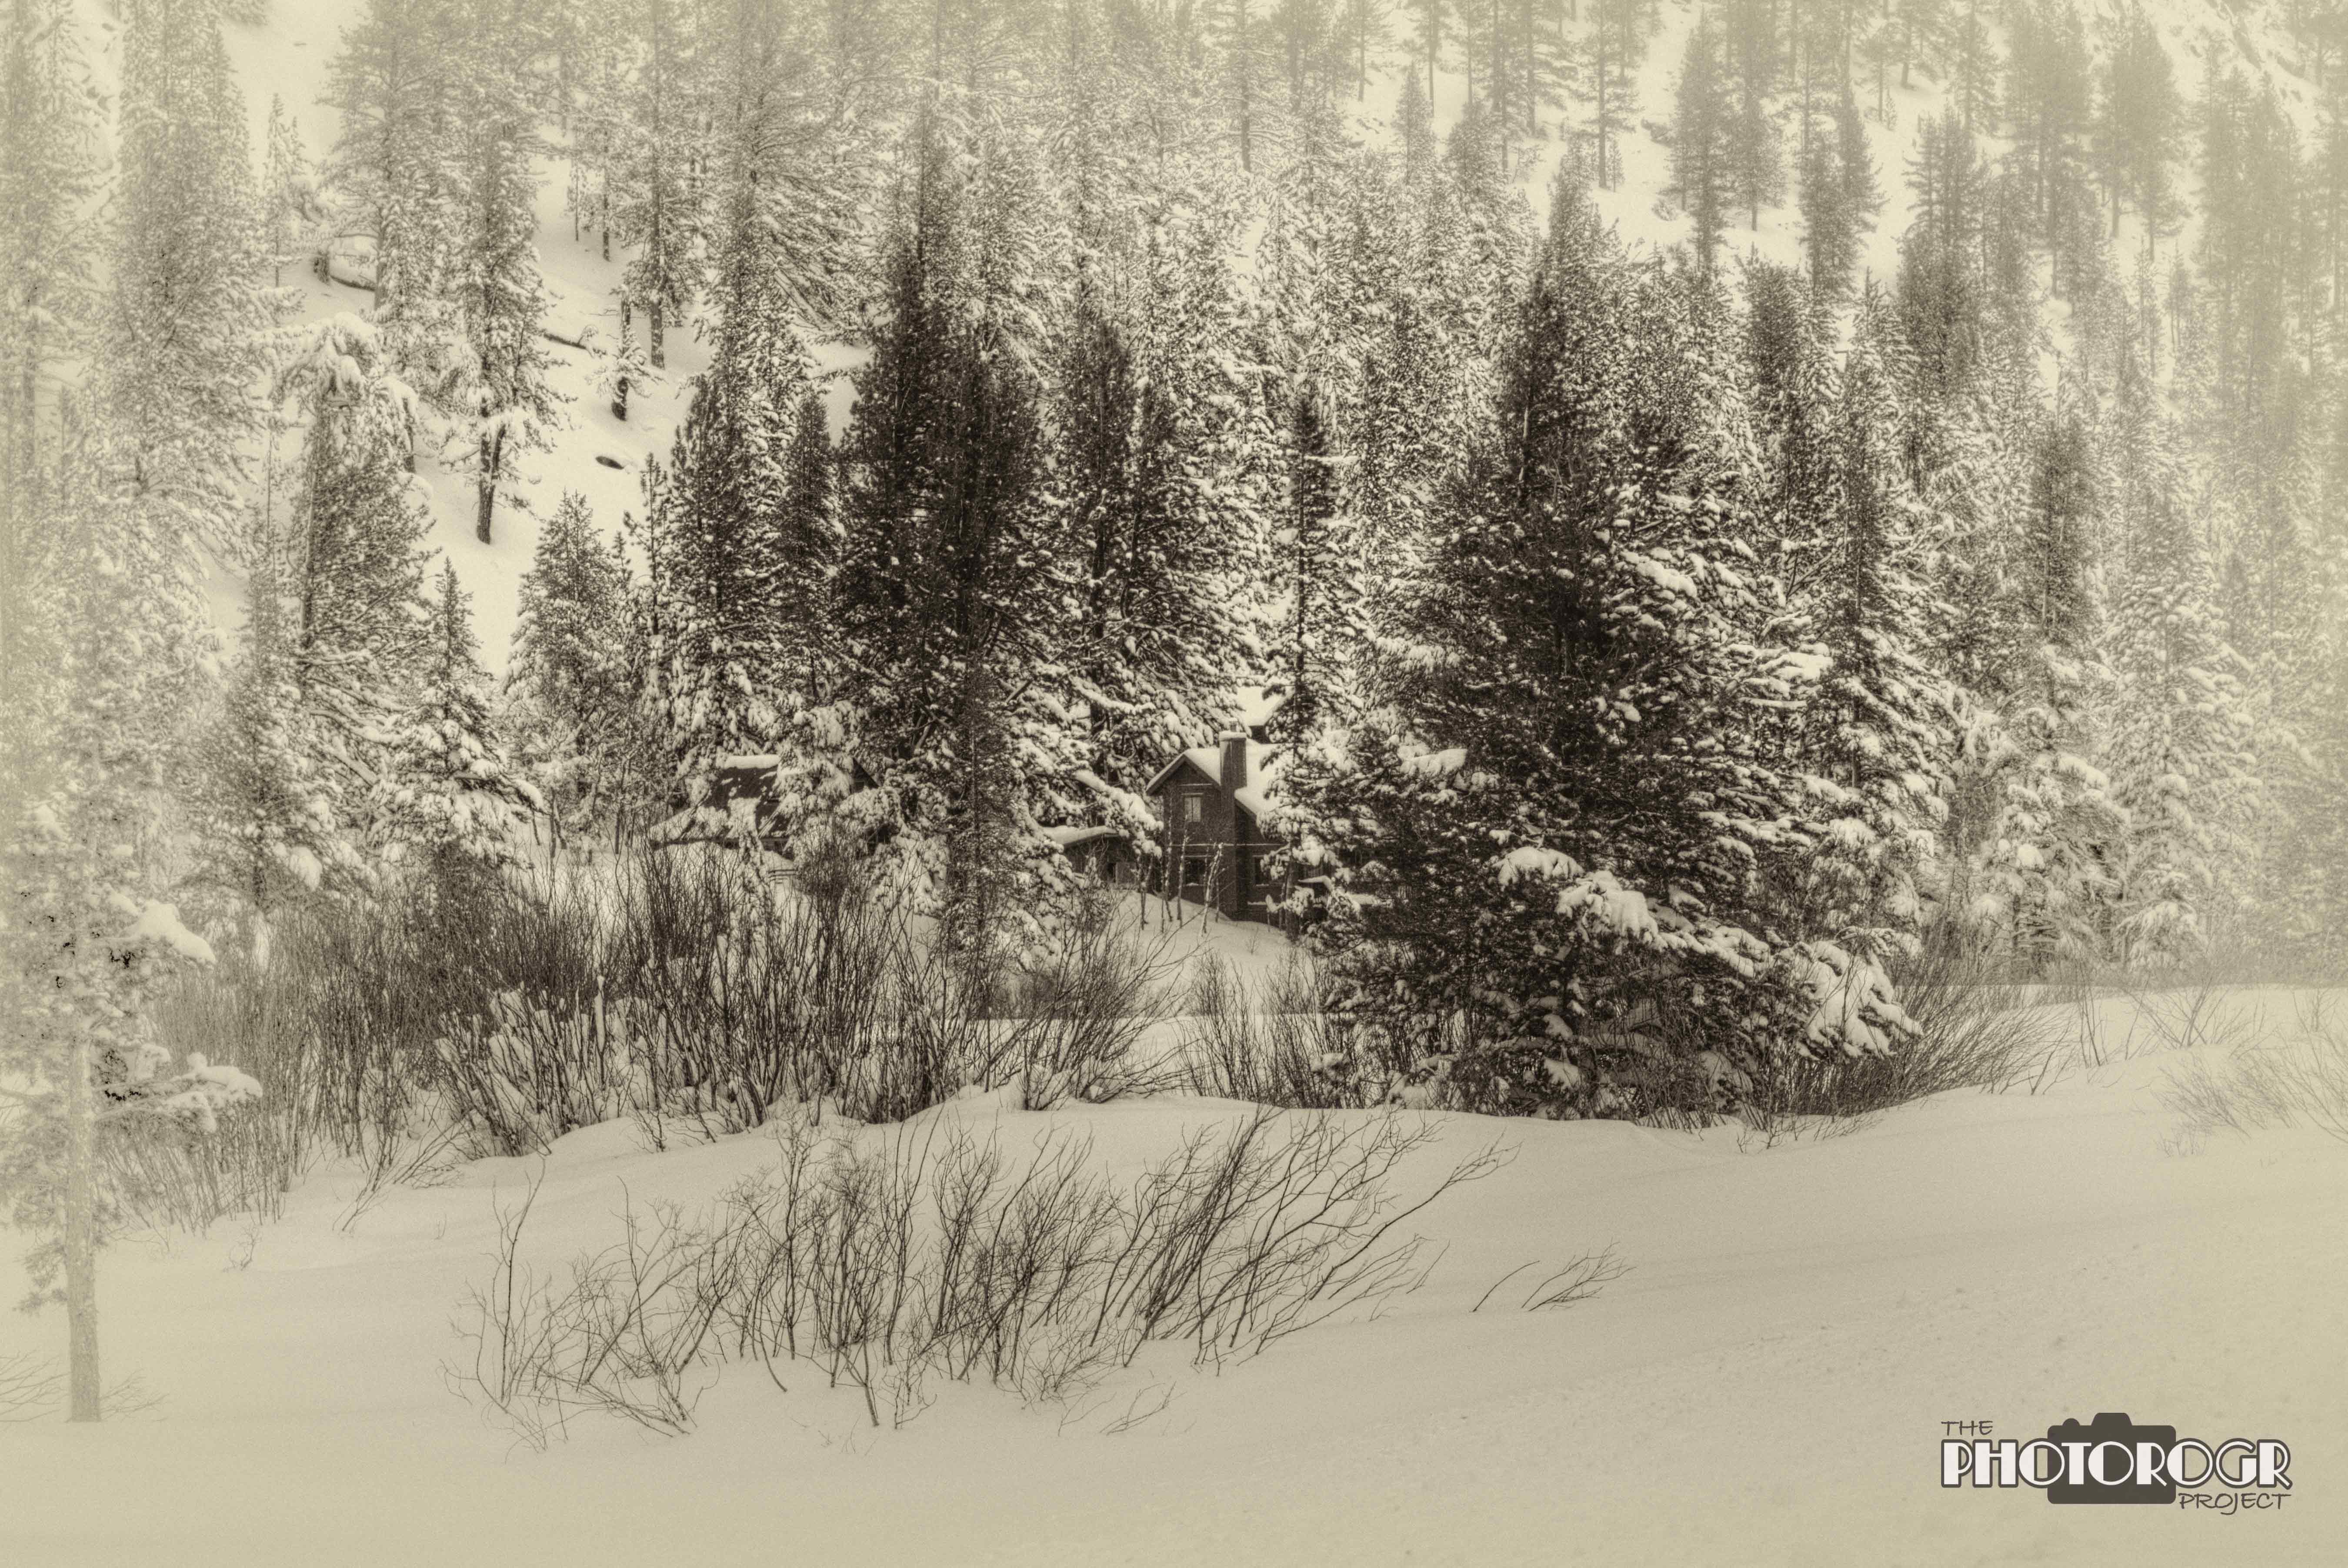
Because I like to explore with different filters during processing, I used a vintage colors filter in Nik Silver Efex for this interpretation. This filter is one of my favorites

fcstk7469-77-e1-w

Okay, this is a new technique called focus stacking. I mounted the camera on a tripod and locked it down. I took 5 images of these crabapples on a tree in our backyard, each image using a different focal plane (focusing at different levels) and blended them in Photoshop to create this image with all the crabapples in focus. I’ll refine my focus stacking workflow and use it on flowers this summer!

rogr7463-e1-w

While I was making images for focus stacking, I made this image of an ‘about to drip’ from another crabapple tree in the backyard. When I downloaded these images to the computer, I noticed the inverted tree in pretty good focus. I tried to get closer, but I would have bumped the tree and dislodged the drip. I’ll take it for now, but will look for other drips to shoot.  Aren’t optics fun?

Well, that’s it for this blog.  Stay tuned for more info on sharpening, focus stacking, and macro.  Until next time – enjoy!

PHOTOROGR

Breaking in a new kind of whet stone…

I can hardly believe that it’s already the first day in February!  Tomorrow, the Groundhog comes out and we’ll see just how much longer we’re going to have winter – at least according to folklore.  I’m betting we’re going to have more winter, partially because a big storm is coming into the Carson Valley tonight!  Speaking of folklore, many of you have spent the last month trying to sustain the new year’s resolutions you made.  I didn’t make any, nor did I set any specific goals for my photography.  As I’ve continued my photographic journey, I’ve found that my best goal is to look for and be ready to pursue knowledge as I find new things.

In my last post, I announced that I was taking a winter photography course.  The snow was deep and our outdoor shooting time was shorter than expected.  The instructor was excellent – we shifted the program indoors to study light and shadow and photo processing techniques, which brings me to the ‘new kind of whet stone.’  Us old Boy Scouts remember that a whet stone is used to sharpen knives and axes.  In the digital photography world, we use software as a ‘whet stone’ to sharpen our images.  During the workshop, we spent quite a bit of time on sharpening.  The most important thing I learned was that I’ve been doing it all wrong, and badly to boot.  I now have a specific goal – become proficient in using software to sharpen my images!

In the book Real World Image Sharpening with Adobe Photoshop, Camera Raw, and Lightroom, authors Bruce Fraser and Jeff Schewe begin the discussion on sharpening with, “…one of the ways our brains try to make sense of the world as seen through our eyes is by breaking down the scene into edges (objects) and non-edges (surfaces). If the edges in an image appear too sharp or not sharp enough, our brains tell us that there’s something wrong, and in the case of a photograph, the image appears unconvincing.”  Bruce and Jeff tell us that, “Sharpening works by increasing the contrast around edges.”  (Contrast is the difference between light and dark tonal values.)  And so begins my journey into the wide world of sharpening!  Since I’m just beginning my venture into sharpening, I don’t have anything to show you.  I will soon – I promise.

What have I been doing besides reading about sharpening?  Let’s look at some pictures!

pmx6290-2_monochrome-e2-w

From the winter photography workshop – this is the view across the road from Sorensen’s Resort in Hope Valley CA. As I said, the snow was deep. Sorensen’s got a foot of new snow the night before the workshop and several inches while we were there. They were expecting another three feet that night!

pmx6290-2_monochrome-e1-1-w

Same picture, just a little bit different editing technique. Could be a nice Christmas card!

rogr5932-e1-w

I ventured into Diamond Valley looking for Eagles and found this tree covered in Pogonip (heavy frost). I made this image before the frost melted away.

pmx6383-5_crowne-winter-tree-e1b-z-w

A recent storm dropped several inches of snow at my house. This is a Spruce tree in my backyard…

pmx6368-70_crowne-winter-tree-e1-w

…one of the Austrian Pines…

pmx6365-7_crowne-winter-tree-e1-w

…and one of the clumped Crab Apple trees in my backyard. The apples help feed the little birds all winter long.

rogr6084-a-z-w

I found this Rough Legged Hawk near Genoa last week. As I was shooting, the Magpie flew into the shot.  How lucky for me!

rogr1608-e2-w

A couple days later, I found the Rough Legged Hawk again – this time on a fence post. He launched…

rogr6971-e1-w

…soared gracefully, close to the snow-covered ground…

rogr6979-e1-w

…and pounced on his noon meal!

rogr6922-a-z-w

The Kestrels have been out in force. I came on this little fella’ just south of David Walley’s Hot Springs on Foothill Road…

rogr6841-e1-w

…and his friend north of Genoa. They always give me a good look before they take off!

rogr6534-e1-w

This Cooper’s Hawk was sitting on the snow pile when I first saw him. He launched as I was taking pictures.

rogr5131-e1a-z-w

I added a new tool to my toolbox – a 2X teleconverter! My big lens now has a maximum focal length of 1200 mm! While this is wonderful, the longer focal length comes with a new set of challenges. Using a tripod is a must. Autofocus only works in Live View (not a bad thing on tripod anyway). The longer focal length exacerbates any movement or imperfections in focusing, and depth of field is very shallow at any aperture setting. It’s a tool, however, and only a matter of learning how to use it! This is the first image at 1200 mm. Not bad!

rogr6140-a-z-w

This is my second attempt with the teleconverter. This Eagle was 173 yards away (I bought a rangefinder) and the background looks like heat waves, although it was near freezing when I made the image. A little soft, but he looks good nonetheless.

rogr6404-e2-w

The Eagles have been in town. I seemed to find this one hanging out at the Dangberg Home Ranch Historic Park rather frequently.

rogr6419-e2-w

I think he’s in his final year of being a juvenile, based on the coloring in his head feathers.

rogr6597-e1-w

His ‘pensive’ pose…

rogr6893-e4-w

This is a different Bald Eagle (note the lack of dark feathers in his head), using his ‘regal’ pose!

One of the fun things for me was having one subject in the same spot on different days and different lighting conditions, then playing with the processing for a different interpretation of each image.  I hope you’ve enjoyed my images, and I promise to be sharper in the future!

Enjoy – PHOTOROGR

Shooting in snow! What a fun challenge!

Our collective attention has focused on the weather for the last week or so, as seemingly the entire nation has been under siege by cold and snow.  (One of my good friends ran off to Australia to escape.  Travel safe, Butch!)

Taking pictures in snow is very challenging.  I’m taking a winter/snow photography class next week so I’ll learn the mistakes I made in shooting for the last couple days, but I’ve had a great time this week and I look forward to learning something next week!

I’ve been out in the Carson Valley the last couple days.  The snow was falling both days – very evident in many of the images.  One of the challenges of shooting snow is preventing the snow from blowing out (or overexposing), making great white spots in the images with no recoverable detail.  One means of preventing this, I’ve read, is to overexpose the image by one stop.  (This is primarily done to maintain white balance in snow pictures.  Since I shoot exclusively in RAW format and assign white balance in the computer, this is not a factor for me.)  I tried this technique and feel that I had great success.

Let’s get to the pictures!

rogr1358-e1b-z-w

You’ve seen these horses before – they were in a landscape I did last year. The two on the left were standing in the snow, and the horse on the right came over the culvert to join them. I couldn’t have placed them in better position.

rogr1372-e1-w

The irrigation ditches are running strong with all the moisture we’ve had. I was drawn by this meandering ditch with the yellow vegetation covered in snow. I thought about processing this in black and white but I loved how the yellow showed through, so I left it alone.

rogr1408-e1-w

This is a bigger irrigation ditch with more vegetation. I didn’t need to desaturate (remove the color to make it black, white, and various shades of grey) the colors…nature did it for me!

rogr1428-e2-w

I processed this scene using Photoshop and Nik Silver Efex to enhance the contrast, give the image a bluish tone, and add a nice vignette and border. I loved the dark tree in the foreground with the smaller tree up the hillside in the background!

rogr1436-e2-w

I had a lot of fun with this image. This is the Genoa Bar in Genoa, Nevada. It is the oldest bar in Nevada. I had made three images when a guy drive his car into the foreground and parked. Darn it! For this version, I processed the RAW image and went into Photoshop. I created a duplicate layer and desaturated the first (or background) layer, then applied a Gaussian blur to the duplicate color layer. I overlaid the blurred layer on the black and white layer and blended them. I then adjusted shadows and highlights and applied a vignette to make this image. It’s a technique called ‘Dreamscape’ that I learned in a weekly photo challenge a couple years ago. It’s a fun effect and works well for this image.

rogr1436-e3-w

Dreamscape is not for everyone, however.  A couple of my friends didn’t like the above image, so I processed this image without the Dreamscape effect. Like most art, beauty is in the eye of the beholder (or something like that).

rogr1449-e2-w

After the interloper disrupted my Genoa Bar shoot, I rolled forward a few feet and began shooting the structures next door. This antique store, with its wagon and covered porch, made a great composition. I worked to bring out the colors in the buildings and the wagon to offset the snow covered trees and foreground. If only I’d had some people in period costume or maybe a horse or two…oh well!

There’s a few of my snowy images from this week.  I hope you enjoyed them.  I look forward to learning how to take pictures in the snow next week, and sharing the results with you!  Everyone stay warm, drive safe, and enjoy!  PHOTOROGR

…I’m at a creative crossroads…

When people embark on a journey, they plan their itinerary in great detail.  Hotels, fuel stops, meals, sightseeing and other tourist stops are set with a timetable and destination in  mind.  If one is on a journey of discovery, however, there is minimal planning – because it’s all about the journey.  A couple years (and lots of posts, don’t forget!!) ago, I started a journey in creative photography.  My only plan was to learn how to make better images.  This blog has been my vehicle to document and share my journey.

In the last few weeks, I realized that I was approaching a creative crossroads.  There are two roads for me; the first continues on the path to making purely photographic images, while the other heads toward more artistic images.  I never thought about the differences until I visited one of my photo mentors to learn about his workflow to process landscape images.  He opened my eyes to editing techniques that I never imagined, so I’ve been experimenting with new and old images.  When an artist takes a new direction or pushes the creative envelope, there is always a period when the work may be considered ‘overdone’ as the artist tries to find a balance – it’s just part of the journey.

I won’t get into detail about the editing for the following images.  I think I’ll let them speak for themselves.  Let’s start with a few landscapes.

rogr2053-1-e1a-z-w

I made this image at the Eden Vale Inn near Placerville CA (a wonderful ‘b n b’ – we highly recommend it!).  I’m not satisfied with the sky, but I love the rest of the image.

pmx2728-30_fall-color1-a-z-w

These fall colors can be found along SR 207, Kingsbury Grade, between the Carson Valley and the Lake Tahoe Basin.

pmx2732-4_fall-color1-a-z-w

After I made the above image, I turned and saw this view into the Carson Valley. It was a beautiful stormy day, as you can see.

rogr2798-e2-w

I made this image yesterday morning. The Carson River as it approaches SR 88, just south of Minden. The sun was just coming up behind the clouds.

tahoe_panorama2-2016-10-27-e2a-z-w

This is the south shore of Lake Tahoe. I visited the lake last week, on a stormy day. I’ve never seen the weather cover the mountains so completely. I stitched together 10 images to make this panorama.

sierra_panorama1-2016-10-24-f-e2-f-b-z-w

The recent storms gave us wonderful skies and light. This a Jobs Peak (the snow covered peak partially hidden by clouds on the left) on a wonderfully stormy day!

Here’s some new Raptor images.

rogr2180-e2a-z-w

I just love this Great Horned Owl!

rogr2681-e1-w

I used the same filter on this Hawk image.

rogr2720-e1-w

It was raining when I made this image. This Hawk was focused on a potential meal.  This image was selected as the ‘image of the week’ by one of the photography froups on Facebook.

rogr2670-e2-w

I got a little aggressive with this image. The dark streak in the background is actually a branch.

rogr2670-e3-w

Same picture, but with an added twist in editing. A little more detail in the chest feathers.  I love this, but it doesn’t look like a photograph to me.

rogr2554-a-z-w

This Hawk was hunting along an irrigation ditch.

rogr2554-e2-w

A little extra during processing, and the image has a completely different feel.

photorogr9978-bald-eagle-on-fence-post-w

I made this image last February. I struggled with the background.

photorogr9978-e3-w

New editing knowledge – new look for the image.

I hope you understand better my dilemma at the creative crossroads.  I think my best direction is to assess each image independently and make the edits that bring out the best in every one.  The journey continues – as does the fun for me!  Using the digital medium, sometimes I will be a photographer and sometimes I will be a ‘cutting edge’ artist.

There’s much more on the way for this exploration.  Enjoy – PHOTOROGR

It was a little Spooky at The PHOTOROGR Project this week…

I needed to get a little yard work done before the first big storm came in; I backfilled a new wall (losing 2 lbs in the process), worked on the drip system, and mowed and fertilized the lawn.  The weather came in on schedule – bringing lots of needed moisture and compacting the fill behind the wall – so I moved inside to pretend to be a studio photographer.  It’s October so my lovely bride is getting out the Fall and Halloween decorations.  They proved to be worthy subjects for my camera!

A little background – when I was finishing my engineering degree (several decades ago), my lovely bride, Susan, was at home with 2 little boys.  Between my working, going to class, and studying, we didn’t have much time for conversation.  One of our neighbors in married student housing was a mechanical engineering student and his wife was in the same predicament.  Susan and the neighbor wanted to have a night out, so they found a tole painting class.  Susan was a natural and became a world renowned tole painter.

For years, our home has been a revolving gallery of her work – the theme changing with the seasons.  With the storm in full swing, I set up a little studio and made images of Susan’s work.  I hope you enjoy her beautiful art and hope that I did proper justice to her talent.  Except where noted, the figures are painted on 1/2″ plywood and the other pieces are cut from 1/4″ pine.

rogr2297-a-z-w

This pair of trick or treaters is painted on 1.5″ thick wood. The Witch is about 7″ tall, and the Pumpkin is about 6″ tall.

rogr2294-a-z-w

This little Witch is 18″ from the bottom of her feet to the top of her hat, and her Ghostly companion is almost 10″ tall.   As with all her figures, Susan paints each piece individually and then assembles them.

rogr2287-a-z-w

This beWitching lady stands about 24″ tall.

rogr2285-a-z-w

This lovely little Witch stands about 20″ tall. Her hands are made of 3/4″ pine, and the spider is 1/2″ plywood and 1/4″ pine.

rogr2283-a-z-w

This little Wolfman also stands about 20″ tall.

rogr2280-a-z-w

Halloween wouldn’t be complete without a Frankenstein monster, complete with charging posts. He stands about 22″ tall.

ps2313-13-f-e1a-z-w

This is our candy basket for the trick-or-treaters. The box is about 12″ square and 3″ deep. The welcoming Ghost is about 16″ to the top of the handle, and stands in the center of the box.  This was my most challenging image, trying to get it all in focus.

rogr2278-w

This Witch is about 16″ tall.

rogr2278-e1a-z-w

I processed this image using different filters and techniques – always exploring!

rogr2308-e2a-z-w

This Scarecrow guards our kitchen counter from intruders. He’s really good, because no unwanted crows are hanging around in there! He’s about 12″ tall.

rogr2308-e1a-z-f-w

And, a little different processing makes a picture showing a different feeling.

rogr2315-1-a-z-w

Susan also has a fun collection of chenille pumpkins and baskets, helping with that Autumn feeling around the house.

pmx2298-2300_soft-a-z-w

The sign says ‘Pumpkins for sale,’ but don’t believe it. Susan painted the sign as a decoration, not an advertisement.

pmx2342-4_creative-e1a-z-w

I experimented with another of Susan’s painted pieces, this Pumpkin, and a lantern. I found the lantern to be very challenging because of the glass door. In many shots, I had unwanted reflections (in several instances, the striped socks I was wearing) blocking the candle. I made this image using multiple exposures and assembled them in Photomatix, then applied filters in Nik Color Efex Pro.

I hope these figures didn’t scare you too badly, but you can understand why it was a little spooky around here this week.  I’m just glad I didn’t watch Young Frankenstein, too!  Just wait, Christmas is around the corner…

Enjoy – PHOTOROGR

Photo Fun in the Benson Sculpture Garden…

A couple months ago, my lovely bride and I loaded up and headed home to Wyoming to join family in celebrating my Dad’s 85th birthday!  While we were there, we also celebrated Mom and Dad’s 65th wedding anniversary.  (The anniversary actually happens in November, but we celebrated while we were all there!)  I just realized that I haven’t shared our family portrait from the party.

rogr9639-a-z-w

The Van Alyne Family – August 2016

My lovely bride flew home the day after the party, so I was on my own for the drive home.  The first photo stop on my trip home was going to be Rocky Mountain National Park, so I reserved a hotel room in Loveland CO (just downhill from Estes Park, the Gateway to RMNP, and about 1/3 of the price of a room up the hill).  As I was driving to the hotel, I passed a brown road sign advertising the Benson Sculpture Gardens.  While I was eating dinner, I looked up the Benson Sculpture Garden on my phone (yes, I know a little about technology) and decided to check it out.  The Garden is a huge park full of huge sculptures.

I arrived at the Garden in late evening, so the light was a little dicey.  Although the sun was nearly down, the sky was a bright white and the sculptures were in various stages of shadow.  Knowing I was in trouble from a lighting perspective, I decided to experiment with a process called ‘light painting.’  In his book Night & Low Light Photography, David Taylor describes light painting as, “…the technique of lighting a subject during a long exposure. This can be achieved by using a handheld flash or with a suitably powerful flashlight.”

I chose handheld flash, and found myself popping the flash from different angles and sides to see what the result would be.  I had to work around all the people in the park – hundreds of them – all walking around looking at their phones.  The Pokemon craze had just hit and it seemed that Loveland’s populace had embraced it fully – at least those who were in the Benson Sculpture Garden that evening!

I’ve taken a very long time to finish these pictures.  Sometimes, we try things in camera that yield good results easily, but some of them take more work.  I look at this as a wonderful learning process.  I need to push the limits of my equipment, but I also need to push the limits of my knowledge of photography and image editing.  I succeeded in pushing the limits.  Using these images made in camera, I learned a lot about editing images using multiple software packages and filters.

A BIG THANKS to all the artists who created these fantastic sculptures and put them on display, and to the City of Loveland for assembling them in this beautiful setting.

I think you’ll like the results, so let’s get to the pictures!

rogr9672-e1-w

One of the first sculptures I saw – Shakespeare. I tried to frame the sculpture with the tree in the background, but the sky still made this a challenge. I introduced a light vignette to bring the sky down a little.

rogr9670-e2-w

Probably not the best angle of this Eagle, but it’s the one I chose. I used a little fill flash underneath to negate the shadows.

pmx9666-8_fused-a-z-w

This sculpture is called ‘The Potato Man.’ It is one of my favorite sculptures in the Benson Sculpture Garden. I combined three images to bring out the colors and the details.

pmx9662-3_fused-w

I made two images of this sculpture, using flash on both sides of the head. I then combined the two images in Photomatix to get this result.

pmx9695-8_tonemapped-color-e1a-z-w

This is an HDR image, using 4 images with different exposures and flash placement.

pmx9695-8_tonemapped-bw-e1a-z-w

I applied a black and white filter and adjusted the contrast a little to make this version of the image. I like them both!

rogr9689-w

This sculpture was in shadow as the sun was setting behind and to the left. A little fill flash made the image work.

rogr9699-e1-w

I loved this statue of a musical trio. There is so much going on that picking a spot to shoot was difficult. I explored the black and white presets in Nik Silver Efex, and liked this one.  I need to remove the car on the left side of the picture, but it’s a Mustang.  Hmmmmm…what a dilemma…

pmx9700-2_smooth-2-e1a-z-w

This is a close up of the saxophone player. I combined three images in Photomatix to make this image.

pmx9700-2_smooth-2-e2-w

I applied a preset filter in Nik Silver Efex to make this image.

pmx9709_painterly-e1-w

Some people would say, ‘…make it stop!’ Filters can be overused, but I had to share one more using this preset from Nik Silver Efex. This is the drummer from the other side of the musical trio statue.

rogr9727-w

Ah, the fun of being young! My Mom has a Christmas ornament based on this sculpture.

rogr9710-w

And then there’s the really interesting sculptures. I tried to capture the setting sun in the background…

pmx9736-8_fused-e1a-z-w

This sculpture is in a beautiful and natural-looking setting. I removed the concrete pedestal to improve the natural look.

rogr9688-w

Another of my favorites. I used a fill flash to make this side of the sculpture visible.

pmx9682-4_vibrant-a-z-w

A couple of bucks running through the woods! There are visual treasures at every turn!

pmx9718-20_smooth-2-e1a-z-w

These kids were really enjoying the park. This is a composite of three exposures.

So, there you have it.  These are but a few of the sculptures in the Benson Sculpture Garden.  I’ll return another day, armed with better knowledge of photography, to make more images of this wonderful place.  If you’re planning a trip to this area, this is a must see.  If you’re on a journey in creative photography (like I am), this is a great place to learn your craft!

I hope you enjoyed these images.  Thanks for joining me on my journey!  Enjoy – PHOTOROGR

Photo Editing Software…and Rocky Mountain National Park!

In previous blogs, I’ve talked about the ways photography has changed due to the transition from film to digital photography.  The basic principles of controlling and recording light have not changed, but editing processes have changed dramatically.  Like many photographers, I work to get the best possible image in camera but further processing on the computer is essential to my success as a photographer.  Thankfully, there are really smart people who have developed great software to make this part of photography easier.  I use Adobe’s Photoshop (PS) CC (Creative Cloud – yes, I pay my access fee every month!) and Camera RAW (ACR) as my primary software.  I also purchased Corel’s Paint Shop Pro X7 when it was cheap (PSP X8 had just come out) and work it every now and then, but PS and ACR remain my go to software.

As those smart guys at Adobe make their products better and easier to use, and I learn how to use the features I have along with the new stuff, I try to produce better images.  Recently, the Adobe CC guys announced a new feature in Lightroom (LR), a sister software to PS.  As background, I prefer PS to LR because I can use layers in PS.  ACR and LR use similar menus and controls for processing, so I’m not missing out on those features.  LR manages files which PS does not do, however, I use Adobe Bridge for my file management.

Back to the cool new tool in LR – Boundary Warp.  If I create a panorama in LR, Boundary Warp allows me to adjust the image without having to crop and lose content.  Regardless of how well I shoot a series of images to merge into a panorama, there is always inconsistency in the edges requiring cropping and/or filling.  Boundary Warp minimizes data loss and is very cool, from my perspective.  I processed several panoramas using both PS and LR to determine if one is preferable to the other, but I’ll let you be the judge in the images below.

Oh yeah, LR now has a High Dynamic Range (HDR) feature in PhotoMerge, but I prefer PhotoMatix Pro for my HDR images.

Today’s images come from the day I spent in Rocky Mountain National Park (RMNP), located in north central Colorado, last month.  I entered RMNP from the east side (US Highway 36 from Estes Park CO).  After a quick stop in the Beaver Meadows Visitor Center for some shopping and a stamp in my national parks passport book, I proceeded into RMNP and that portion of US 34 known as Trail Ridge Road.  Trail Ridge Road is only open in the summer months, as its 12,000 foot (+/-) elevation makes for a very snowy road in the winter months.

I came across a flock of turkeys, but failed to get a decent image of them.  I drove by this beautiful vista.

RMNP-Pano1-2016-08-16-LR-a-z-z

I believe the peaks to be (left to right) Mt. Wuh, Stones Peak, and Terra Tomah Mtn, with Tombstone Ridge in the middle ground.  This panorama was created and edited in Lightroom, using the Boundary Warp feature.

RMNP_Panorama2-e1a-f-z-w

Here’s the same view processed in Photoshop.

The differences in brightness, contrast, and color are my adjustments and experimentation.  I manually cropped the LR version to a standard 5:1 ratio panorama, the same as the PS version.  What’s important to note is that there doesn’t appear to be geometric distortion from the Boundary Warp, however, there is more foreground in the PS version (check the tree line) which indicates a larger availability of data in the LR image.  Based on my totally non-scientific experiment, I opine that the use of PS versus LR for panoramas is a matter of personal preference at the moment.

Back to pictures.

RMNP_Panorama3-f-e1a-z-w

I believe these peaks to be Mt. Chiquita (l) and Mt. Chapin. This is a panorama merged in PS.

ROGR9794-w

For comparison, I shot this image using a wide angle lens. For this view, either shooting method works fine.

RMNP-Pano6-LR-2016-08-16-a-z-w

This is a panorama of Sundance Mtn. While I was at this location, I visited with a very nice young lady who was shooting with her Canon T2i and a Canon 100-400 zoom lens. We had a nice discussion about lenses and photography.

PMX9881-4_Interior-3-z-w

One of my favorite shots on the day. This is an HDR. When I shot this, the flowers in the foreground were in deep shadow and HDR allowed me to bring them into the light, so to speak. The wind was blowing at 12,000 feet, as you might imagine, so there is a touch of movement in the flowers. A few minutes later, the clouds moved off but the wind came up. The flowers in the full light images were blurry due to the wind.

ROGR1041-w

If you’re an Elk in the mountains on a hot summer day, how do you keep cool? They’re on a snow bank enjoying the cool. They were probably 1/2-3/4 mile away.

ROGR1023-a-z-w

And these Elk were using the trees to keep cool, again, 1/2-3/4 mile away.

RMNP_Panorama7-2016-08-16-e1a-z-f-w

I believe these peaks to be (l-r) Stones Peak (the sharp pointed one), Sprague Mtn, Nakai Peak, Mt Julian, and Terra Tomah Mtn. This is a panorama merged in PS.

ROGR0953-a-z-w

I came around a corner with lots of people looking up a hill, watching this Bear. He was a couple hundred feet away and cared less about the crowd at the bottom of the hill. I parked and came back for this shot, the best of what he gave us before disappearing behind the trees.

ROGR0988-w

When he disappeared, the crowd dissipated. I hung around to see if he would make another appearance, and made a few images of the flowers and landscape.

RMNP_Panorama11-2016-08-16-e1a-z-f-w

Beautiful mountain flowers.

LUMIA-20160816-011-a-z-w

I made this image with my trusty mobile phone. Every now and then, it makes a nice image. Note the wildlife.

RMNP-Pano9-LR-2016-08-16-a-z-w

I believe the center mountain to be Terra Tomah Mtn, with Jackstraw Mtn on the immediate right. This is another panorama merged in LR using Boundary Warp.

RMNP_Panorama9-2016-08-16-e1a-z-f-w

Same view from a PS merge.  I see a subtle difference in the foreground, especially on the right side, but not enough to conclusively say one is better than the other.  Both images are stunning!  oh yeah, the LR image is cropped to 5:1 ratio and the PS is at 3:1.

ROGR9994-a-z-w

I was making a series of images for a panorama when I caught movement out of the bottom corner of my eye. This Marmot, also called a Rock Chuck, was very busy and unfazed by all the people just 30 feet away.

ROGR1065-w

The rocks were alive with these North American Pika. About the size of a Guinea Pig, these little fuzzballs were busy working on nests for the coming winter.

I have established a page dedicated to Rocky Mountain National Park.  Visit the page to see more images from this part of my trip.

Since I got home, I’ve spent some time in the yard with my flowers, so I’ll close with them.  Enjoy – PHOTOROGR

PMX0225-8_Natural-a-z-w

One of the Rose blooms in the backyard.

PMX0186-7_Interior-3-a-z-w

My favorite Candy Tuft. The sun was going down and lighting up the side of the bloom.

Summer is here…

…and it’s getting hot outside!  Thankfully, the Carson Valley cools down at night, which helps keep the house comfortable!

I’ve had an exciting couple weeks since my last post.  I received an email from a museum in Roseville, California, asking if they could use some of my panoramas in their train diorama.  I’ll let you know when the display is ready!  I have note cards at the Dangberg Home Ranch Historic Park.  They’re the big size, so go get them.  I also got a call from a company looking for a picture for a proposal.  The image came out great and I wish them luck with their proposal.

I got out and did some long exposure/HDR stream shots.  They’re so much prettier when the vegetation has leaves and a little color.  I also spent last Sunday at Heritage Park in Gardnerville, shooting the Car Show and The Great Race lunch stop.  The pictures came out great, but my Canon 7D broke and is at the Canon Repair Center.  We hope it’s not fatal!  While I don’t think it broke because I was taking pictures of foreign cars and those made by the Evil Empire, I’m not ruling it out!

Take a look at the Heritage Park Car Show page for pictures of the car show, and The Great Race page for pictures of the race cars!  There are links to The Great Race website on both pages.

So, here’s a few images.  Enjoy – PHOTOROGR

ROGR8680XL-a-8x12-z-w

This is a Columbine flower. When I master ‘focus stacking,’ it’ll be a better picture.

PMX8622-4-fused-w

West Fork of the Carson River.

PMX8608-10-fused-w

More Carson River…

PMX8592-4-fused-2-e1a-w

The moss on the rocks and branches really made this picture for me!

GR8RACE9018-a-w

Great Race racer – Lincoln Continental – now that’s a great cruising machine!

GR8RACE9002-a-w

1966 GT350-H…rare and gorgeous. How would you like to drive this across country?

GVILLE8856-1-w

My friends, Mike and Sharon Silvera, won ‘Spirit of the Show’ with their 1911 Chalmers! What a gorgeous car!

GVILLE8781-w

Another friend, Mike King, with his classic Woody! Check out the rest of the show cars at the Heritage Park Car Show page!

I’ve slowed down a little – could you tell?

There’s nothing like a three week break between posts to demonstrate how much I’ve slowed down in my shooting.  Just to be clear, though, it’s only my shooting that has slowed down!  I’m spending more time studying new techniques and continuing work with those I’ve already added to my ‘toolkit.’  Also, it is Spring so I have to spend a little more time at home working on the yard and taking care of business in general.

I’ve continued my exploration of in-camera High Dynamic Range (HDR), as you will see below.  As explained in a previous post, HDR is the process of combining multiple exposures to utilize the best parts of each image for best detail from shadows and highlights.  After figuring out the settings, it works much better than I originally thought.  I noted an interesting part of the in-camera process the other day.  While reviewing several sets of exposures, I saw that the camera floated the ISO setting to obtain the underexposed image.  When I manually create multiple exposures, I usually float my shutter speed to create the over- and under-exposures.  I never adjust the aperture because of the impact to depth of field.  In addition, I’ve been exploring the Nik Efex filters and the variety of options available in Photomatix Pro.  I made these pictures at the Dangberg Home Ranch Historic Park, with the Sierras as the background.  They will demonstrate better than words.

7DHDR7908-w

In-camera HDR with minor adjustments in Adobe Camera Raw (ACR). Another problem with in-camera HDR is that the file is in JPEG format, which limits post-processing options.

NIK7908-w

This image was made from the same set of exposures as the one above. I combined the exposures in Photomatix Pro with additional processing in Nik. I received feedback from another photographer, telling me I needed to change my camera settings to minimize noise and also be careful of chromatic aberration. I’ll discuss these topics in future posts.

ROGR7944-w

This in-camera HDR was processed in ACR.

ROGR7904-w

Also in-camera and processed in ACR.

ROGR7880-w

I should have shifted a touch to the left to keep Jobs Peak from hiding behind the wheel spoke.

My lovely bride and I are members of the Friends of Dangberg Home Ranch, and I’ve been working with the Curator on some note cards for them to sell.  Here’s a couple of the options we are discussing.

ROGR4429-2-A9-w

I took this image several years ago when I didn’t know what I was doing photographically. There are those who will argue that I still don’t know what I’m doing, but I’ll leave that alone for now. This image was shot in low resolution JPEG format at the wrong time of day, but I was able to work it enough to make this image – formatted for a large note card.

A9-ROGR4429-1-w

Just for grins, I made it monochrome and applied a sepia filter. This will probably not make the cut for the final note cards.

ROGR7309-A9-w

Better light and better angle. Jobs Peak is visible in the left side of the picture.  This one will be on the note cards.

The Dangberg Home Ranch Historic Park teamed up with the Carson Valley Arts Council for an event called Something in the Wind.  A kite group from Oregon came down and put on a wonderful event.  The wind cooperated, sometimes just a little too much.  Here’s a little of the color from the two day event.

ROGR7400-w

These spinners were on poles – very fun and beautiful.

ROGR7377-w

Can you tell we had good wind? The spinners came down soon after I made this image.

ROGR7359-w

Lots of colorful flags, too!

ROGR7756

And then there were the kite fliers – all shapes and sizes! This little guy worked his kite pretty hard.

ROGR7699

The bubbles were quite the hit on Sunday!

ROGR7487

Kites are very beautiful these days!  A far cry from newspaper and sticks that we used.

ROGR7450

The kite folks put these in the air and tethered them, and they flew all day!

ROGR7417

This young man walked by my booth and proudly announced that he just turned 7 and he got this box kite for his birthday! I enjoyed seeing a father and son spending time together.

I stopped by my favorite Owl venue and captured this Barn Owl!

ROGR7795-w

Looks like a young one by the puffy feathers. I shot this handheld, so it’s not the best focus (camera shake from me and my hands – the low light and long shutter speed also contributed).  A cutie nonetheless.

The nice wet winter brought lots of flowers to the desert.

ROGR7147-a-w

This is the introduction for my next shooting technique – Macro Photography! Stay tuned!

ROGR7839-w

The mountains west of the Carson Valley.

ROGR7853-w

Shot from the road, looking up hill. But the flowers are gorgeous!

I’m really looking forward to my exploration into the world of Close-up and Macro Photography.  Thanks for looking at this blog.

Enjoy – PHOTOROGR

What a Rush!!!!!

This week has been wonderful.  While Shooting the West (shootingthewest.org) was awesome, the days before and since were equally wonderful.

I was in the final stages of building my STW presentation and needed a little break, so I decided to try something new – flowers overlaid on a textured background.  I’ve played with the technique before, but not with a specific goal in mind.  I had some textures in a folder, and the flowers from my backyard this Spring were great candidates.  To make a long story short, the results are wonderful and I will be making them into note cards and prints.  I’m thinking about canvas prints, too, but we’ll see.  Here they are!BLND3950-TXTR0250-a-w

BLND6537-TXTR0250-a-w

BLND4706-TXTR0250-a-w

BLND3968-TXTR0250-a-w

I drove to Winnmeucca last Thursday.   I took my time and enjoyed the drive.  A couple months ago, I got my US 50 Survival Guide from the Nevada Commission on Tourism, so I planned to get a couple stamps while I was on the road.  The Dayton Chamber of Commerce was closed, but Fernley’s was open so I got my first stamp!  For the uninitiated, the US 50 Survival Guide is designed to promote travel on the Loneliest Road in America.  When I get 5 stamps, I qualify for my US 50 Survivor certificate and sticker for my car!

While on the road, I got a call from a senior center in Carson City.  They were hosting a fundraiser for wild horse adoption, and wondered if I would bring some wild horse pictures to display and sell.  The fundraiser was on Tuesday, so I would have to work quick when I got home on Sunday.  I agreed and put it on my calendar.

I got to Winnemucca in good time, so I stopped by the Convention Center to check in and coordinate my presentation with the audio-visual tech.  He downloaded my file and everything worked, so that was one less thing to worry about.  I bumped into a friend who was finishing his workshops, so we grabbed our cameras and headed for the Humboldt River for a few pictures before dinner.  All we found were small birds, so we visited the local Museum.  I encourage you to stop in when you visit Winnemucca – the Museum is great!

Dinner with more friends at the Martin, a local Basque restaurant.  It was a busy night so we had a wait, but it was worth it!  I had pork ribs that were wonderful!

Friday morning and Shooting the West kicked off for me.  I enjoyed seeing old friends, making new ones, and meeting people that are friends on Facebook.  The presentations were great, with diverse subjects and beautiful images.  The keynote speaker was Drew Gurian, who discussed his work as a photographer in New York City.  Other presentations included ranch photography, large format photography, and a wildlife photography presentation, along with presentation of awards for the Range Outback Photo Contest.  I had a great conversation with  the Canon representative, who showed me how to use the in-camera HDR feature on my 7D Mark II.  An interesting process, worthy of a few pixels sometime.  (See my blog ‘An Amazing Week for Me’ on March 29, 2016, for a discussion on High Dynamic Range photography).

My presentation was Saturday afternoon, but I wasn’t worried.  I had practiced and I was ready.  I paid close attention to the morning presenters.  I was almost sold on mirrorless cameras until the presenter told us about the negatives – short battery life and very susceptible to getting dirty when changing lenses.  I enjoyed the presentation on photo workshops and tours, but started to get a little nervous as my start time got closer.  Finally, it was my turn.  I took the stage and, of course, the AV tech ran into difficulty starting my presentation.  I knew it would happen, but I only had 15 minutes and a couple jokes.  He resolved things quickly and I began.  Don’t ask me what I said – I have no idea, and I only had to rush a little at the end.  I got great feedback from everyone afterwards, so I feel good about it.

Sunday morning, and I’m off to the car show and air show at the airport.  Here’s a little of what I saw!

ROGR7000-w

I forgot the year, but this is a Hupmobile.

ROGR7023-w

You see the darndest things at a car show. The guy on the left was showing this home-built camp trailer, towed by his Model A.

ROGR7018-w

There were several military vehicles there. This is a beautiful Willys Jeep.

ROGR7002-w

The local tractor club was showing, too. I always enjoy an old Ford tractor.

ROGR7026-w

I didn’t get close enough to see if it was armed or not!

After the car/plane show, I headed east to Battle Mountain to have lunch with an old Air Force friend and his wife.  On the way, I decided to try that in-camera HDR feature.

7DHDR7080-w

This is the in-camera image. It’s nice, but a little off from what I like in an HDR image.

PMX7080-fused-w

Using the bracketed exposures, I merged them in Photomatix with a little nicer result.

7DHDR7064-w

Another in-camera image. Notice the ‘ghosting’ or multiple images of the car on the right side of the image. When using this feature, I will have to be careful to ensure that nothing moves, since the camera aligns the bracketed exposures, but doesn’t account for ghosting.

PMX7064-fused-w

Here’s the merge I did in Photomatix. Bottom line – in-camera HDR could be useful in the right place at the right time, but it will not replace my existing HDR workflow.

On Monday, I got ready for the fundraiser on Tuesday.  The money raised will support the Nevada Discovery Ride (www.NevadaDiscoveryRide.com).  This August, Samantha Szesciorka and her horse, Sage, will undertake a 1,000 mile journey to encourage wild horse adoption.  The weather was excellent and I met many nice people – sales were good, too!  Samantha is very nice, and I wish her well on her ride.

Okay, that’s it for this post.  I’m taking a little time and working on the yard (I finally mowed the lawn this morning!), but I will be showing at Something in the Wind at the Dangberg Ranch on May 14 and 15.  Come on by and see the kites – make sure you say hello!

Enjoy – PHOTOROGR